A few weeks ago I mentioned the importance of treasuring ideas in an “inspiration wellâ€. Having a place to go back to when you are feeling uninspired and blocked is important both for your creative process and your well being – it keeps you inspired, optimistic and energized.
Just taking notice of your environment and of all the wonders of the world around you and the beauty of your everyday life can help you feel more inspired and have a more relaxed life. However, writing those details down can help you stay focused and inspired also on gloomy days, when it is very difficult to be aware of all the goodness around you.
Another good reason for writing all the great ideas your mind (and your heart) yields is to perpetuate them on paper (or on your computer). When we have a fabulous idea we are consumed with it and cannot imagine we would ever forget it, but we do. No matter how fantastic and fabulous the idea is, life’s endless flow of information and duties can push away the greatest ideas.
Now, think about a journal that does not only keep your ideas but also helps you to come up with the ideas… That sounds like a great idea, doesn’t it? Well, in my case, making my own journal from scratch can do that for me.
This week’s prompt is making your own hardbound journal to inspire and to treasure ideas in it.
Supply –
- Chipboard
- Adhesive backed patterned paper (you can also use regular patterned paper and apply glue)
- Cutting mat + craft knife
- Blank papers
- Construction paper
- Paper piercer
- Needle + thread
- Adhesive
Optional tools –
- Brayer
- Bone folder
Directions –
Cut two pieces of chipboard, the size of your desired cover and one narrower strip, the length of your desired cover and the width of your desired spine (about ½“ should do for the width).
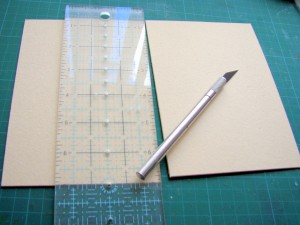
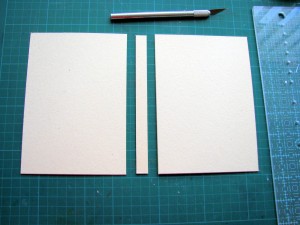
Cut the patterned paper 2†longer and wider than your cover chipboard pieces (an inch more in each side).
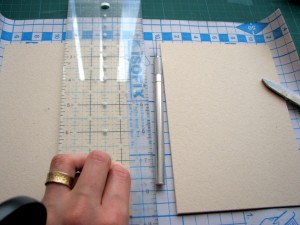
Adhere the patterned paper to each cover – use a brayer to insure the paper sticks well to the chipboard.
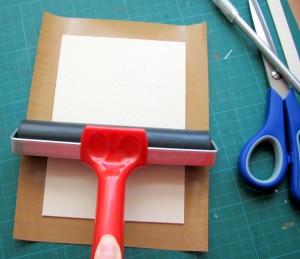
Cut the corners of the patterned paper – but not all the way to the chipboard.
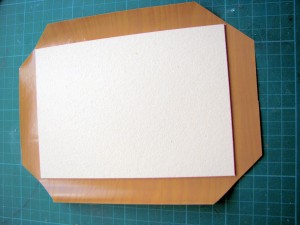
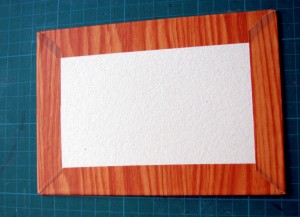
Adhere the patterned paper’s rims to the chipboard. (a bone folder can be helpful)
Cut a piece of construction paper to cover the spine, allowing an inch of a rim all over.
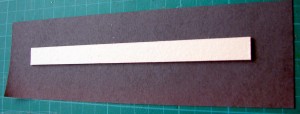
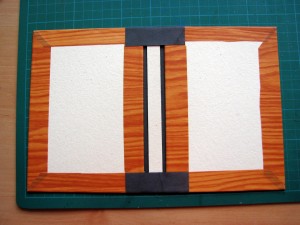
Adhere the spine to the center of the construction paper and apply glue only to the parts which are marked with an ‘x’ in the picture below. Allowing a ¼†of unglued paper near both sides of the spine.
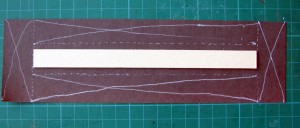
Adhere the spine to the cover pieces, as shown below.
For the inserts of your journal cut the blank papers ½†shorter than the length of the spine and 2 times the width of the covers pieces, minus ½â€. (That means that if your cover is 6†in length and 5†in width – you need to cut your blank papers at 5½” X 9½â€).
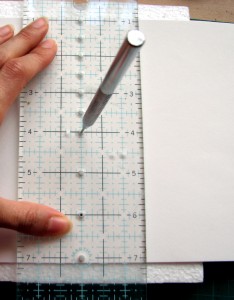
Fold the blank papers lengthwise to find the middle mark and pierce it with 3 evenly spaced holes.
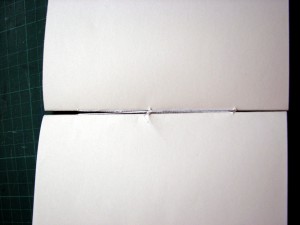
Attach all the blank papers together with a needle and a thread. If you have more than 10 inserts, it is better to make it in batches and attach each batch with the thread as well.
Cut a construction paper slightly bigger than the unfolded inserts (If we go back to the example above, it would be 5¾†X 9¾â€). Adhere your inserts to the construction paper (I have used doubled-sided tape).
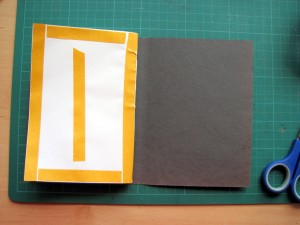
Adhere the covered inserts to the cover pieces, lining them with the outer cover. It is better to first adhere one side and than the next, by applying the glue and closing the cover on it.
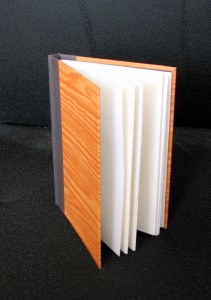
Enjoy your new journal and get inspired !!
Tags: creativity prompt, journal tutorial, Tutorial


This is a great idea. I am going to get the supplies and try it. I made a soft-bound journal once, and it was one of my favorites because I made it myself.
Thanks for the comment. I also like the ones I do the best (or handmade gifts from others) it has a special character that a store bought one will never have.
I have just picked up the supplies to do this. I bought some extra to make one as a gift for a friend too. I make birthday cards for friends, but have never made a journal as a gift — only for myself. So this will be a fun challenge. Thanks again for the idea.
I will be happy if you share your journals with me 🙂
Hello,
I’m french and I speak english not very well, but thank you very much for your tutorial.
best regards
pommeliane 🙂
Thank you very much for your kind comment 🙂 I wish I will be able to provide more prompts to make you happy.
[…] a few writers on your holiday list? Follow Creativity Prompt’s tutorial for making your own hardbound journals for some great handmade […]
Hi! I was surfing and found your blog post… nice! I love your blog. 🙂 Cheers! Sandra. R.
Thanks, Sandra. Welcome in!
I love your site. 🙂 Love design!!! I just came across your blog and wanted to say that I’ve really enjoyed browsing your blog posts. Sign: ndsam
Hi Avital! Your site is really helpful, I’m very happy I’ve found this! I was thinking to create a book for my boyfriend, and I will give it to him on our 3rd anniversary. Thanks again! (=
Hey your website help me alot I got my project submitted on time!
thanks for the tutorial! I was looking for a way to add this kind of covers to my coptic stitched journals. I think this’ll do the trick! 😀
Hi, Thank you for the great tutorial! I will be having a class for my Adult Summer Reading Program. I’ll try to get a picture of the finished journals for you.
That would be great, thank you!