/** Font types */

Posts Tagged ‘recycling’

Creativity Prompt – Recycle Styrofoam Into A Bulletin Board

Friday, March 6th, 2009

Recycled Bulletin Board This week I have another quick and easy, and most importantly – recycling – project for you.

Saying styrofoam is bad for the environment is quite an understatement. Nevertheless it is widely used for packaging and some other “really important” (NOT) purposes. Changing the world is done one step at a time, right? So our baby step today is reusing the styrofoam.

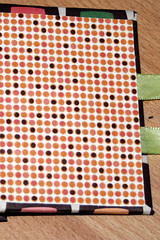
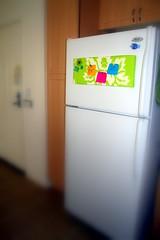
The styrofoam is light weight as well as soft enough to be pierced repeatedly (while chanting: “Bad styrofoam. Bad. Bad. Bad”) what makes it perfect to serve as a magnetic bulletin board! By salvaging a never-has-been-no-longer-will-be in use pillow cover we got ourselves the perfect recycling project and quite a nice addition to the fridge. (This looks much neater than a bunch of scraps scattered around).

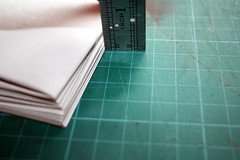
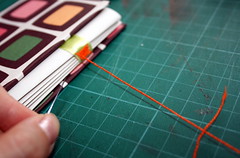
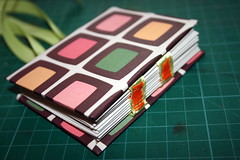
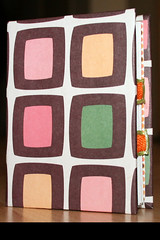
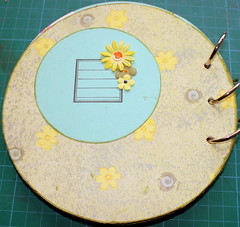
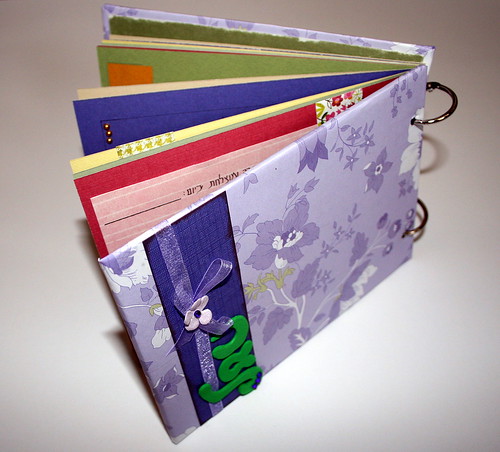
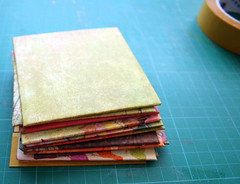
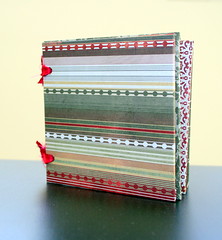
If you recognize the fabric from the easy peasy hardbound journal tutorial, you are right… (and I haven’t used the rest of the sheets yet, so stay tuned).

Tools & Supply

How To –

Step By step Instructions –

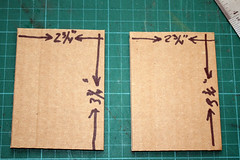
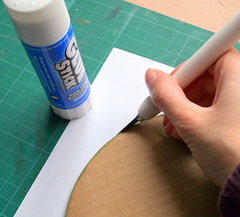
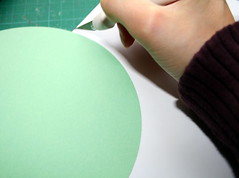
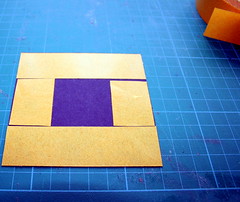
  1. Measure a piece of fabric, about 3 inches larger than the styrofoam, both lengthwise and widthwise.
  2. Cut the fabric to size. You can use your scissors or cut a small slit ant rip along.
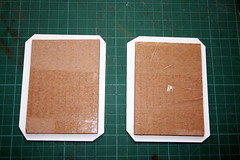
  3. Put the fabric on your desktop – right side down – and straighten it. You can use an iron if you feel much inclined. I don’t.
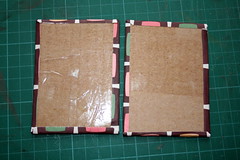
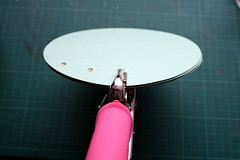
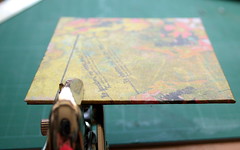
  4. Adhere the fabric flaps to the back of the styrofoam. I used Thermoweb’s Clear adhesive Lines but you can use a stapler, just as well (probably better). Start with the long flaps and then move to the shorter ones. Make sure they are pulled tight before adhering or stapling them.
  5. Tuck the edges of the small flaps in, as if you are wrapping a present. Then adhere or staple them to the back of the styrofoam.
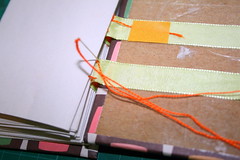
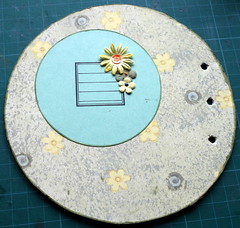
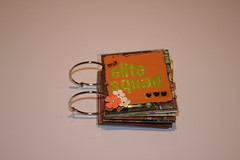
  6. To embellish the bulletin board I threaded a string through some buttons and adhered the buttons to some paper flowers. I then adhered the flowers to the board with pop-up glue dots.

Recycled Bulletin Board
[Click on the picture above for a better view]

Share –

If you have any question, suggestion or remark – don’t hesitate to contact me – either leave a comment here, use the contact form or start a new thread on the Creativity Prompt Flickr Group!!!

I would also be very happy to see your own creations, so don’t be shy and share 🙂

Creativity Prompt – Chunky Mini-Album – First Video Tutorial

Friday, January 16th, 2009

Chunky Mini-Album
After long deliberations with myself (I admit. I have those.) I have decided to go ahead, roll up my sleeves and make a video tutorial. I have chosen to make a project similar to a former creativity prompt – a mini album I have prepared from a recycled cardboard box, for my nephews’ and niece’s photos.

I hope you will enjoy this tutorial and that the instructions are clear enough. However, bear in mind that this is my first attempt at a video tutorial, so it’s a bit rough around the edges (and then some). Therefore I would be much appreciative for any feedback – good and bad, so I can apply it to my next videos.

Covering the cardboard (which is the same as covering chipboard) with patterned paper is a step which is repeated in many creativity prompts. So it’s good to have it “on tape” for you to see the way I am going about it. I believe that even in poor quality, a video is more explanatory than a photo.

This week’s creativity prompt is brought to you in a video form… Enjoy!


[To watch in high resolution, go here and press the link below the video]

The papers I used on my tutorial were from Basic Grey Wassail 6×6 Paper pad.

The song on my video was made and performed by my brother in law and his friend while they were still in high-school. I was amazed at their talent and I would like to know what you’re thinking as well 🙂

Enjoy!!!

Chunky Mini-Album

If you have any question, suggestion or remark – don’t hesitate to contact me – either leave a comment, use the contact form or start a new thread on the Creativity Prompt Flickr Group!!!

I would also be very happy to see your own creations, so don’t be shy and share 🙂

Creativity Prompt #24 – Recycled Stitched-Spine Journal

Friday, November 7th, 2008

Stitched Spine Journal 
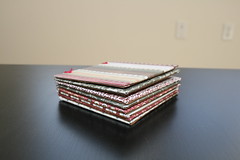
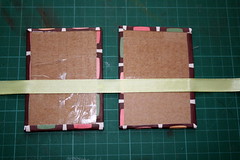
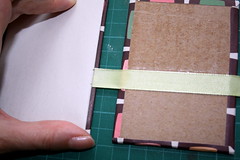
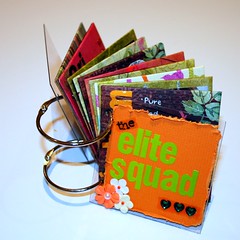
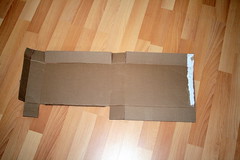
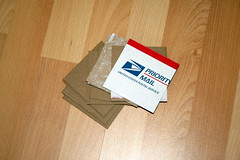
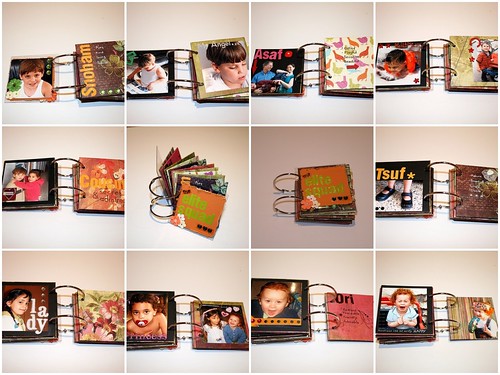
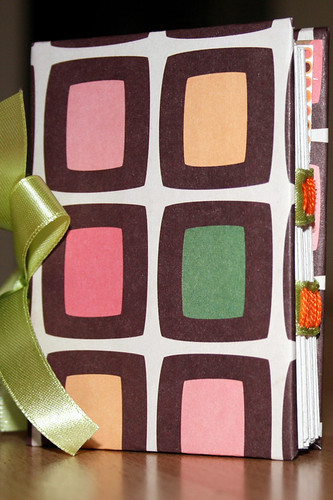
Next time you receive a package, don’t throw the box and the padding material away. Instead, turn them into a gorgeous hardbound journal, you can carry in your pocket.

This tutorial is a recycled version of the extremely popular Hardbound Journal tutorial. You can find another variation here.

Supply –

  • Two 2¾” by 3¾ “ cardboard pieces, cut from the box.
  • 50 pieces of newsprint paper (used for padding packages) measured 5” by 3½ “.
  • 4 scraps of patterned paper. Two measured 3¼” by 4¼” and two measured 2 5/8” by 3 5/8”.
  • Glue stick + double sided tape.
  • Ribbon
  • Embroidery floss

Tools –

Instructions –

  1. Flatten the box and cut 2 pieces, measured 2¾” by 3¾ “.
    Cutting the covers from the  box
  2. Adhere the cardboard pieces to the larger scraps of patterned paper (3¼” by 4¼”) with the glue stick. Position the cardboard pieces in the middle of each paper scrap (you can also use fabric scraps which are slightly larger). Cut the corners of the patterned paper flaps and allow an 1/8” gap between the edge of the cardboard to the base of the cut. Fold each flap and adhere it to the cardboard, using a bone folder.
    wrapping the covers

    wrapping the covers

  3. Cut the newsprint paper to size (5” by 3½“) and fold each piece in half (creating 2½” by 3½” pages) – use a bone folder to insure a crisp fold. Stack every 5 pieces into one signature (altogether 10 signatures of 5 pages each).
    Folding the newsprint inserts
  4. Measure the height of the stack of signatures to determine the width of the spine.
    measuring the signatures
  5. Position the two covers apart from each other allowing the gap between them to equal the signatures’ height, as you have measured before. Using a double sided tape, adhere a strip of ribbon to both sides of the covers.
    attaching the ribbon to the covers

    Mark the width of the ribbon on the signatures to figure out where to pierce them afterward.
    marking the signatures for piercing

    Repeat with a second strip of ribbon. The second strip will reinforce the journal and increase its stability.

  6. Secure the embroidery floss to the cover with a piece of tape and start sewing the signatures to the ribbon. Start from the outside of the ribbon, into the signatures and through the ribbon.
    Preparing the stitched spine

    Preparing the stitched spine

    Take a peek at the finished spine –
    The journal's spine

  7. Cover the inside of the journal with the 2 5/8” by 3 5/8” pieces of patterned paper to conceal the embroidery floss and give the journal a finished look. This is the time to trim the ribbon’s ends and cover them, if you don’t wish the ribbon’s ends to show.
    Finishing touches

    Here is how the journal looks without the ribbon’s ends –

    The journal without ribbon

Enjoy!!!

If you have any question, suggestion or remark – don’t hesitate to contact me – either leave a comment, use the contact form or start a new thread on the Creativity Prompt Flickr Group!!!

I would also be very happy to see your own creations, so don’t be shy and share 🙂

Creativity Prompt #20 – How To Make A Circular Mini-Album

Friday, October 10th, 2008

Circular Mini-Album

I love making my own mini-albums. The handmade album is unique and filled with love and attention.

By definition, the handmade album is going to be a “one-of-a-kind”, even if you make a hundred of them – because as long as it is not mass produced by machines it is going to turn up a wee-bit different each time you make it.

Apart from the handmade album’s singularity, there are two more things that make me happy about making my own mini-albums:

  1. Recycling. By making my own albums (and journals) I get to reuse stuff that otherwise would go to the bin and clutter the world… I can recycle boxes, notepads covers, chipboard which is used for flattening shirts and linens in their packaging. I get to literally turn trash into treasure, and I LOVE it.
  2. Flexibility. When I am making something from scratch I am the one setting up the rules. I decide what shape it’ll be (or that it is going to be made out of multiple shapes). I decide what size is it going to be (or multiple sizes – to fit my own personal needs). I decide which materials I am going to use (hence the opportunity to recycle). I am the boss 🙂

In this week’s creativity prompt, I am calling you to use your flexibility and create a circular mini-album for yourself or as a gift for a loved one.

Tools –

Materials –

(for embellishing your album you can use whatever you have in your stash – patterned paper, paper flowers, buttons, glitter, ribbon etc. The sky is the limit when it comes to embellishments. You can be creative and do some recycling for creating your embellishments as well…)

Instructions –

  1. Start by making the album’s cover. Cut 2 circles from a cardboard box (mine are 6″ in diameter). Because of the thickness of the cardboard, the circle cutter won’t go all the way through, but it’ll help you in creating a nice groove that you can follow cut all the way through with either the utility scissors (very sharp) or the craft knife.

    Cutting the cover

  2. Next you need to cover the cardboard circles with patterned paper. Apply a generous amount of glue with your glue stick and stick each of the cardboard circles to a sheet of patterned paper. Then flip it over and cut the excess of the paper with either the utility scissors or your craft knife (what ever works better for you).

    Covering

    Alternatives: you can paint the cardboard with acrylic paints and a sponge brush or cover it with modge-podge or leave it as it is for a natural-recycled look.

  3. Punch the holes for your album with the trusty Crop-a-Dile. Make sure your hole is no farther than a ¼” from the edge, otherwise the pages of the album won’t turn easily (I’m speaking from my own experience here… You can see that in the picture below).

    punching album's holes

  4. Cut the insert circles from your cardstock, using the circle scissors again. You can cut them a little bit smaller than the covers. You may use multiple colors of cardstock to make it more interesting visually.

    Cutting inside inserts

  5. Next punch the holes in your inserts. Use your punched covers as a guide and trace the holes lightly with a pencil. Using the Crop-a-dile, you can punch all your pages at ones to make it quicker and to insure even lining. (Don’t forget the ¼” rule from step 3 above!!!)

    Punching holes in the inserts

  6. It’s time for the fun part – embellish!!! You can cut any excess by flipping the circle over and use your utility scissors or craft knife.

    embellishing

    cutting excess

  7. When all your album pages are done, thread them through with the loose leaf rings (you can also use ribbon or thread as an alternative binding method).

Share –

I would love to see your own interpretation to the circular mini-album.

Share you creations by leaving a link in the comment section below or by adding the pictures to the Flickr’s Creativity Prompt group pool.

Feel free to share your thoughts about this project. I’d love to hear what you think about it.

Psst… You have got less than a week for a chance to win a copy of the book: Visual Chronicles by Linda Woods and Karen Dinino.

Enter the giveaway by leaving a comment here. Just follow the instructions and secure your place at the raffle.

Creativity Prompt #16 – Guided Album

Friday, September 12th, 2008

Guided Album

What is a guided album? let me show you but lets start with a story.

A good friend of mine has recently given birth to her third child. A baby girl named: Noa. Having two more children to take care of (and a job to come back to after the short maternity leave) means she has zero time on her hands. A guided album is the result of me thinking “what can I possibly give my friend for Noa’s birth?”

A guided album is an opportunity. It is a chance to preserve your memories and document your thoughts and feeling without going through the effort of making a traditional scrapbook.

A guided album is basically a mini album with journaling prompts written on premade journaling tags and a designated space to stick uncropped 4″ by 6″ pictures on.

A guided album can be a perfect gift for a busy mom, a bride to be or to serve as a “pregnancy pal”. (Just adjust the journaling prompts to the occasion). You can also make a guided album for yourself, as an incentive to preserve more memories, thoughts and emotions. Make it in advance, on your free time, for a busier time to come.

This week’s creativity prompt is to make a guided album.

Supply –

Tools –

Instructions –

  1. Cut all the pieces of cardstock, chipboard and patterned paper to size:
    • 2 Cover pieces – cut chipboard at 5″ by 7″
    • 2 pieces of patterned paper to cover the chipboard – cut at 6″ by 8″
    • 2 pieces of cardstock, for the inside of the covers – cut at 4¾” by 6¾”
    • Inner pages – cut as many cardstock pages as you wish, at 4¾” by 6¾”

  2. Cover the chipboard pieces with the patterned paper.
    • First adhere the chipboard to the center of the patterned paper.
    • Then cut all the corners of the patterned paper, allowing a gap of 1/8″ between the chipboard edge and the base of the triangular cut.
    • Fold and adhere the remaining patterned paper’s flaps to the chipboard.
    • Adhere the two cardstock pieces to the inner side of the chipboard cover, to give it a finished look.
  3. Punch 2 holes on each cover, a ¼” from the middle edge and an 1″ from the top and bottom edges.
  4. Use the punched cover as a guide for marking the inner cardstock pages.

    You can then punch them all together with the Crop-A-Dile.
  5. Attach the binding rings and make sure they run through all the inner pages and both covers.

    The framework of the album is pretty much done…

    Now we will proceed to what makes this a “guided album” …

  6. On each 2 pages spread, designate one page for a standard size picture (to eliminate the need to adjust and crop the photo) and one page for journaling.
    • Photo page – Take a standard size photo as a template and position it wherever you wish, then trace lightly with a pencil around your template. Avoid positioning the photo where the punched holes are, so you or your recipient won’t have to repeat the punches.

      Apply 4 strips of double sided tape to the corners of the pencil marks and leave the top cover on. This way, your recipient can just peel off the top cover and use it as photo-tabs, for a quick and easy assembling.
    • Journaling page – Write a journaling prompt and include a journaling tag (or stamped image) to write on.

Some journaling prompts to consider –

  • Birth details: date/name of hospital/ weight/ height/ eye color/ hair color; etc…
  • Thoughts and feelings during the last week before giving birth. Worries/ hopes; etc…
  • The birth experience itself.
  • The first moments at home, with the new baby.
  • How did the siblings greet the new baby? What do they wish for the new baby?
  • A letter from dad.
  • A letter from mom.
  • First bath.
  • First smile.

You can browse the entire guided album here.

(To join the Creativity Prompt Flickr group click on the link at the right side bar.)

Share

How did you find the idea of the guided album? What would you use it for? Please share your thoughts by leaving a comment on this post.

Giveaway

Only two more days are left. To enter leave a comment here and give me some feedback.

Creativity Prompt #13 – Recycled Mini Album

Friday, August 1st, 2008

Mini Recycled Album

Due to the vast popularity of the former “turn your trash into treasure” post, I have decided to make a series of posts, concentrating on using recycled objects to create art.

On this week’s creativity prompt I am going to show you how I have made a beautiful mini album, featuring my 3 nephews and niece, also known as “the elite squad“, using a USPS priority mail box.

Instead of throwing the box to the bin I salvaged it by taking it apart and cutting it to 3½ by 3½ inch squares. After covering the squares, punching them and putting a ton of embellishments on them, no one can tell they were taken out of the garbage bin 🙂

By making the album out of this box, I am not only helping the environment by the mere act of recycling but also by not using a brand new album or a new chipboard sheet, made out of newly chopped trees… I guess I can call it a mindful use of finite natural resources and the results are pretty cool, as you can see yourself.

So here goes this week’s tutorial:

Supply

  • Cardboard box (not necessarily USPS’s box).
  • Patterned paper and black or craft cardstock.
  • Adhesive – glue stick, tape runner and double sided tape.
  • Basic – ruler, scissors, craft knife and a cutting mat.
  • Crop-a-dile
  • Binder’s rings
  • Embellishments – clear your stash & go crazy!!!

    Instructions

    1. Take the box apart and flatten it up
    Cardboard Box
    Flat Cardboard Box

    2. Measure and cut the squares
    Cardboard Squares

    3. Cover up the squares the same way you’d cover a journal bind – cut a bigger piece of patterned paper and apply glue stick to the cradboard square. Adhere the square in the middle of the patterned paper piece and cut all the edges in an angle, then adhere the flaps you have created to the cardboard.
    Covering Cardboard Squares

    4. Cut 3½ inch squares from the black cradstock to cover up the other side of the cardboard squares. (As I was using a very colorful and busy patterned paper for covering the cardboard squares, I chose to cover up the other side with a black cardstock. I would have used craft cardstock, had I had any…. but the main idea is to use the supply you already have.)

    5. Adhere the cardstock squares to the uncovered cardboard with double sided tape, to insure a sturdy hold.
    Cardstock Cover
    Covered Squares

    6. Punch your finished covered squares with the crop-a-dile (¼ inch from the side edge, 1¼ inch of the top and bottom edges).
    Punching holes

    7. Attach all the squares together with the binder’s rings and start adhering the pictures and writing the stories to go along with your pictures.
    Mini Album

    You can take a peek at my finished mini-album here.
    Finished mine album pages

    Please share your recycled creations with me by leaving a comment!