/** Font types */

Posts Tagged ‘scrapbooking’

New Workshop – Welcome Little One || REGISTRATION CLOSED

Tuesday, August 3rd, 2010

Workshop - Welcome Little One

I am super excited to announce the launching of a new unique workshop by Creativity Prompt.

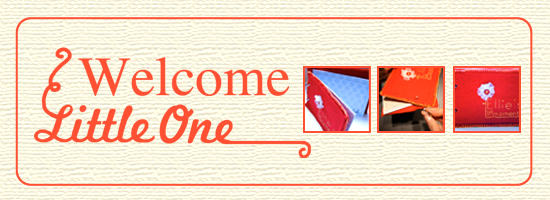
Whether you are expecting a new baby soon, you have just had a new baby or you want to give a special gift to a new mom, “Welcome Little One” is exactly what you are looking for.

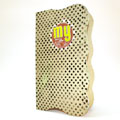
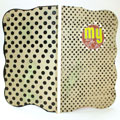
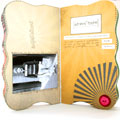
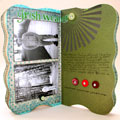
This workshop offers a quick and easy way for the busy new mom to put together a gorgeous mini album to capture and record the first moments of the precious new born child.

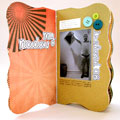
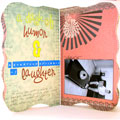
The workshop is unique by providing pre-designed pages with journaling prompts, all sized to the standard 4″ by 6″, so that all you have to do is to print the pages, add the photos and tell the stories.

All the guess work is left for the upbringing of the child, none for the child’s very first mini album.

In addition, by providing all the patterned papers and titles in the pre-designed pages, the workshop is also reducing the supply list down to the absolute minimum necessary.

In fact, chances are that you already have all the supply at home, especially if you like recycling old boxes for their chipboard and old clothing for their fabric. Thus, basically the cost of this mini album is limited to the cost of the workshop and prints. Thats it!

Not only that, but the workshop also provides a set of digital frames you may use on your digital pages, lay over photos or print on your own patterned papers or cardstock, in case you prefer your creative freedom over pre made templates.

Furthermore, as the workshop kit is digital, you may use it over and over again for the same low price.

The Workshop Includes:

  1. A pdf file with clear and concise step by step instructions, supported by color photos and supply list.
  2. 10 jpeg files with pre-designed pages – to be printed at home or online.
  3. 10 png files with digital frames, you may use with your photo editing software.
  4. An embroidery guide for the cover of your mini album (Plus instructions on how to make your own embroidered title guide).

Details

    Type: Self paced, downloadable workshop.
    Format: PDF, JPEG, PNG
    Price: $12.00
    Skill level: All levels.
    Software requirements: None. If you wish to use the digital frames you will need a photo editing software such as Photoshop or Photoshop Elements, but it is only optional.

How Does The Workshop Works?

  1. Immediately after the purchase you will be asked to confirm your membership, simply follow the instructions you will get on your e-mail.
  2. After the successful registration you will get instant access to all the workshop files with simple downloading instructions.

If you have any question, please leave a comment here or contact me via e-mail.

National Scrapbooking Day Blog Hop

Saturday, May 1st, 2010

Biting the Bog Apple layout

[Fonts: Erika Ormig, Marketing Script; Digital Kits: KD Frame Essentials 1, KD Digi Essentials (masking tape), KD For The Boy (background paper), KD Fly Boy (paper airplane), KD Stamp Alphas 1 – all by Karla Dudley.]

Today is National Scrapbooking Day and to jump start the day some creative bloggers and I have gathered together in a special blog hop.

Each of us is sharing a layout with her interpretation to the subject – “Cross Country Road Trip”.

Go on and browse all the blogs to see their amazing layouts, to leave some loving and appreciative words behind and to participate in the drawings (On the table there are a copy of my e-book Unleashing The Creative Child Within You and My Mind’s Eye LUSH minibook with papers and who knows, you may hop and find some more goodies in your way)…

We invite you to join us and create a layout (all paper, all digital, or hybrid) about a trip to anywhere in the 50 United States [or anywhere else if you’ve never been to the States] and to submit a direct link to your wonderful layout on Rosann’s blog by May 15th at 11:59pm EST for a chance to win the goodies.

If you are new to my blog, make sure to pick up some of the FREE printables I am giving away each Friday. I’m sure you’d love yesterday’s woodgrain journaling labels!

Blog Hop Order

  1. Rosann => Submit your layout here for a chance to win!
  2. Jana
  3. Terri
  4. Kim
  5. Sharon
  6. Lacey
  7. Karen
  8. Avital => YOU ARE HERE

Enjoy!

Sharing More Layouts

Wednesday, April 7th, 2010

Sometimes I just feel like creating with no reason or rhyme. No specific order. No specific theme. Just putting memories onto pretty paper.

Birthday

Supply

  • Cardstock: American Crafts “Earth Tones
  • Patterned Paper: Sassafras “Sunshine Lollipop” wee bundle.
  • Letter Stickers: generic from the 1 Dollar bin at Target.
  • Journaling tag: Creativity Prompt. (free)
  • Decorative tape: Anna Griffin Border Stickers [I used the Valentine collection]
  • Sticker: KI Memories.

Purim

Supply

Share

Have you been scrapbooking lately? Please leave a comment and share your thoughts and experiences.

Unleashing The Creative Child Within You

Is It Spring Yet – Sharing A Layout And A Techniqe

Tuesday, April 6th, 2010

Is It Spring Yet

Supply

  • cardstock: Bazzill
  • Patterned paper: My Minds Eye “Home” (pale blue), Autumn Leaves (text)
  • Adhesive: Fabri Tac by beacon; Glue Glider Pro by Glue Arts; 2 Way Glue by EK Success.
  • Letter Stickers: American Crafts “Lullaby” Thickers (white), Generic from the Dollar bin at Target (turquoise), Jenni Bowlin Tiny Circle Stickers.
  • Tools: Punches: EK Success (scallop border punch), Martha Stewart (starburst); Stapler: Tiny Attacher by Tim Holtz.
  • Journaling tag: Creativity Prompt.
  • Ribbon: American Crafts (Dotted), Generic and o-l-d (seafoam thin satin)
  • Jewels: generic.

How To

Pleated Ribbon

  1. Attach the edge of your ribbon with 2 tiny staples.
  2. Apply a line of fabric glue. Fabri Tac is WONDERFUL. (I wish I was endorsed by Beacon. I am not)
  3. Pleat the ribbon along the glue line irregularly to create a messy look. don’t worry about the pleats opening up at this stage.
  4. Go back and apply a bead of glue underneath each “pleat” to keep it in place.

Ribbon Flower

Also Known as – what to do if you run out of ribbon while pleating but happen to have a similarly colored ribbon at hand…

  1. Put a drop of fabric glue where you want your flower center to be at and adhere the tip of your ribbon strip to it.
  2. Apply some more glue around the glued edge and start turning your ribbon around it, flipping the ribbon occasionally.
  3. Keep applying more beads of glue around and building your “flower” until you are satisfied with its size.
  4. Cut off the excess ribbon and tuck the end underneath one of the pleats with another bead of glue.

Share

Is it spring yet? Share your thoughts by leaving a comment.
If you give the techniques a try – pweeeeeze share 🙂

Make Your Own Planner Workshop
Check out Creativity Prompt’s self paced workshop: “Capture Your Dream”. In this workshop you will capture, follow and make your dream come true as well as document your journey in a fabulous mixed media mini album.

Using Up OLD Patterned Paper – Creativity Prompt

Sunday, March 21st, 2010

I am not sure about you but I have got a TON of patterned papers. When I say a ton I mean a few shelves full of it plus an overflowing scrap basket.

Only a small part of my paper stash has been purchased recently [and I am waiting for one more order with a couple 6 by 6 packs to arrive on Monday].

Most of my papers have been accumulated over time ever since I started scrapbooking a while back. That means I have some pretty old paper.

Why do I have so much paper? Well…

First, I love papers. I am drawn to their patterns, colors or the overhaul happiness they confer.

Second, I am afraid to use pretty paper. Yes, I admit. I’m silly like that. What good will the paper bring if I don’t use it, I don’t know. But I’m still afraid to take a beautiful piece of paper and cut it or stick stuff on it. To make things worse, a few years back I used to buy every pattern at least twice (occasionally in several colors). Beware, don’t think it made me use it more often. I just have double-trouble right now…

Lastly, when I was working as a lawyer back home I used to compensate the lack of free time with excessive supply shopping. Every time I had a few minutes to spare on my lunch time I would go online and look for cute scrapbooking supply – and between us crafters, what scrapbook supply isn’t cute and inviting?

To make a long story short, I have A LOT of papers. Most are old. Many are “out of fashion” [some have made a come back, though].

So what do I do now?

Simple.

Steering clear of my new stuff and start pulling the old stuff. Here’s what I made this weekend:

What is on your mind layout

What’s On your mind Layout

Patterned paper: Chatterbox
Letter stickers: Doodlebug Designs
Rub ons: American Crafts Remarks
Marker: American Crafts
Flowers: handmade
Button: Autumn Leaves
Tools: Tiny Attacher by Tim Holtz; Doily Lace punch by Martha Stewart.

Boys will be boys layout

Boys Will Be Boys Layout

Patterned paper: Background – Pebbles Inc.; Cut flowers – Autumn Leaves.
Letter stickers: Doodlebug Designs
Paper Frills: Doodlebug Designs
Marker: American Crafts
Gems: Zva
Tools: Precision scissors

Sometimes sad but mostly happy layout

Sometimes Sad But Mostly Happy Layout

Cardstock: Bazzill
Patterned paper: Chatterbox
Letter stickers: American Crafts Remarks “JFK”
Marker: Uniball white gel pen
Button: Autumn Leaves
Tools: Corner Chomper by We R Memory Keepers; Heart punch by Martha Stewart.

Very happy layout

Very Happy Layout

Cardstock: Bazzill
Patterned paper: Chatterbox
Letter stickers: American Crafts, Jenni Bowlin
Marker: American Crafts, Uniball white gel pen
Chipboard button: Love Elsie by KI Memories
Stickers: KI Memories
Rub ons: DCWV
Tools: Corner Chomper by We R Memory Keepers, Precision scissors.

Share

Have you been piling up your stash too? What type of supply do you tend to accumulate most? Share by leaving a comment. I’d LOVE to hear I am not the only one.

Make Your Own Planner Workshop
Check out Creativity Prompt’s self paced workshop: “Capture Your Dream”. In this workshop you will capture, follow and make your dream come true as well as document your journey in a mixed media mini album.

Scavenging My Scrap Basket – Creativity Prompt

Monday, March 8th, 2010

My scrap basket is a disgrace. I seem to only use it one way – dumping more and more bits and pieces inside. I have scraps of papers from companies that no longer exist… (not that it’s that difficult in our economy, but I am talking about Chatterbox and the like…).

A scrap basket isn’t supposed to act as a burial place for broken 12 by 12 sheets… It is supposed to live symbiotically with the rest of the supply. Complete and enrich each other.

This is not the case, unfortunately.

My total lack of time drives me repeatedly to my stash of paper pads and loose leaf papers because it is easier, fresher, more approachable. Not the most economically and environmentally friendly way of working with papers… I know.

Sometimes I am determined to work with my scraps, and I usually love the result but it doesn’t happen frequently enough.

This weekend I felt like pulling out my scrap basket and see what treasures I can find inside, here is what I made –

Sunshine Boys Layout
Supply

Patterned papers: Black River, Sassafras, Chatterbox.

Letter stickers: American Crafts, Making Memories.

Embellishments: Paper frills by Doodlebug Designs, buttons by We R Memory Keepers, Crochet flowers – handmade.

Journaling tag: Creativity Prompt.

Tools: Tim Holtz (Tiny Attacher + Scissors), We R Memory Keepers Corner Chomper.

Goodog Layout
Supply

Patterned papers: Black River, KI Memories.

Cardstock & letter stickers: American Crafts.

Embellishments: Ribbon: American craft (orange), Other (lace). Chipboard accents: Making Memories. Jewels: Basic Grey.

Journaling tag: Creativity Prompt.

Tools: Tim Holtz. (I absolutely love the Tiny attacher. I was skeptic at first, but it goes through the chipboard like butter)

Home Field Layout
Supply

Patterned papers: vintage textbook paper.
Cardstock: Bazzill (dark brown) DCWV (red).

Letter stickers: American Crafts, Doodlebug Designs; White gel pen: Uniball Signo.

Punches: Martha Stewart (Heart + Doily Lace), Fiskars (Threading Water + Scallop Sentiment), Other: Small heart.

Journaling tag: Creativity Prompt (will be posted soon).

Other: colored pencils (Prisma)

Share

Have you been working with your paper scraps lately? What relationship do you have with your scrap basket/ drawer/ tray? Please share and leave a comment.

If you have any question, suggestion or remark – don’t hesitate to contact me – either leave a comment here, use the contact form or start a new thread on the Creativity Prompt Flickr Group!!!

I would also be very happy to see your own creations, so don’t be shy and share 🙂

Make Your Own Planner Workshop
This year you can really make your dream come true!

“Capture Your Dream” workshop is a self-paced, six weeks long workshop, that will walk you through a journey of capturing your biggest dream and making it come true.

In the process of making your dream happen – with lots of inspiration and guided self-exploration, you will also create a mixed media mini album from scratch and learn many tips and techniques – including some photography pointers that will add character to your photos and will help you take better pictures of your projects.

The workshop includes 30 printable PDF lessons with step-by-step pictures and instructions as well as several printable templates you may use in other projects too.

I am confident you will enjoy it and find it helpful so I also offer full money back guarantee while the workshop lasts.

Experiment With Color On Your Layouts – Creativity Prompt

Sunday, January 24th, 2010

Experiment With Color On Your Layouts

I am a great believer in the power of the written word. In fact, only recently I’ve urged you to write as if your next word will be your last. However, there comes a time when you just need to play. Remind yourself what is it that you love so much? Why do your fingers tingle? Why does your heart beat so hard when you stumble upon a pile of ink pads and paint mists?

Unleash your creative child and experiment with colors. Reveal the artist within you!

In the layout above I did just that. I experimented and played and had fun. Here is how I did it:

Tools & Supply

Step-By-Step Instructions

  1. Cut the smooth cardstock to 2″ by 5″ strips.
  2. Stamp the petticoat pattern all over the strip with Versamark ink and emboss with a clear embossing powder, using the heat tool.
  3. Squeeze the distress ink pads on a craft sheet and mist with plain water until the ink bubbles up. Then lay your strips – stamped side down – on the wet ink and move it around. Use the heat tool to dry and set the ink.
  4. Spray the strips with the water-diluted pearl medium and with the glimmer mist and blot down the excess ink with a paper towel.
  5. Intensify the color by using the distress inks directly on the strips with the foam blending tool. Work in a circular motion, from the outside in. Use darker colors on the edges of the strips. Wipe the strips with a paper towel or a baby wipe to emphasize the embossed pattern.
  6. Dip your finger in clean water and flip it over the strips. The distress ink will react to the water and spread out. It will create a vintagey worn-wallpaper look. Once you get the affect you want, immediately dry it out with a heat tool to avoid farther spreading of the ink.
  7. Once the strips are completely dry, stamp over them with the rest of the stamps, using Versamark ink and emboss with a black embossing powder. For the Chandelier’s cord I used a glue pen and poured the embossing powder over it.
  8. Attach the strips to the bottom of your cardstock, about an inch from the edge, centered and evenly spaced from each other. (I used both a tape runner and some glue dots.)
  9. Adhere the red mat (11″ by 6½”) above the paper strips.
  10. Adhere the photo on the left edge of the mat, evenly spaced from all 3 adjacent edges.
  11. Assemble your long title with the letter stickers.
  12. Hand draw an outline around the mat with a white gel pen and don’t forget to write down the date.
  13. Use the foam blending tool to ink up the edges of your background cardstock with the Fired Brick distress ink by Rangers.

How was your play time?

Share

If you have any question, suggestion or remark – don’t hesitate to contact me – either leave a comment here, use the contact form or start a new thread on the Creativity Prompt Flickr Group!!!

I would also be very happy to see your own creations, so don’t be shy and share 🙂

Make Your Own Planner Workshop
Check out “Make Your Own Planner” workshop for an affordable monthly and weekly planner in a workshop that keeps on giving…

Creativity Prompt – Make a Hybrid Board Book

Friday, November 13th, 2009

Hybrid Board Book
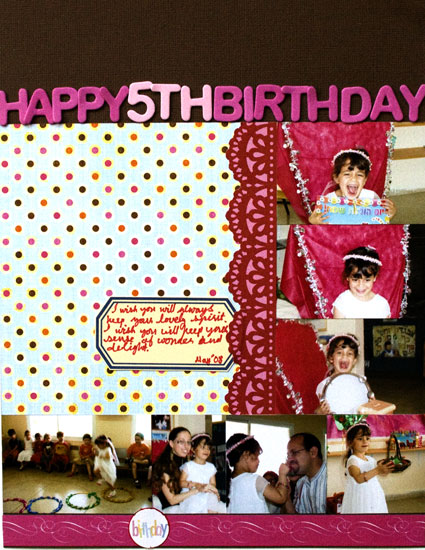
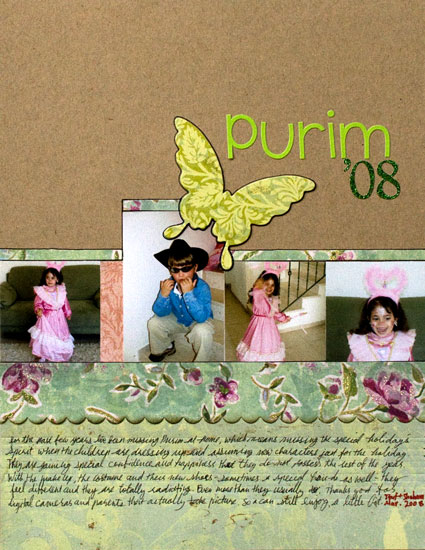
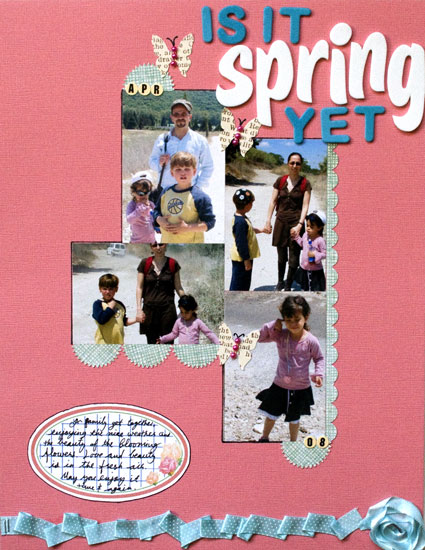
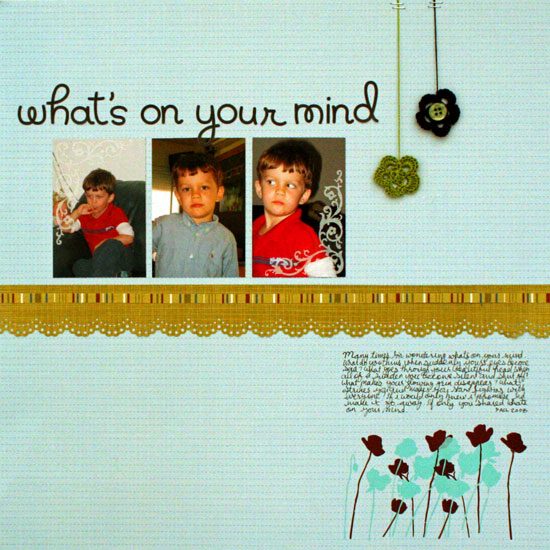
This time I revisit an oldie, but a goodie – the altered board book.

This week there is a twist – I am going hybrid.

That means that part of the book is designed digitally and part of it – traditionally. Together it’s a great mix of new & old.

Using digital elements, such as patterned papers, word art and other digital embellishments helps in keeping a theme and a color scheme for the book. If you want to make this book as a gift, in multiples, then starting on your computer also allows you to include all your journaling on the pages and then printing them either once or a million times, with no extra effort.

Cool, huh?

Tools & Supply

How To


[Watch on You Tube]

Step-by-Step Instructions

  1. Start this project on the computer. Open your photo editing software and either crop or resize the digital patterned papers to the same width and height of your board book.

    Don’t forget to count the spine while making the pages for the cover, leave a gap the same width as your spine between them.

  2. Print your pages on cardstock. Plain paper won’t be opaque over the altered pages of the board book.

    Use the borderless printing setting, otherwise the printer will scale down your images to allow a white border around them and it’ll distort your measurement.

  3. Start working on the cover – trim off the excess paper and score your spine’s fold lines to get crisp creases. You may also go over the folds again with the bone folder, for an even crisper look.
  4. Adhere the cover by applying a generous layer of glue stick on the board book cover and burnish with a brayer. Let dry.
  5. In the meantime, start cutting the pages and your photos and any other digital element you have printed (word art, embellishments, journaling tags, etc.)
  6. Once the glue has dried, turn your page around and cut off the excess with a very sharp craft knife. If you get uneven edges, you can file them down with sand paper.
  7. Repeat the same process with the rest of the pages: adhere, go over it with a brayer, let dry and trim off the excess.

    Make sure you trim off the edges of a page before adhering the printed cardstock to the other side.

  8. Some ideas for embellishing your mini altered book:

    • Adhere your titles with foam pop-dots to give some extra dimension.
    • Stick to one type of embellishment (buttons in my case) to maintain cohesion.
    • Use different sizes of pen tips to create interesting handmade word art.
    • Outline your pictures, letter stickers and other elements with your journaling pen to anchor them to the page and add dimension.
    • Using 3D embellishments can make dents in your photos, so make sure both pages have the same “elevation” so the elements won’t touch the pictures themselves.
    • Have fun!!!

Hybrid Board BookHybrid Board BookHybrid Board BookHybrid Board Book
Hybrid Board BookHybrid Board BookHybrid Board Book

Share

If you have any question, suggestion or remark – don’t hesitate to contact me – either leave a comment here, use the contact form or start a new thread on the Creativity Prompt Flickr Group!!!

I would also be very happy to see your own creations, so don’t be shy and share 🙂

Make Your Own Planner Workshop
Check out the new “Make Your Own Planner” workshop and you may solve this year’s holiday gift shopping problem. An affordable workshop that keeps on giving…

Freebie – Printable Journaling Labels

Friday, October 30th, 2009

What can I say? Life happens.

I don’t know if I mentioned this before, but for the past 3 months my husband and I have decided to transform our lives into healthier ones. Non of us was really heavy but we were gaining weight – little by little – and feeling bad, both physically and emotionally.

Weight can really creep up on you. From being a skinny teenager that eats chocolate non stop and only seem to get smaller, you become an adult that can gain weight from merely standing in close proximity to food. That’s life.

So we took control over our bodies, started eating healthier (that doesn’t mean less food. It means healthier, more nutritious food) and we wake up each day at 6:30 a.m. and go together to the gym for a strenuous workout that includes both aerobic and weight training.

We see results. GREAT results (especially my beautiful husband).

But every once in a blue moon we have a day in which we feel more tired and energy-less than usual.

This is such a day. So there will be no free tutorial this week.

HOWEVER – I am not missing a tutorial without leaving something nice for you guys instead. So I am including a freebie printable journaling labels for my fabulous readers to play with (right click on the link and opt for the ‘save link as…” option).

Just print on cardstock and cut out with scissors. I used cream colored cardstock and it looked great on it.

Print as many as you want for personal use only.

Share

If you print out and use these labels please leave a comment and tell me if you liked them. Thank you!

New Workshop: Make Your Own Planner || REGISTRATION CLOSED

Monday, October 26th, 2009

This workshop is for 2010, you will find an updated version for 2011 here.

Make Your Own Planner

I am excited to announce my latest self-paced workshop. In this workshop you will make your own planner for 2010.

The workshop will provide you step-by-step instructions to complete the beautiful planner you see above – all at the comfort of your own home. You will also get a full planner kit I designed, in both JPG and PDF files for instant download. I will walk you through the process of putting the planner together, however you will have to handle all the “wow!” you’ll hear yourself.

The planner’s pages are elegant and appeal to any taste. The page templates include:

  • Monthly and weekly planner pages.
  • Shopping list.
  • To do list.
  • A page for information you wish to remember.
  • A page designed especially for sketching creative ideas you come up with throughout the day.

Planner 2010 Planner 2010Planner 2010

For only $10.95, less than a price of one designer planner, you will get a beautiful, meticulously designed planner kit. Not only that, but you may also use the kit to create planners for your friends, family and colleagues – a great handmade and affordable present for the coming holidays. You may also alter the JPG files, change their color, add or subtract elements and personalize it with a photo editing program.

What Else Will You Get?

The segments of the workshop are jam packed with tips and suggestions on how to harness your creativity for customizing the planner and make it uniquely yours. You will also find clear and concise step-by-step instructions, paired with large colorful pictures of each and every step – leaving all the guesswork out of the equation.

Immediately after registering to the workshop, you will gain access to the entire kit for instant download. You will also receive the first segment with an introduction and a complete tools and supply list. Note: all the tools and supplies are pretty basic and can be found at your local craft and office supply store. For your convenience, the list contains links to recommended online stores that sell these products.

The following three segments will be delivered to your inbox every day. Just enough time to allow you to complete the former segment without overwhelming you with all the information at once.

In a span of 4 days, you will get all the workshop material and complete your planner (depending on your preferred way to print out the planner kit).

As always I offer each member full support and encouragement.

P.S.: You are going to love this planner… OR your money back!

I am so confident you will absolutely love the planner you’ll make, that I am offering a full money back guarantee. If you are not fully satisfied with the workshop, just send me an e-mail and I will refund 100% of your purchase – no questions asked.

The Details

  • Price: only USD 10.95.
  • Duration: Self paced.
    Instant download of kit and complete delivery of workshop segments in a span of 4 days.
  • Contents:

    • 17 JPG files
    • 10 PDF printable documents
    • 4 workshop segments in PDF file format
  • Special features:

    • Members only forum.
    • Step-by-step photos and written instructions.
    • Unlimited personal use of the planner kit: make as many planners as you’d like.