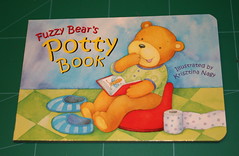
On December 4th my husband and I landed in California after an 11 hours flight and were welcomed by our wonderful friends. They’d hosted us for over a week, until we found an apartment, and drove us around for all our initial errands. I am very thankful for their help and hospitality. On one of our first shopping sprees, Andrea, my good friend, has introduced me to the one dollar bin at Target, where we bought a children’s chipboard book.
The idea of altering a children’s chipboard book has sat in my mind for quite a while and as soon as I saw these one dollar books at Target, I knew I have a project at hand. I made Andrea buy one as well, so she would join me for the “craft-session” and I enjoyed her talented company a lot.
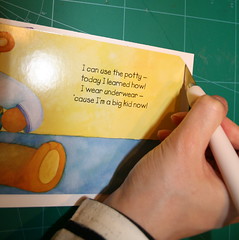
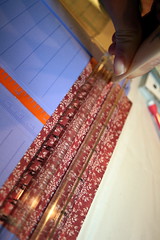
So for this week’s creativity prompt I will show you how I turned this:
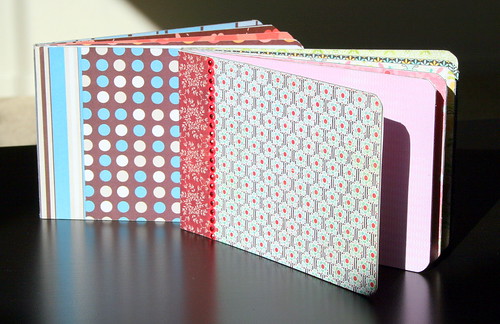
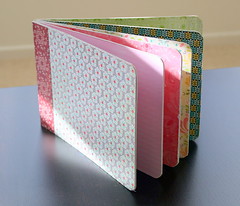
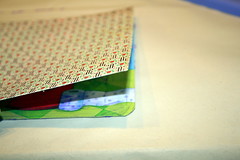
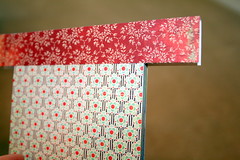
Into that:
- Chipboard book.
- Patterned paper.
- Glue stick.
- Craft Knife & Cutting mat.
- Ruler.
- Bone folder or a paper trimmer with a scoring blade.
Step By Step Instructions –
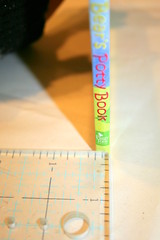
- First, measure the size of each page, the spine and the page fold. Write down the numbers on a scrap of paper.
The Spine.
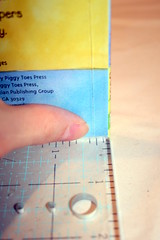
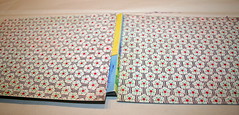
The Page Fold. - Cut the patterned paper to the page’s size and adhere them on each of the book’s pages with a generous amount of glue stick. Make sure that the glue is completely dry before moving to the next page, otherwise, the pages will stick together and tear.

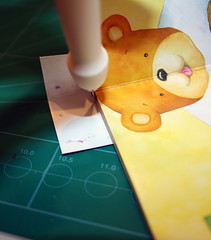
- After adhering each patterned paper, flip the book and cut the excess paper with a sharp craft knife. Make sure not to glue two papers to both sides of the same page before cropping the excess out!
- When applying the patterned paper to the cover, stop at the first score mark on each page. (One is probably flash with the spine and the other with the page’s fold.)
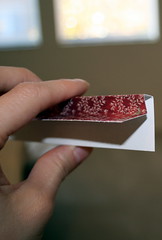
- To conceal the spine start by trimming a patterned paper to the same height of the book and 2″ wider than the spine.
- Next, score the strip at 1″ on each side (lengthwise) – that should create the spine’s score lines.
- Then score the strip again on one side at the same size of the page’s fold that you have measured on step 1. Make the score line, measuring from the spine’s score line to the edge.
You should end up with a strip of patterned paper which looks like that:
- Glue the patterned paper strip to the book, using a glue stick.
- Cut the excess with a craft knife.
Voilà ! You are done and free to embellish the altered book as you wish.
Enjoy!!!
If you have any question, suggestion or remark – don’t hesitate to contact me – either leave a comment, use the contact form or start a new thread on the Creativity Prompt Flickr Group!!!
I would also be very happy to see your own altered books, so don’t be shy and share 🙂


Okay, so I’m NOT crafty at ALL but I WILL be doing this in 2009 with some board books that are no longer being read in our house.
Thank you for the idea and instructions.
Thank you for your comment. It was so heart warming to hear I have inspired someone who THINKS she isn’t crafty to embark on a project that will prove her wrong (and talented) 🙂
Oh what a fun project, thanks for sharing! I’ll be linking.
Thank you, Rachel!
this is a really cute idea! What will you be filling the pages with? I am looking for something to inspire me back in my paper crafts and this just might be the ticket! Thanks!
I was thinking about filling it with some black and white photos of my nephews and niece… (First I need to buy a new photo-printer) 🙂
Wow, I can’t believe how simple that is! Really great idea! I was wanting to make a board book for my daughter for ages … but couldn’t find blank ones at the time. I’ve never even thought of using real books! This is PERFECT – (and cheaper than the blank ones you can buy). Will be searching the book stores for sales books! And looking at her old books … I might even have some books lying around that didn’t turn out to be as great as thought …
Thanks for sharing this really great idea!!!
Miss Muffin
Thank you – you are very welcome. (I’ve heard you can get some great deals on board books at thrift stores and try the garage sales as well…)
You did a beautiful job!
Thank you!
Hi – I did see this idea quite a while ago and bought some books from a second hand book sale – this was about 2 years ago – but from seeing your tutorial – it has sparked me to start something today – thanks for the inspiration! – Cheers Tania
Thanks. I’d love to see your finished project!
If you want to read a reader’s feedback 🙂 , I rate this article for 4/5. Decent info, but I have to go to that damn google to find the missed pieces. Thanks, anyway!
wonderful tutorial! thank you!
You are very welcome! Thanks for stopping by 🙂
I just found your book idea and love it! Does the glue stick hold well enough? My experience with glue stick glue is it looses its stick kind of quickly.
In my experience, as long as you apply the glue generously and burnish it well, it stays put.
I’ve done this with a few of my daughter’s old board books.. in one or two cases I had to run sandpaper on the pages first… just lightly so the glue will hold. You also want to make sure that you catches the edges good.
What a great idea! Thanks for sharing. 🙂
Great idea! I’ll be trying this today, thank you for sharing with us.
Merry Christmas!
Cindy
Merry Christmas, Cindy!
Is it possible to contact administration?
Thank you
Go here: http://www.creativityprompt.com/contact-me/
I am covering a board book right now. After putting in all of my cover pages, my book doesn’t want to close at all. I tried cutting out one of the middle pages but it still isn’t closing. Not really sure where to go from here. Was wondering if you had any ideas….
thanks
Hi Meg. There are two things I can think of that can make that happen: (1) the creases/folds of the papers are covered and thus preventing the pages from being folded (2) the book is too bulky for the width of the spine.
To address the (1)st issue, you can use a craft knife to cut, carefully and shallowly, the edges of each crease to re-score it. You may also try to use a scoring tool to do that.
To address the (2)nd issue, try to add closure to the book. Maybe just a ribbon or rubber band that ties around it.
I hope I was helpful to you.
Sooooo cute!! I love scrapbooking, sewing, and crochet. Just when you think you have seen most of it!!! This is so simple yet brillant. Love it. You could also go to garage sales and by these little books for .10or .25 cents.
Thank you! That’s a great idea!