 The grunge, vintage and distressed look seem to have always been “in style”. this look adds a fabulous touch to a project and makes it look like an handmade, one-of-a-kind piece of art (which is a great look to have, don’t you think).
Tim Holtz is well known for creating wonderful altered art with a characteristic distressed look. Therefore it isn’t surprising that he came up with a line of products for Rangers Industries designed to help getting this one of a kind look.
On this post I am going to review Tim Holtz’s distress inks and foam blending tool.
Overview
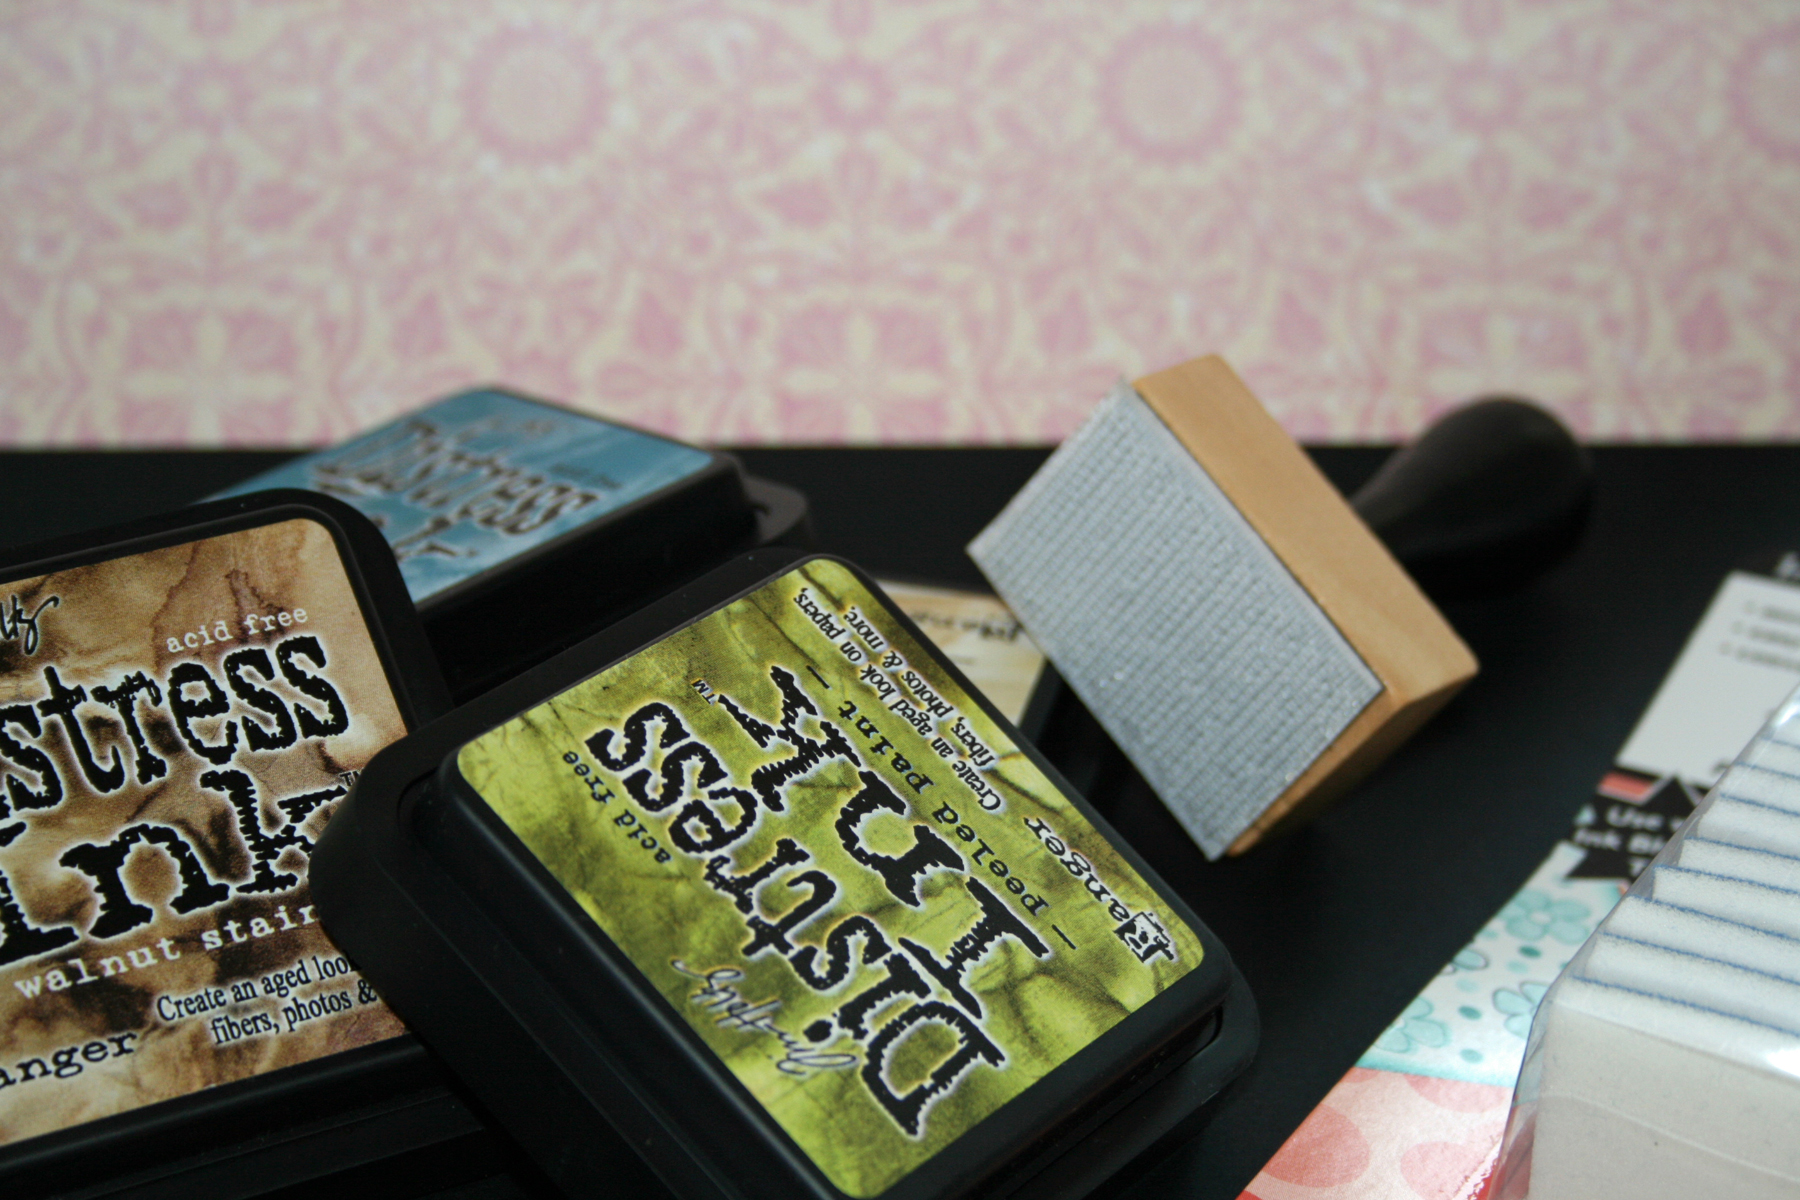
The distress ink is an acid free dye ink with an agent that delays drying, which makes those inks more blendable.
The foam applicator is basically a tool with a wooden handle and interchangeable foam applicators, designed to absorb the distress ink and apply it moderately and with more control to the altered surface (paper, cardstock, chipboard, fabric etc.).
Using these tools together you can conquer the world create a special distressed look, tint photos and apply a color wash to porous surfaces.
I like 🙂
Pros
- Gorgeous colors. The designers at Ranger Industriess really did a great job at picking up the colors for the ink pads. They are absolutely beautiful.
- Compatibility. Ranger has an entire line of distress inks, paints and embossing powders and all the colors matches perfectly, which makes our life easy when coordinating colors on our projects.
- High quality. Those ink are really excellent. They are vibrant and won’t fade. When you apply the ink it appears to be very vibrant and gets more subtle once it’s dried. However, after the color is set, it stays there magnificently.
- Inexpensive. For their size, the ink pads are really inexpensive. The blending tool is also inexpensive if you have more than one ink pad, as the interchangeable applicators are coming in a pack of 10 (The basic handle comes with 2 applicators as well)!!!
Cons
- highly addictive. After you get a couple ink pads, you start developing an appetite and although these ink pads are inexpensive individually, the price does add up when you start a collection (and you need a different foam applicator for each color). I wish they had small queues, like Clearsnap’s colorbox chalk inks.
- Staining. Once you’ve got some distress ink on your fingers, it doesn’t come off. No matter how long you are going to wash it with soap and water… I’ve been trying to avoid contact, but it’s impossible. You have to touch the applicator in order to replace it… If you have any tips on that matter I’d love to hear them!
- Packaging. The ink pads are designed to stack together on top of each other, which is great, BUT the cap seems to have a will of its own and it magically opens all the time. It wouldn’t be such a big problem if the ink wasn’t that powerful (and staining => see above). A larger inking surface will be appreciated too, as this ink is PERFECT for background stamps.
Tips
- Foam applicators storage. Ranger does have a special Craft Spinner for storing the applicators. But it works only for the tool itself, and doesn’t answer the need to store the applicators themselves and it’s also a bit pricey.
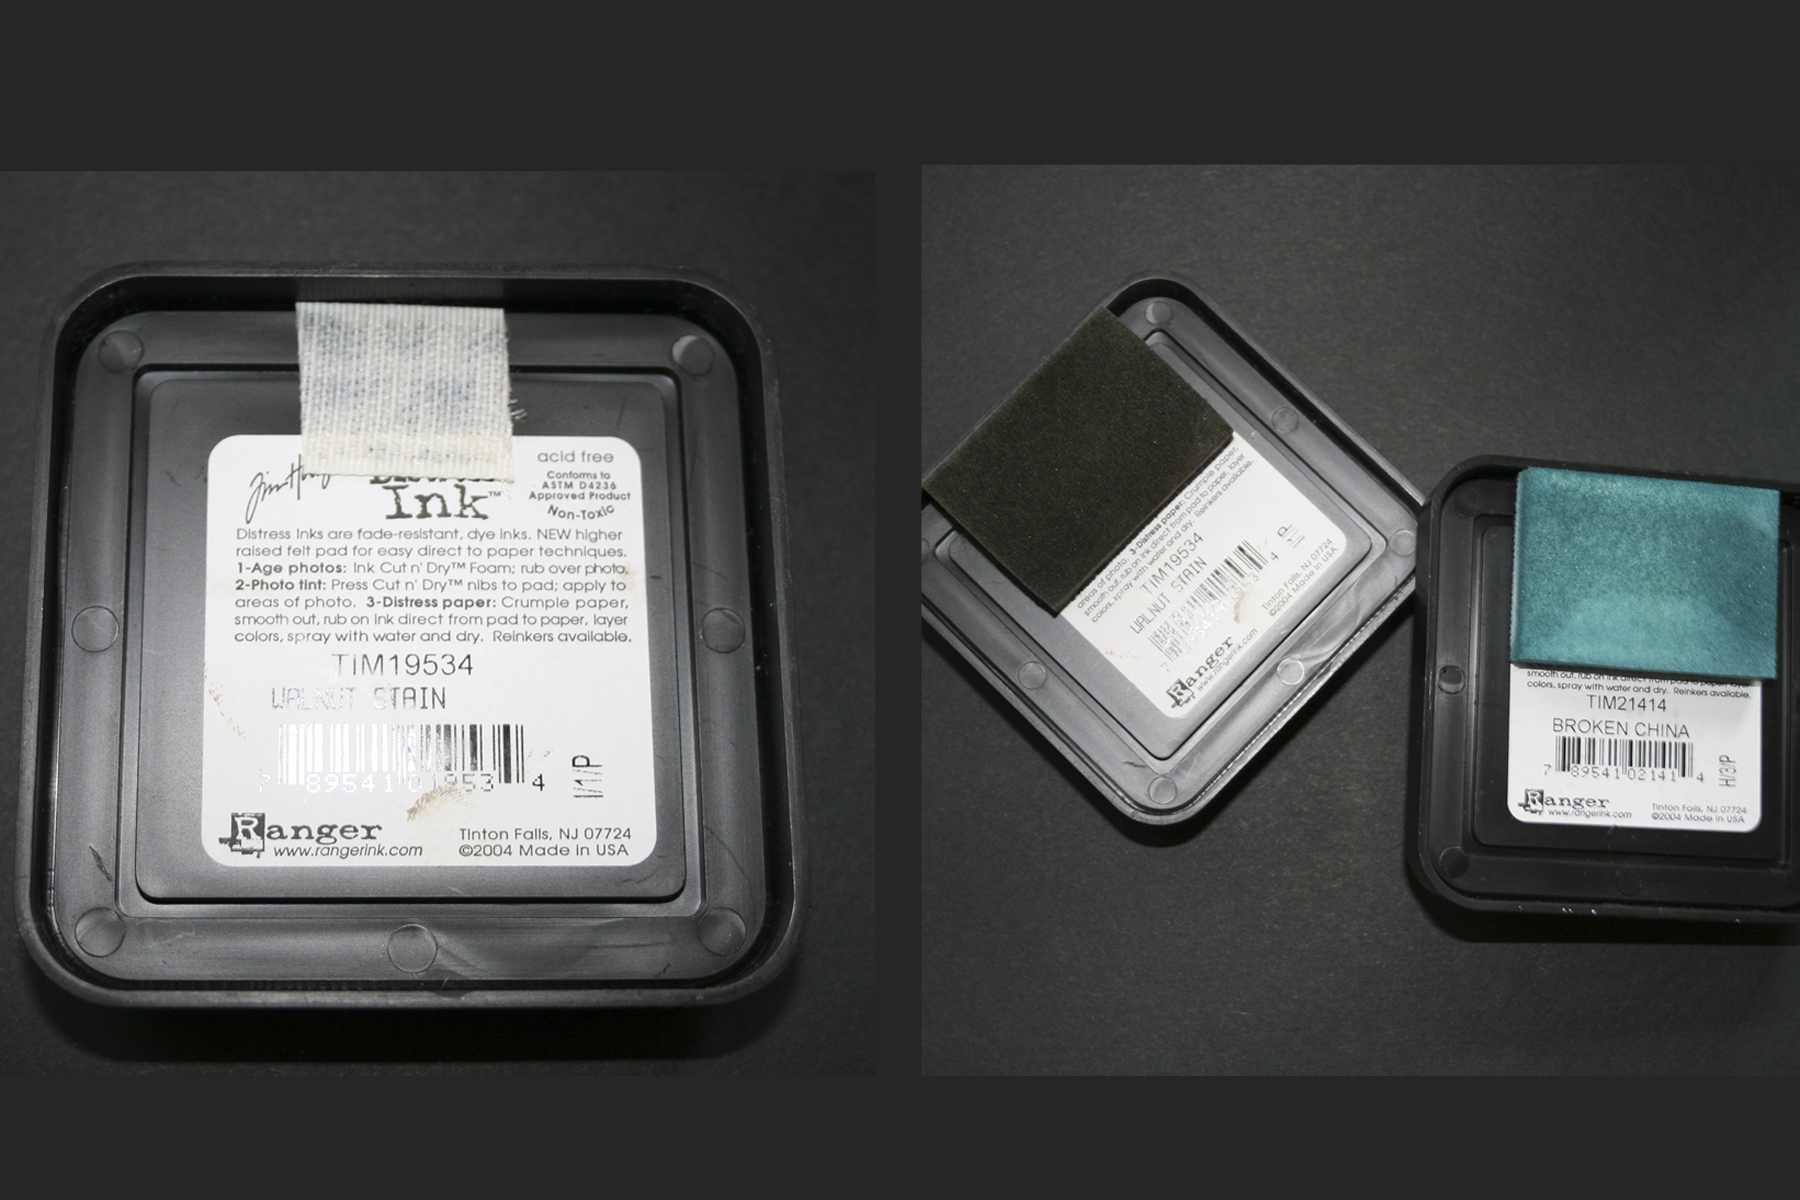
I came up with a nifty idea that I want to share with you. Just cut a small Velcro piece with a self adhesive back and adhere it to the base of the ink pads. The applicator will stick on it and you can easily know what color ink the applicator is for. (Just make sure to store the ink pad upside down so it won’t stain your drawer or shelf and it will also keep your ink juicy).
- Ink application.
- For inking up the edges of your paper or cardstock, tilt your applicator in 45 degrees and gently pass it across the edge. The harder you press on the applicator, the thicker and less precise the inking will get – so instead of applying pressure on it, just repeat the application over and over until you get the desired result.
- For distressing the surface itself, hold your applicator straight down, start from the outside and go in with swirling motions.
- You can also cut the applicator to smaller pieces if you want to ink up smaller surfaces or ink with more control – this technique can also help if you want to add a tint to a black and white photo.
These are some cards I have made, using the distress inks:

Share
Have you ever used distress inks? If so, how did you find them?
I hope this review has been helpful for you, I’d love to hear your thoughts, so leave a comment on this post 🙂
Similar posts:
Tags: blending tool, distress, distress ink, Product Review, Tim Holtz


This was a wonderful review…I agree with all your Pros and Cons!! I am so addicted to these inks, I can’t wait to acquire a few more colours!! I wish I knew about the staining power they have before I used my fingers to blend the inks around my embossed background image. So glad I didn’t have to go into work today, LOL I am a nurse and that would not have been too professional hahaha
Thanks! Saying you’re a nurse gave me an idea => wearing gloves while playing with the inks 🙂
I accidentally bought the pads for alcohol ink application, but don’t have the alcohol inks. Will it work with the ink pads also (which is why I got it in the first place)? I didn’t know there were two types! Maybe I should look at it like I now HAVE to buy the alcohol inks? LOL.
The felt tips (made for alcohol inks) are too absorbent for the distress inks. Buying alcohol inks and playing with them on non-porous surfaces might do the trick 😉 or you can just replace those for the foam ones 🙂
Thanks! Saying you’re a nurse gave me an idea => wearing gloves while playing with the inks 🙂
Oops, should have added great post! Waiting on the next one!
YEP!! that would of helped soooo much….funny thing is I don’t even have any at home. I will have to put some used (because otherwise work would call it stealing), but CLEAN ones in my pocket next time I am at work 🙂
You can also just put your hand inside a plastic baggy – they are cheap and you can just slip them off when done.
That’s a great tip, thanks!
Tracey beat me with the gloves idea, LOL! I was just going to suggest you could use one of those latex surgery gloves and have a single pair to use over and over just for playing with the inks (some eco conscience here too).
Before Distressing inks, I used other pigment inks to create skies and ground. I used cosmetic sponges and tore along the defined edge of the sponge so the line would not show when applying the ink onto the paper. You’d get fuzzy edges to your clouds instead of hard-defined edges, so it looked more natural. Then they came out with cloud stamps. The ink was all over the hands this way. I like the new foam backed flatter pads too, but didn’t buy a tool, bought a sheet of the pad and cut it into rectangles. I can’t cut it perfectly straight, but at least my hands are NOT completely covered with ink. I stored all my sponges in a plastic baggie. I like your idea of storing them on the ink pad itself.
Great tips and information here:)
I am now glad to have an understanding about these ink pads. But how about using a plastic sandwich bag whenever you need to protect the fingers? It could be a temporary “glove”. Too bad about the staining properties.
For a newbie (like me) to distress ink, this is so good to learn. I printed out your tips/instructions to keep them handy…in case I miss a point or two! Thank you, Avital!!
I was just going to email you about this post today! I see you are right on top of it. I am trying distress on my new garden card…I like it so far, using the cloud stamp too.
Thanks for your review…I am a big fan of TH’s Distress Inks and use them for Stamping….Distressing…Colouring on my images….and making backgrounds with Resist Embossing…to get the ink off your fingers….wash your hair….the shampoo seems to do the trick…if like me…you use these inks a lot….it’s a bonus….always have nice clean shiny hair.
Hugs Kath xxxx
good one, Kath! love it.
Great review and tips, Avital. Being a “newbie” to distress inks I was
unaware of the staining problem. I was going to suggest latex gloves,
but the sandwich bag idea is even better….and less expensive. Thanks
to all for the great ideas. Appreciate it.
Hi there! Here is a tip that i use…and yes you are SOOOOOOO right about the pads being addictive! but they are not really cheap in Australia so i only buy when i need to.
anyway the tip..or tips….
I brought the big sheet of ranger foam that they sell. i think it is called cut and dry foam. i cut this in strips about a inch wide and use one end for distressing and the other to hold it and not get ink on my hand. it was hard to get the tool here so this is why i started to use this method. i have written on the back in marker what color i used on each foam piece and store in a zippy bag.
also the black soot ink is great for use with copic markers or tria markers as long as you heat set it.
Thanks for sharing your great tips with me!!!
Great points! And one more reason that Distress Inks are different than any other ink on the market – they are specifically designed to BLEND with WATER without losing any of their color quality. If you’ve ever used other dye inks with lots of water you may have noticed that the black inks will turn purple, blue inks turn sort of gray, etc. These inks stay true to color no matter how much water is added!
And oh yeah, they do stain. All other dye inks I’ve used also stain when doing distress or direct-to-paper techniques. Cheap shampoo is what works best for me (a tip I picked up on the Ranger Yahoo Group Forum). I keep a bottle of $.99 shampoo on the ledge of my laundry room sink so I can scrub after a good inky play session! *grin*
(Oh and I am not affiliated with Ranger either, just a true Distress Ink addict – and yes, I DO have ALL of the colors AND the matching re-inkers! Like potato chips – ya can’t have just one or two, right?!? *wink*)
Excellent points, thanks Phinny 🙂
I do love my distress inks, as well as my Pringles 😛 (Though, luckily for my thighs, they don’t sell the ones I love here in the US!!!)
Hey there… came to your post via Hero Arts… they gave you a nice plug…
I love these inks too and am super addicted to them myself… so much so that they have virtually replaced all other inks. About the staining: rubbing alcohol works well at removing it from your fingers as does a Lanolin based soap… the oil seems to help break the ink down. I’m often making something right before work and the Lanolin soap has been a real help.
Thanks for the tips. Alcohol doesn’t seem to work in my case but I will give the Lanolin based shampoo a try… (I’m not sure I have one).
I love the distress inks, but also pretty impressed with the Colorbox fluid chalk ink. The “cat’s eye” ink pads tend to dry pretty fast, but the fully sized ones are decent. They work especially well with photopolymer stamps.
This is a great review. To prevent finger staining, I use inexpensive gloves I got at Costco (Sam’s Club in the East). And I made my own foam applicators by buying thin cosmetic foam sponges and cutting them to size. Then I glued them to pieces of white felt that were also cut to size. I got the felt from a craft store–it’s under a $1 for a 8″ x 9″ in. piece. It didn’t take much time, and it makes a lot. Hope this helps.
Thanks for sharing your great tips!
Hi,
What can I use as a sealent with the alchol inks? I would like to use them on glass, but they come off with water.
I have heard recommendations on the DecoArt DuraClear Varnish as a good alcohol-ink’s sealant.
Hi I just read your question and I hope this helps you. I have used alcohol inks on tiles, dominoes and things like that. I usually use Rusttoleum on all of them, I prefer the glossy but just about anything like that will work. You might want to try triple thick as well, not sure how it would do on glass so you might have to do some practicing with that one. Oh by the way before I spray my items I will wait for a good two to three days before spraying them, to me it seems like the alcohol inks are really in there for good and it won’t smear or run. Hope this helps.
I am a huge fan of Tim Holtz and all his tools and especially the Distress Inks (& now Distress Stickles, too!)
I use cosmetic sponges to apply my distress inks…and you can rinse them out after and use them again with another color when they dry. When they’ve been used too much you can toss them since they are pretty cheap (much cheaper than anything stamped with “Ranger” I am sure). I prefer the wedge shaped sponges for the different application areas it has, but the others work well, too.
If you have a semi new dry distress ink pad like I did…spritz it with water. If it is not so new, place a few drops of Adirondack pigment ink re-inker in the same color on the foam, scrape across the foam with an old plastic credit card to spread the ink into the surface.
Thanks for the great tips!
love the tips want to know if you can use hair dye with this concept ?
That’s a really good idea. I don’t know whether you can or cannot, but give it a try. It sounds interesting 🙂
I want to use distressed inks, (the dabber) on some muslin fabric for a decoupage box I’m doing. Will it blend really well on such a fabric? I have been trying to find information on this or a video before I start which is in a few weeks.
It should be working fine, you can always spritz water on the ink to help them blend. Try on a small piece, before you go about painting on your art project.