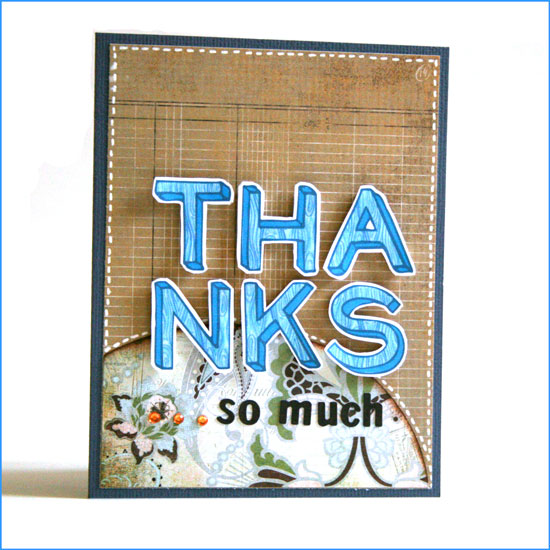
[Supply: You Are Amazing (woodgrain alpha) by Shimelle Laine for Two Peas In A Bucket, Basics + Cappella (patterned paper + small alpha stickers) by Basic Grey, Rhinestones by Kaiser Scrapbooks, Earthtones cardstock by American Crafts, White gel pen by Uniball, Foam dimensionals.]
Step By Step Instructions
Using Digital Alphas
- Open a new document in Photoshop Elements: Width: 8.5″ Height: 11″ DPI: 300.
- Use the rectangle shape tool and add a rectangle, sized 4.25″ by 5.5″. By doing that you make sure the size of your alphas will be perfect.
- Open up all the different letters you need for your greeting from the kit. Use the move tool to drag and drop them on your new document.
- Before positioning the letters you need to resize them. To do that, line them all up in one straight line – regardless of the way you want to put them on your card.
- Pick all the layers with the letters (Just click on the layer with your CTR/CMD button pressed down) – make sure they are all highlighted.
- Pick the move tool ,then press align and opt for the center alignment.
- While your layers are still all highlighted – click on one of the edges of the word and drag the cursor towards the center. This way you are resizing the letters proportionally.
- After you get to a size you are please with, position the letters the way you want them on the card. The rectangle shape you drew earlier will help you keep the proportions and size right.
- Conceal the layer with the rectangle shape by clicking on the eye icon and print your page on a white, smooth cardstock.
- The alphas on Shimelle’s new kit have a faint outline that you can use as cutting guidelines.
Assembling The Card
- Cut the patterned background paper to 5.25″ by 4″, adhere to your cardstock base.
- Cut the accent piece of patterned paper in a curve (using an ellipse cutter – I used Coluzzle) – make sure the base is 4″ wide.
- Ink up the top edge of your curved paper and adhere it to the bottom of the patterned paper you adhered before.
- Adhere the individual letters with foam dimensional stickers. Cut the foam adhesive down to size if needed.
- Add the letter stickers and the rhinestones.
- Give the card to a friend to show that you care and to say thank you…
Share
Who would you like to say thanks to? Have you made a hybrid card before? Share by leaving a comment here 🙂

Tags: cards, Digital Kits, DT, hybrid, Shimelle


I love this card, I saw this on Shimelle blog and as a paper scraper…. I was inspired to purchase the kit and I look forward to printing it and playing with it…..
Thanks again for the step by step
KS
That’s great. thanks! I’d love to see your card/other project!