 The grunge, vintage and distressed look seem to have always been “in style”. this look adds a fabulous touch to a project and makes it look like an handmade, one-of-a-kind piece of art (which is a great look to have, don’t you think).
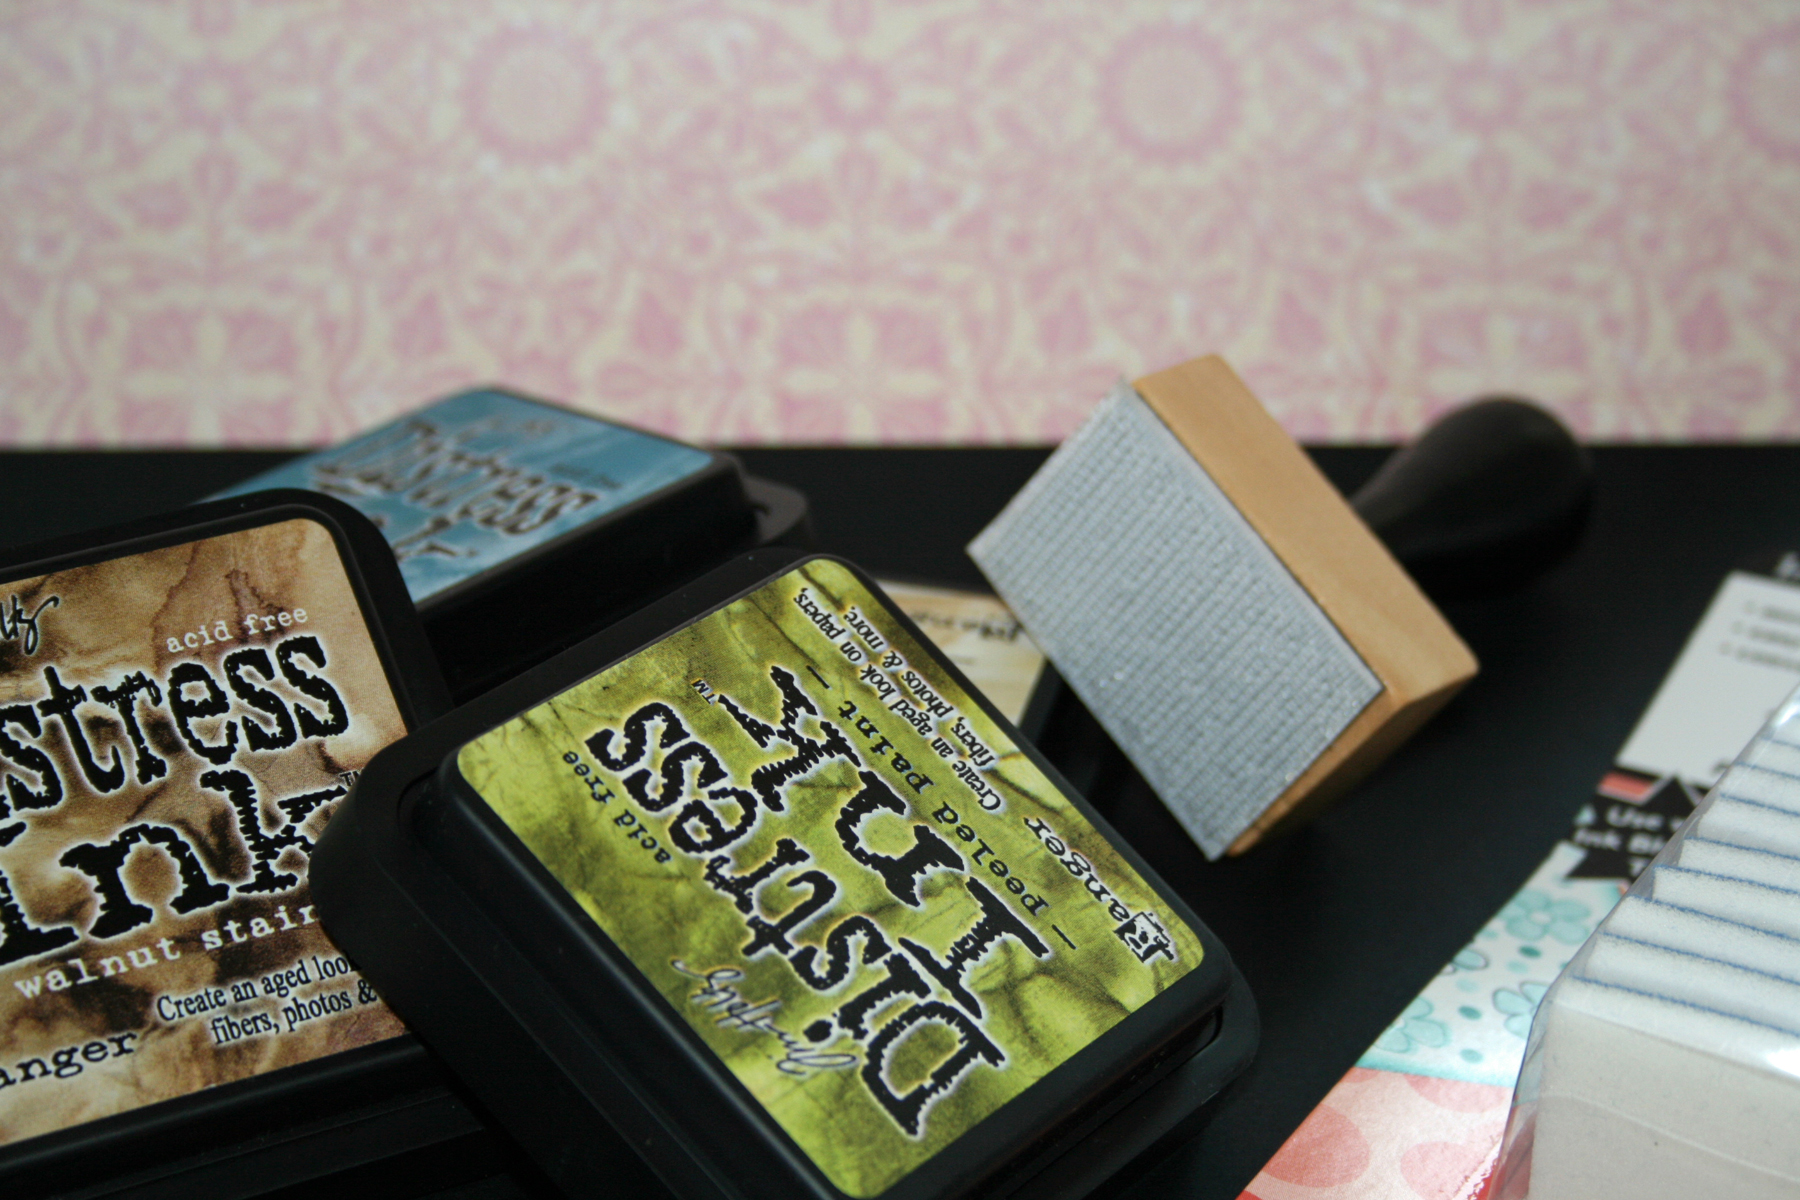
Tim Holtz is well known for creating wonderful altered art with a characteristic distressed look. Therefore it isn’t surprising that he came up with a line of products for Rangers Industries designed to help getting this one of a kind look.
On this post I am going to review Tim Holtz’s distress inks and foam blending tool.
Overview
The distress ink is an acid free dye ink with an agent that delays drying, which makes those inks more blendable.
The foam applicator is basically a tool with a wooden handle and interchangeable foam applicators, designed to absorb the distress ink and apply it moderately and with more control to the altered surface (paper, cardstock, chipboard, fabric etc.).
Using these tools together you can conquer the world create a special distressed look, tint photos and apply a color wash to porous surfaces.
I like 🙂
Pros
- Gorgeous colors. The designers at Ranger Industriess really did a great job at picking up the colors for the ink pads. They are absolutely beautiful.
- Compatibility. Ranger has an entire line of distress inks, paints and embossing powders and all the colors matches perfectly, which makes our life easy when coordinating colors on our projects.
- High quality. Those ink are really excellent. They are vibrant and won’t fade. When you apply the ink it appears to be very vibrant and gets more subtle once it’s dried. However, after the color is set, it stays there magnificently.
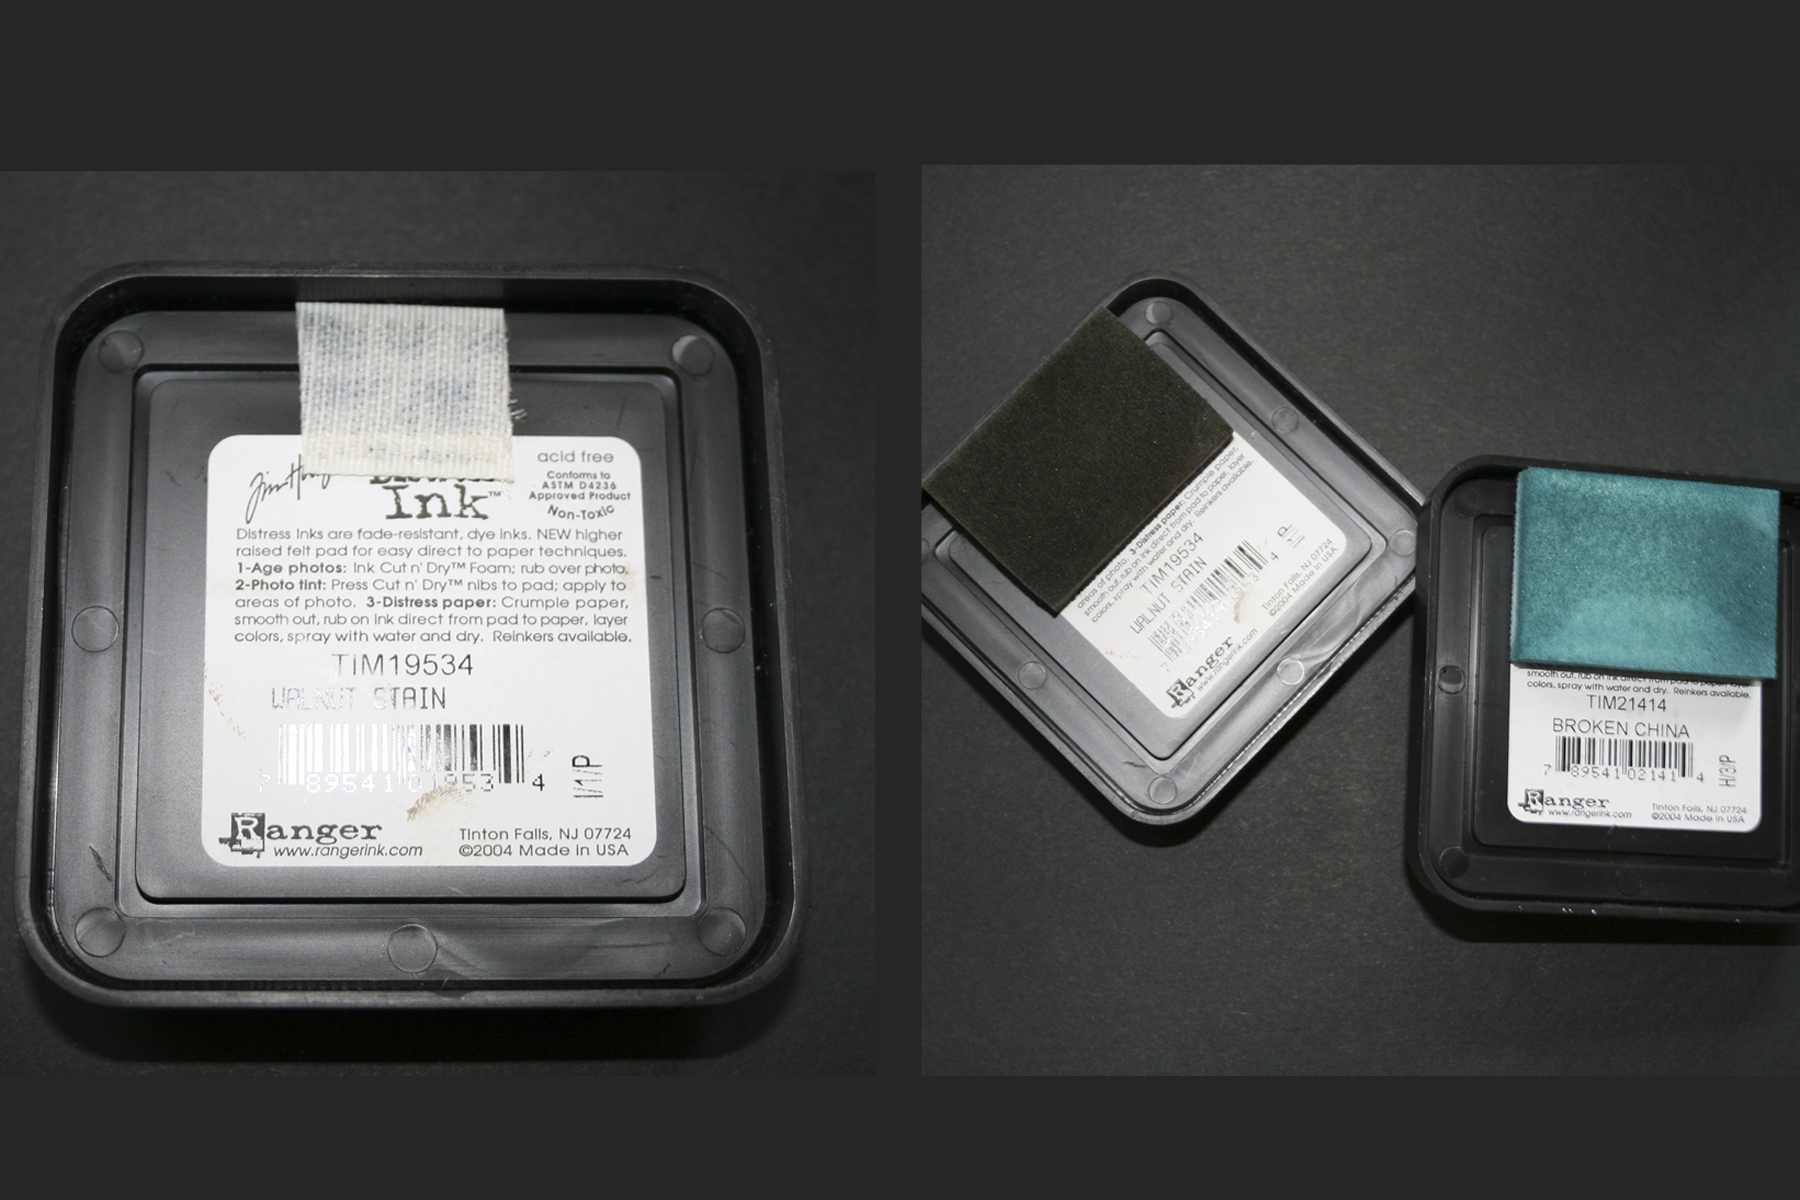
- Inexpensive. For their size, the ink pads are really inexpensive. The blending tool is also inexpensive if you have more than one ink pad, as the interchangeable applicators are coming in a pack of 10 (The basic handle comes with 2 applicators as well)!!!
Cons
- highly addictive. After you get a couple ink pads, you start developing an appetite and although these ink pads are inexpensive individually, the price does add up when you start a collection (and you need a different foam applicator for each color). I wish they had small queues, like Clearsnap’s colorbox chalk inks.
- Staining. Once you’ve got some distress ink on your fingers, it doesn’t come off. No matter how long you are going to wash it with soap and water… I’ve been trying to avoid contact, but it’s impossible. You have to touch the applicator in order to replace it… If you have any tips on that matter I’d love to hear them!
- Packaging. The ink pads are designed to stack together on top of each other, which is great, BUT the cap seems to have a will of its own and it magically opens all the time. It wouldn’t be such a big problem if the ink wasn’t that powerful (and staining => see above). A larger inking surface will be appreciated too, as this ink is PERFECT for background stamps.
Tips
- Foam applicators storage. Ranger does have a special Craft Spinner for storing the applicators. But it works only for the tool itself, and doesn’t answer the need to store the applicators themselves and it’s also a bit pricey.
I came up with a nifty idea that I want to share with you. Just cut a small Velcro piece with a self adhesive back and adhere it to the base of the ink pads. The applicator will stick on it and you can easily know what color ink the applicator is for. (Just make sure to store the ink pad upside down so it won’t stain your drawer or shelf and it will also keep your ink juicy).
- Ink application.
- For inking up the edges of your paper or cardstock, tilt your applicator in 45 degrees and gently pass it across the edge. The harder you press on the applicator, the thicker and less precise the inking will get – so instead of applying pressure on it, just repeat the application over and over until you get the desired result.
- For distressing the surface itself, hold your applicator straight down, start from the outside and go in with swirling motions.
- You can also cut the applicator to smaller pieces if you want to ink up smaller surfaces or ink with more control – this technique can also help if you want to add a tint to a black and white photo.
These are some cards I have made, using the distress inks:

Share
Have you ever used distress inks? If so, how did you find them?
I hope this review has been helpful for you, I’d love to hear your thoughts, so leave a comment on this post 🙂
Similar posts:


