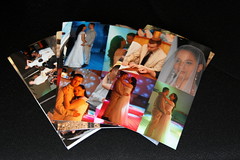
Getting married in the digital cameras era means you have thousands of photos from your special day. The photos are capturing all the highlights of the day together with all the people surrounding you. your wedding day brings all your loved ones – both friends and family – together and you end up with a large variety of pictures.
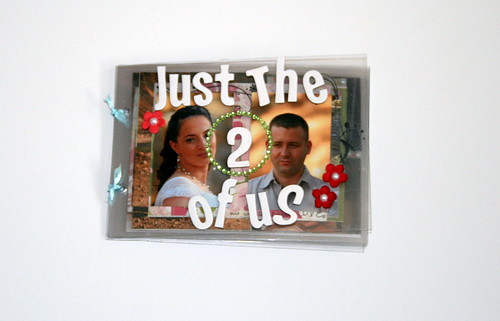
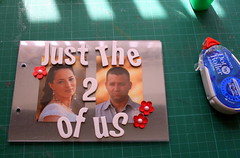
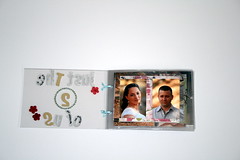
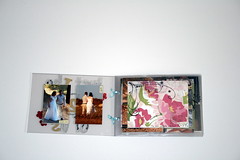
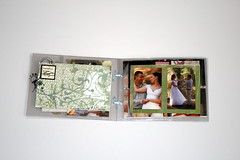
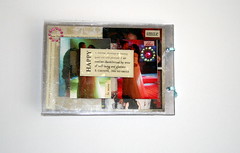
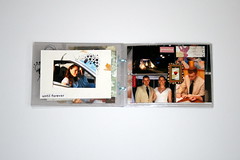
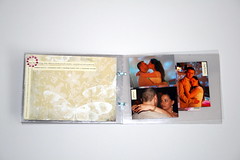
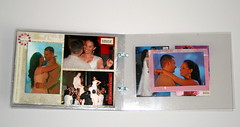
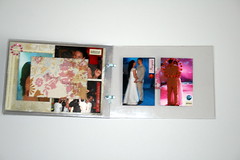
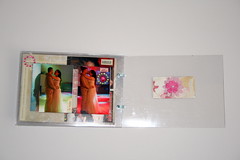
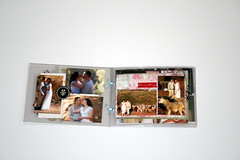
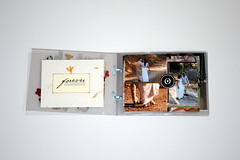
for this project I wanted to pick up pictures with just the two of us on them. Only my husband and I. The photos are featuring different aspects of our wedding day. The photo-shoot in the country, the traditional ceremony and the party itself. Concentrating on pictures with only us two, brings to the front all the emotions involved in getting married.
I have never used clear albums before and as this trend gets hotter and hotter I have had a strong urge to have my go with it. Mostly having my own way at something means I am trying to make it from scratch, to enhance my “ownership” on the project.
You don’t have to go that way. If you prefer to concentrate your efforts on the content rather than on the platform, there is a great variety of gorgeous ready-made clear albums. Just to name a few, look at clear albums from these merchants:
This week’s prompt is to make your own clear album. Here’s how I did it:
Supply-
- Clear acrylic sheets.
- Adhesive.
- Ribbon.
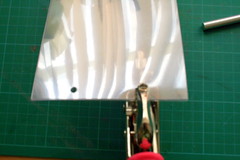
- Crop-a-dile.
- Mini glue dots.
- Basics – Cutting mat, ruler & Craft knife.
- optional – Paper trimmer
Embellishments –
- Paper flowers
- Love Elsie soft charms
- Rhinestones & pearls
- Heidy Grace rub-ons
- Basic Grey paper
- Thickers
- Word stickers – Making Memories (word-fetti, definition), 7 Gypsies (Journal stickers: Love)
Instructions –
- Start by choosing the photos and cropping them to size (mine are all 2″x3″). As we are dealing with a mini, go for photos with a common denominator you can showcase on that mini-album.
- Cut your acrylic sheets to the desired size. The great thing about making your own album is that you can choose whatever size you need and also use various different sizes on the same album. (mine are 5″x7″).
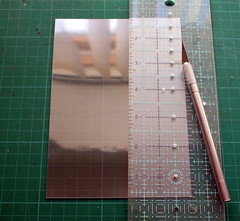
- With your trusty Crop-a-dile, punch two holes through all your clear pages on the side, approximately 1/8″ from the edge. If the height of your album is longer than 5 inches, you should consider punching 3 holes.
- Thread the ribbon through the holes you have punched and tie it in a secure knot. (I applied diamond glaze to the edges of the ribbon to avoid fraying). Your album is done. The key to a clear album layering is adhering all your photos and patterned papers back to back. Now have fun in building everything up and embellishing it to death 🙂

Tags: album, clear-album, creativity prompt, Tutorial


I just stumbled upon your blog and this beautiful project! I have also put off jumping into the clear album craze but you have inspired me to give it a try.
Thanks!
Thank you!!! I am so happy to hear that and would really love for you to share your results with me.
It’s beautiful… alas I’m not a very crafty type! 🙂