/** Font types */

Posts Tagged ‘album’

First Date Anniversary Mini Album

Tuesday, February 14th, 2012

Anniversary Album

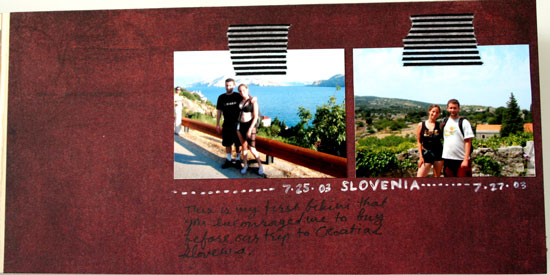
On February 22 (2012) my husband and I are going to celebrate 11 years of togetherness. We’ve been married 4½ years and have been having fun this entire time. Our love just gets bigger, stronger and deeper.

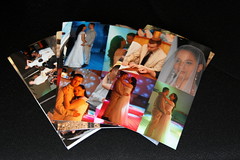
Beware, this is going to be a long and picture heavy post…

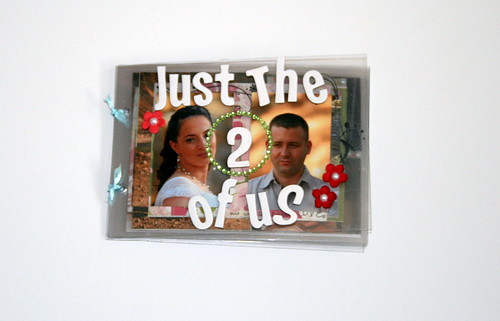
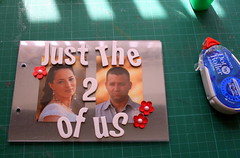
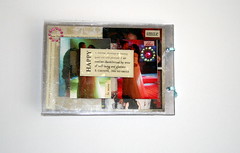
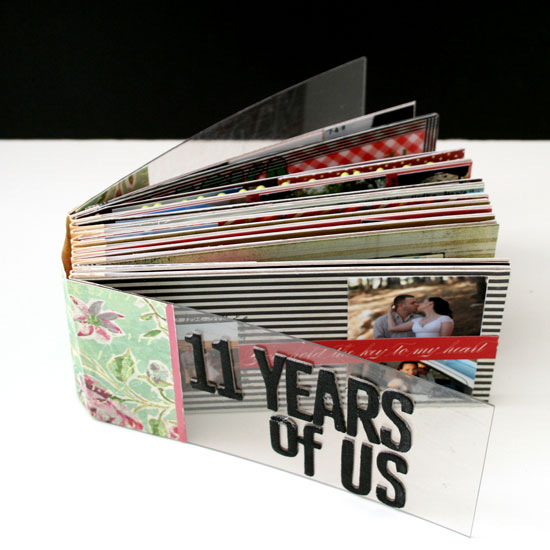
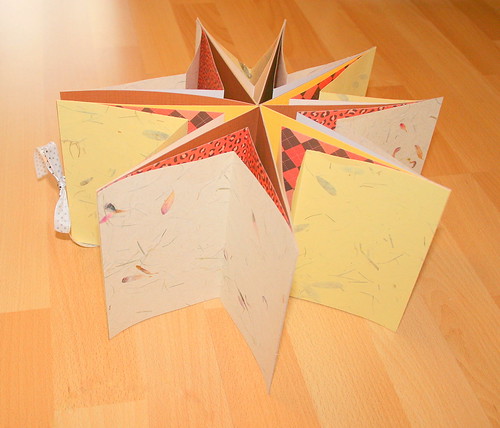
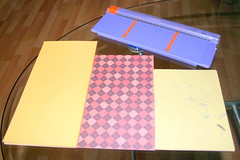
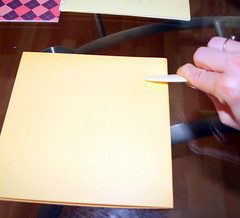
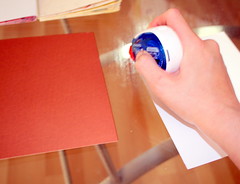
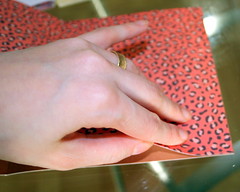
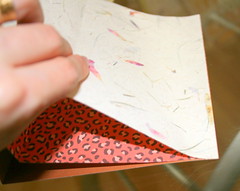
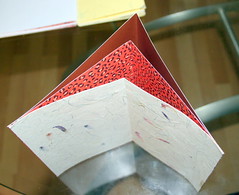
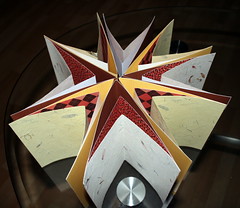
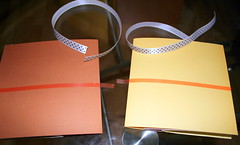
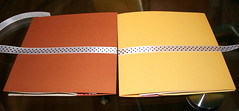
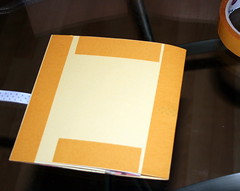
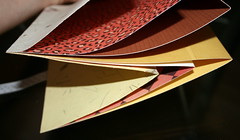
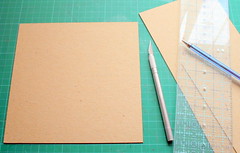
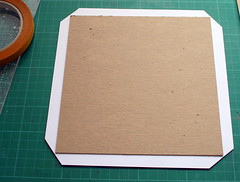
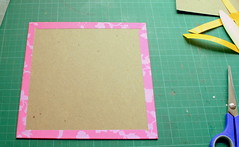
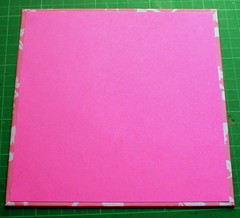
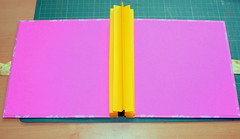
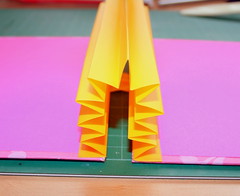
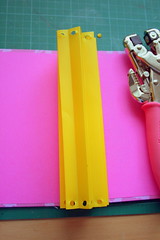
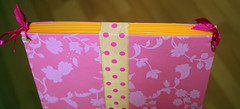
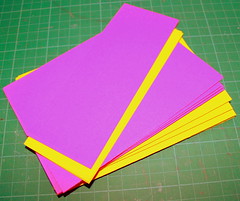
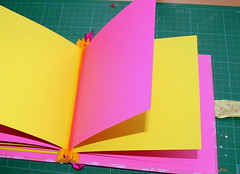
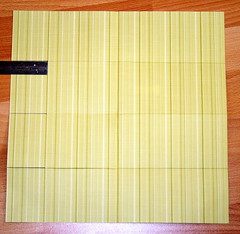
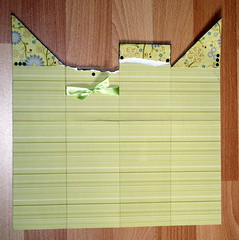
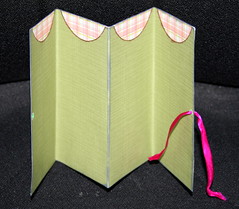
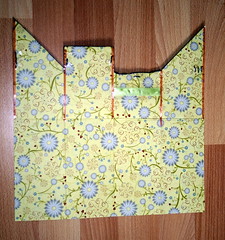
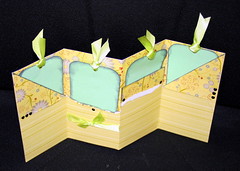
I made the mini board album from scratch. All I did was to take an 11″ by 3″ strip of cardstock and score it every ½”. Then I did an accordion fold on that piece and attached 3″ by 6″ pieces of chipboard to each fold (plus 2 pieces of hard plastic I purchased 3 years ago in Dublin, Ireland… that I added as cover.) To complete the look I wrapped a 3″ by 3″ piece of patterned paper around the spine. That is all…

Layouts and supply:

[As this is a personal project, in essence, I blurred a few details. Sorry.]

mini album layout

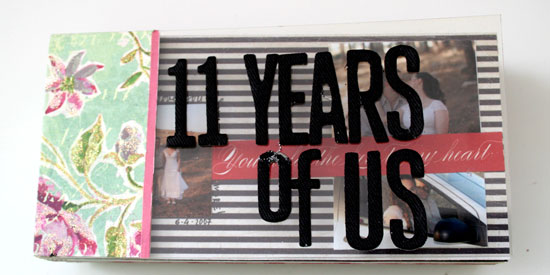
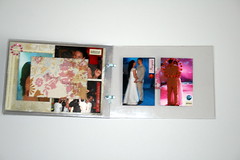
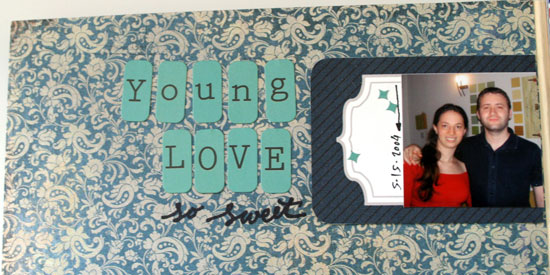
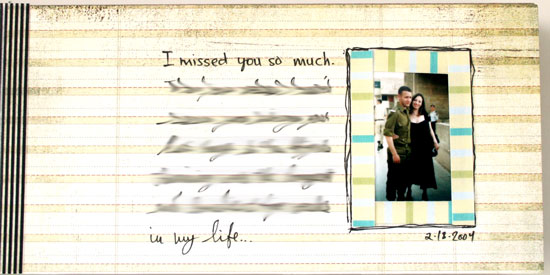
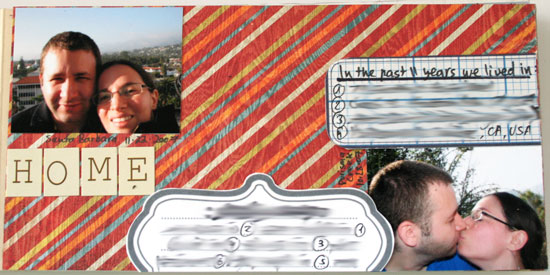
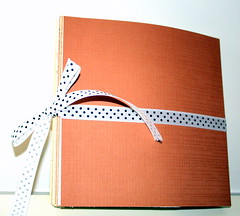
This is the cover page. I just used an old K&Company patterned paper (to wrap around the spine), an old Heidi Swapp paper tape and fabric Thickers.

mini album layout

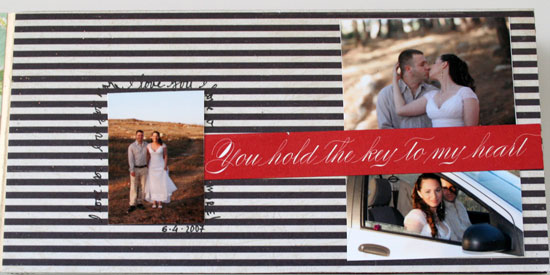
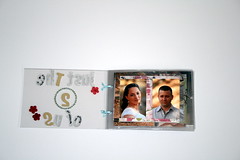
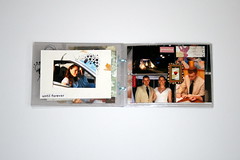
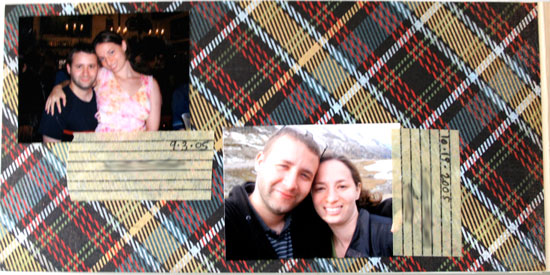
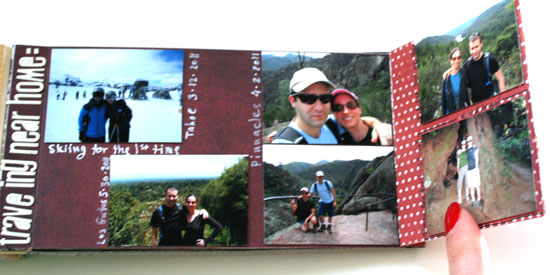
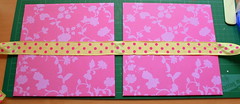
Here I used an old Anna Griffin paper tape (red) and Crate Paper patterned paper from the Portrait collection.

mini album layout

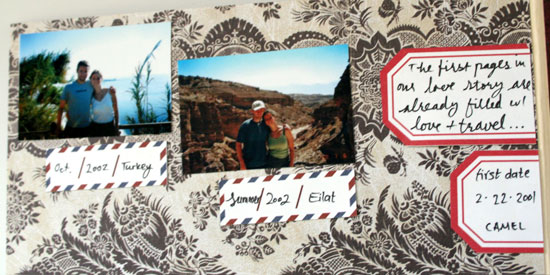
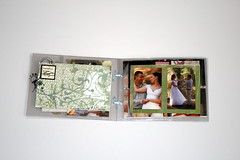
Here I used another Crate Paper’s Portrait patterned paper and my free printables which I used all through this album…

mini album layout

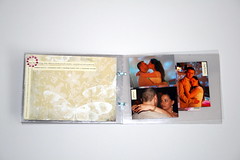
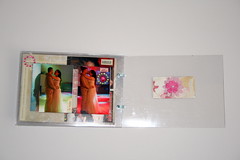
Here I used Basic Grey’s Oxford patterned paper and my new obsession- washi tape by Sweet Bella!!!

mini album layout

Here I also used Basic Grey’s Oxford patterned paper and another one of my free journaling spots and Prima’s tiny alpha letter stickers for the title.

mini album layout

mini album layout

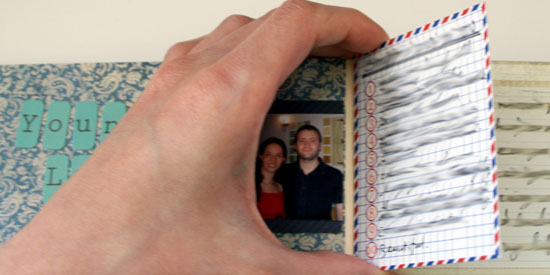
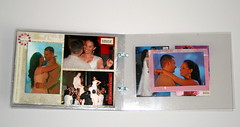
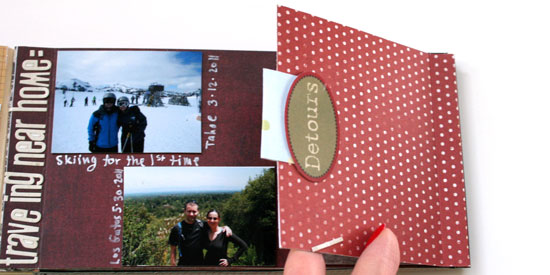
Here is another one of my journaling cards, used as a page. What happened is that I was “printer-happy” and had more photos than pages, so I fixed that with a few extra pages that I attached to the album with the fabulous washi tape. So simple and effective. I also adhered a piece of Crate Paper’s Emma Shoppe’s paper to cover the back of the journaling card.

mini album layout

Here you can see the “tail” of the washi tape I used to adhere the extra page in place and for the layout I used another one of Basic Grey’s Oxford patterned paper with a fabric tape, so old I don’t even know where is it from… I always love to mix up old and new supply. This is my way of using up my stash without missing out on the new-ish collections.

mini album layout

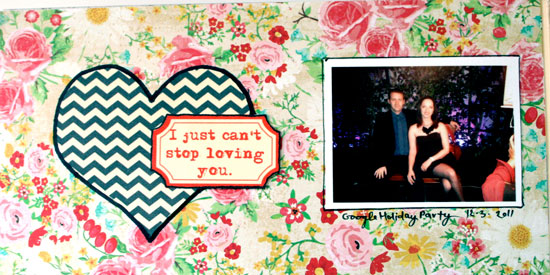
Here I used the beautiful Crate Paper’s Emma Shoppe’s paper and my own printable Valentine’s Card that you might recognize from yesterday…

mini album layout

Yet another one of the gorgeous papers from Crate Paper’s Emma Shoppe’s collection and some Lily Bee Design letter stickers. I love the size and font of these stickers but I’m not nuts about their quality.

mini album layout

My love story with Crate Paper’s Emma Shoppe does not end. I used here yet another paper from this collection as well as some of that ancient fabric tape and Jenni Bowlin letter stickers (these are good quality stickers!)

mini album layout

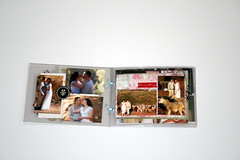
Here I used Crate Paper’s Neighborhood paper and you can see the rest of the title with the fabulous Jenni Bowlin letter stickers. This is a layout about my husband’s healthy sense of humor. To demonstrate that I collected a few screen prints of the hilarious things he writes when we chat. Such a great memory.

mini album layout

Here I used another Basic Grey’s Oxford paper as well as 7 gypsies washi-ish tape that I also like a lot. It’s great for journaling!

mini album layout

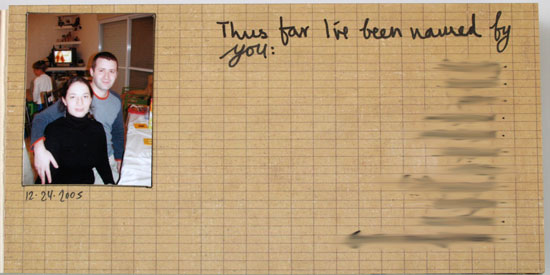
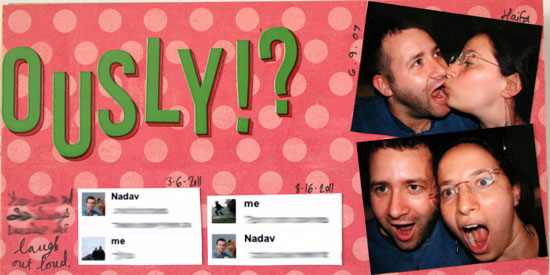
This paper is from Crate Paper’s Neighborhood collection, which is great for journaling. I used that to list my notorious nicknames that although I don’t like any of them, my husband keeps calling me by them. I blurred them for 2 reasons: 1. I don’t like them. 2. I use some of them as passwords 😉

mini album layout

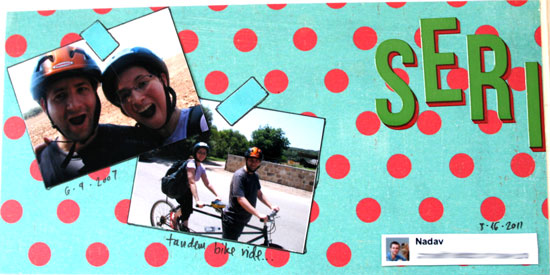
Here I used Basic Grey’s Life Of The Party paper as well as these Lily Bee letter stickers.

mini album layout

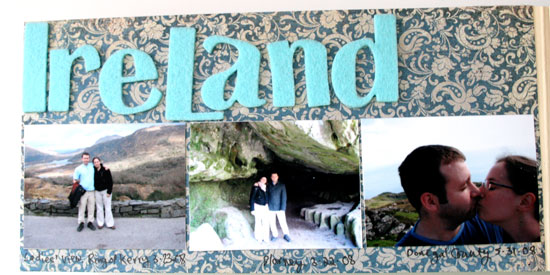
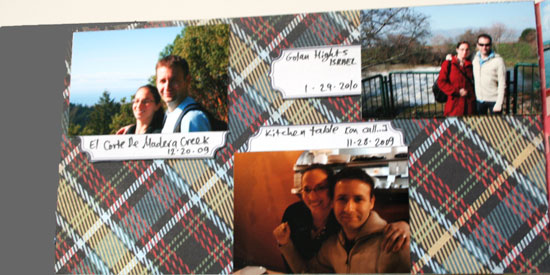
Here I used another paper from Basic Grey’s Life Of The Party collection and some more of these Prima letter stickers as well as two of my own printables. I blurred the journaling here because I listed all the addresses we’ve had during the last 11 years (quite a lot – in 3 different continents).

mini album layout

Here I used some old Making Memories fabric letter stickers and another paper from Basic Grey’s Oxford collection.

mini album layout

Here I used yet another paper from Basic Grey’s Oxford collection [it’s actually the other half of the page I used before…] and some of my freebie journaling spots and a strip of an a-d-o-r-a-b-l-e washi tape.

mini album layout

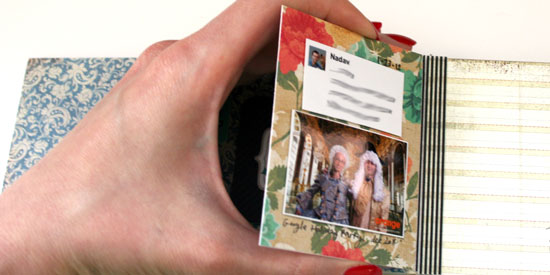
Here I used another paper from Crate Paper’s Emma’s Shoppe and some old American Crafts letter stickers [=> Remarks in Lax].

mini album layout

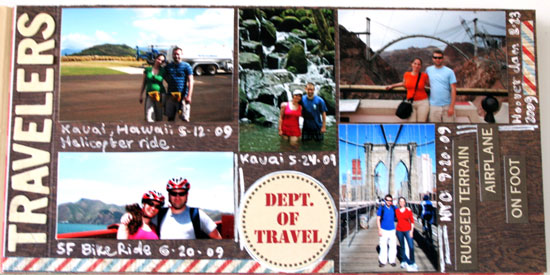
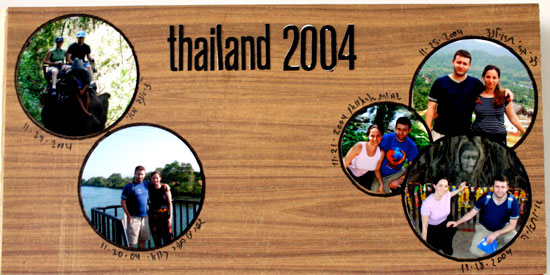
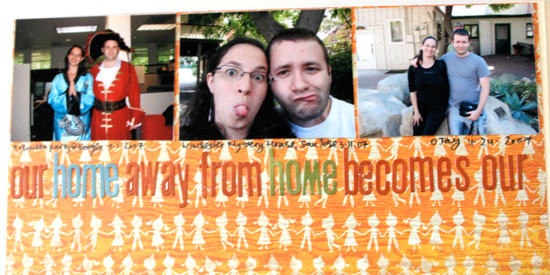
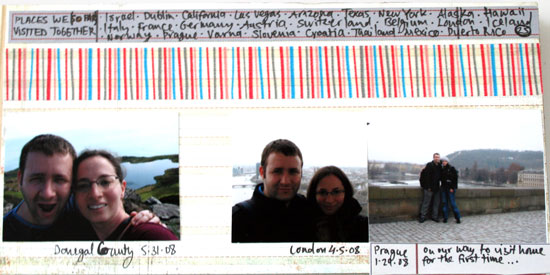
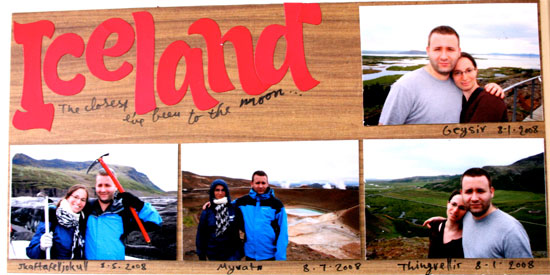
Here I used a woodgrain and striped paper from Basic Grey’s Life Of The Party collection and some Basic Grey’s micro letter stickers that are very hard to find at the moment. I also used some old 7 Gypsies word stickers to emphasizes our travels.

mini album layout

Here I used some more of my free journaling labels and paper from Basic Grey’s Oxford collection.

mini album layout

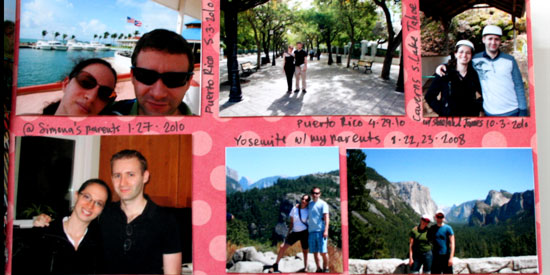
This one is easy. We travel way too much to get extra embellishments in… The background paper is again form Crate Paper’s Neighborhood collection.

mini album layout

Another easy one… The paper is again from Crate Paper’s Neighborhood collection and the letter stickers are by American Crafts.

mini album layout

mini album layout

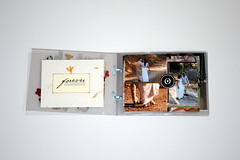
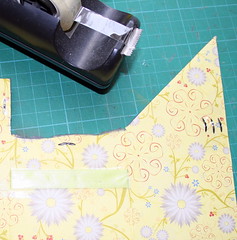
Here I added another page as a ‘flap’. To attach it I scored ½” at the end and applied adhesive to the scored part and adhered it to the end of the existing page. I added an old fabric tape to make an ‘handle’ for the flap. The papers I used are from Basic Grey’s Oxford collection and My Mind’s Eye’s Everyday Flair collection. The title was made with Lily Bee’s Harvest letter stickers [5 points if you spot the missing ‘l’].

mini album layout

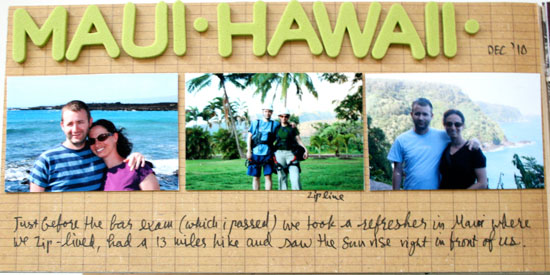
Here I used some more papers from Crate Paper’s Portrait collection and Emma’s Shoppe collection as well as some more of Lily bee’s Harvest letter stickers.

mini album layout

Here I used paper from My Mind’s Eye Everyday Flair collection as well as some more of Lily bee’s Harvest letter stickers and some more of Jenni Bowlin’s letter stickers. I also used some old chipboard photo corners and I also secured the page, after manipulating it too much, with some more of my beloved washi tape.

mini album layout

This is the back side of the page above, so you can see the ends of the washi tape. I also used some more of the old American Crafts Remarks letter stickers and the paper is again from Basic Grey’s The Life Of The Party collection (many woodgrain papers in there).

mini album layout

Here I used another paper from My Mind’s Eye Everyday Flair collection. This is a simple page. It’s mostly about the journaling, which you cannot see…

mini album layout

This is the last page of this album, but it represents our wish for many, many more years of love and togetherness. I used Cosmo Cricket’s chipboard letter stickers (that are on clearance…) and a piece of paper from My Mind’s Eye Everyday Flair collection (which is also on sale).

I hope you are not completely bored by now.
However, if you are still in focus, have you noticed that each and every photo is of the two of us together?

Thank you for stopping by!

Creativity Prompt #29 – Make A Star Album

Friday, December 12th, 2008

Star Album

The star album has a strong “WOW” factor as it opens, but it is actually very simple to make one. The secret is in the graduating width of the partitions. For a step by step instructions on how to make this album, keep on reading:

Supply

  • 4 sheets of 12″ by 12″ cardstock.
  • 8 sheets of 12″ by 12″ patterned paper (or 16 sheets of 8½” by 11″ pp).
  • Tape runner.
  • Double sided tape.
  • 2 pieces of ribbon, 12″ each.

Tools

  • Paper trimmer.
  • Bone folder.

Step by Step Instructions –

  1. Cut the star’s partitions, as follows:
    • 8 pieces of 6″ by 12″ cardstock (just cut your cardstock in half).
    • 8 pieces of 6″ by 10″ patterned paper.
    • 8 pieces of 6″ by 8″ patterned paper.

    Cutting the partitions of the album

  2. Fold each piece in half, along its long edge, and burnish well with a bone folder.
    folding the star's partitions>
You should end up with 24 pieces, all having the same height but graduating widths.
<img style=
  3. Apply adhesive to the 6″ edges of the patterned papers.
    Applying adhesive
    Then attach the partitions together –
    First, attach the 6″ by 10″ patterned paper to the 6″ by 12″ cardstock.
    Attaching paper to cardstock
    Then attach the 6″ by 8″ patterned paper to the 6″ by 10″ one.
    Attaching paper to paper
    You should end up with this shape –
    Individual star 'leg'
    Now repeat, until you’ve got 8 “legs” for building the star.
  4. After you finish adhering the star’s “legs” – assemble it on your desktop, to make sure everything works well together and to guide you through the next stages.
    Assembling the star's shape
  5. Pick 2 adjacent “legs” randomly (they are going to become the cover of your album) and apply a double sided tape strip along their midsection.
    Attaching the ribbon - step A
    Note that the adhesive’s strip is bulging out of the creased edge – this is done in order to tuck-in the edges of the ribbon for an elegant and more finished looking closure. Just wrap the access adhesive’s strip over the crease and attach the ribbon to it.
    Attaching the ribbon, step b
  6. Next, pick one of the outer “legs” and start attaching each 6″ by 6″ partition to the adjacent one.
    Applying glue to the star's partitions - part aApplying glue to the star's partitions - part b
    This is when assembling the star’s shape in advance is going to come in handy.
  7. Repeat the last stage, until you finish attaching all the star’s partitions to each other. Make sure not to attach the partitions with the ribbon to each other…

A glimpse at the star album while it’s closed:

Star album when closed

Enjoy!!!

If you have any question, suggestion or remark – don’t hesitate to contact me – either leave a comment, use the contact form or start a new thread on the Creativity Prompt Flickr Group!!!

I would also be very happy to see your own star-album creations, so don’t be shy and share 🙂

Creativity Prompt #21 – Making An Accordion Spine Album

Friday, October 17th, 2008

Accordion Spine Album

I love making my own albums and journals. Many times I use recycled materials along with some yummy patterned paper. If you are new to Creativity Prompt, you are welcome to have a look at the different album and journal tutorials I have posted so far:

Album Tutorials –

  1. Circular mini album.
  2. Guided album.
  3. Recycled mini album.
  4. Mini acrylic album.
  5. Circular Pocket album.
  6. Mini chipboard album.

Journal Tutorials –

  1. Hardbound journal. This journal acts as a base for any hardbound album or journal that I am doing.
  2. Matchbox journal.
  3. Tiny hardbound journal.

Now lets get to business and make an accordion spine album – just another fun way of keeping your heartfelt memories.

Materials & Tools –

How To –

  1. First cut the cover of the album out of your chipboard. You will need to cut 2 pieces, 7″ by 7″ each.

    Cutting the cover

  2. Next you need to cover each of the chipboard pieces with patterned paper.
    • Cut the patterned paper at 8.5″ by 8.5″.
    • Adhere the chipboard piece to the middle of the patterned paper with your glue stick.
    • Cut the corners of the patterned paper up to 1/8″ of the chipboard corners.
      Cutting the corners of the patterned paper
    • Adhere the edges of the patterned paper to the chipboard (you can use either the glue stick or a double sided tape). For crisp lines, use a bone folder and work each time with the flaps on the opposite sides.
      Covering the chipboard
  3. To finish up the cover’s look, adhere a 6¾” by 6¾” piece of cardstock on each of the chipboard pieces.
    Covering the inner side of the chipboard cover
  4. Now it’s time to add on the ribbon. Position your chipboard covers one next to another with a gap (1″) between them. Put a strip of very strong double sided tape along the midsection of each chipboard piece and adhere the ribbon to it. Keep enough excess of the ribbon on each side for tying it nicely in a bow. Learning from my on experience, I suggest not to use a wire rimmed ribbon.
    Adhering the ribbon
  5. For the spine you need a 10½” by 7″ piece of cardstock. Score it along the 10½” side at every ½”.

    Scoring the spine

  6. Next you need to fold the cardstock on each score line in an accordion style – one fold up and one down. It is important to burnish each fold thoroughly with the bone folder. When you finish up folding the entire strip of cardstock, secure the spine with paper clips. If you have the time – let it rest like that for at least a day or so.

    Folding the spine

  7. Adhere the spine to the chipboard cover, in a way that creates a mountain fold between the cover and the spine and the other cover (which means the score line is turning outwards). I used a double sided tape for adhering the spine.

    Adhering the spine to the cover
    Closer look at the adhered spine

  8. To control the accordion spine, which tends to get a bit unruly… use your crop-a-dile to punch a hole all the way through it, both at the top and at the bottom of the spine.
    Make sure that you leave enough room for the album’s inserts to fit inside.
    It’s hard for the regular crop-a-dile to go through the spine and the two chipboard covers. So either use a craft drill (don’t forget to protect your cutting mat, when using the craft drill) or punch the spine and secure it with a ribbon before adhering the spine to the cover (that means doing steps 8-9 before step 7).
    Punching holes to secure the spine
  9. Secure the spine by threading a ribbon or a strong thread through the holes and tying it in a knot on each side.

    securing the spine

  10. Cut all your inserts from cardstock at 6¾” by 6¾” (and keep the leftovers for fast card making 🙂 ). I have used 9 inserts in two different colors – you can use as many colors as you wish or make it monochromatic.

    Cutting inserts

  11. Attach each insert to the spine by lining its edge with double sided tape and adhering it to the inside fold.

    Adhering the inserts to the spine

Share –

I really hope you’ve enjoyed this tutorial (along with all the others) and that the instructions are clear enough for you to go right into making your own mini album. If not, please feel free to ask any question by leaving a comment.

Please share your creation with us by posting a link as a comment here or by adding a picture to the Creativity Prompt Flickr Group.

Enjoy!!!

Creativity Prompt #17 – Tag Book

Friday, September 19th, 2008

Tag Book

For this week’s creativity prompt I have a quick and easy project for you. All you need are 3 sheets of 12″ by 12″ cardstock (OK, and some double sided tape).

With such an easy and low maintenance project I am sure every single one of you can make this beautiful tag book, along with the cute little matching box. This makes a great keepsake for yourself or a thoughtful, yet very affordable, present for a loved one.

So, lets get to work:

Supply-


Tools (optional) –

Instructions –

Tag Book

  1. Score one side of the cardstock every 3 inches and the other side at 6 inches.
    Scoring
  2. Cut 3″ down each 3″ score line on one side.
    cutting
  3. Fold and embellish the 4 flaps of the cardstock anyway you wish. You can get some ideas from this picture:
    creating embellished folds
    Here is another way of creating the pockets for the tags. You can create that with a circle punch:
    alternative pockets.
  4. Optional – Apply short strips of packing tape to seal the tips of the brads and the ribbon on the inside of the pockets to prevent the tags from getting stuck inside.
    Sealing
  5. Apply double sided tape to the seam of each fold line, as well as to the edges of the cardstock. Then fold along the 6″ line and adhere the two sides together. As an alternative, you can run all these lines through the sewing machine, and create the pockets after folding along the 6″ line.
    Adhering the pockets
  6. For the tags, cut 4 pieces of cardstock at: 2 5/8″ by 5½”
    Cutting tags
  7. You can embellish the tags with an ink pad, a corner rounder and some ribbon – and your tag book is ready!!!
    tag book

Cardstock Box

The box tutorial video is given as a courtesy of Jennifer Muraoka. Jennifer is an extremely talented artist and I enjoy following her creations both on her blog: “Kiyomi Krafts” and on her You-Tube channel. Apart from her wonderful creations, she also conveys her great personality through her tutorials and blog posts.

Share

Share your tag book creations on the Creativity Prompt Flickr group or by leaving a comment on this post with a link to your creation. You are also welcome to share your thoughts about this tag book and to suggest ideas on what to use it for. Your comments are always adding so much value to the prompts, so keep on commenting 🙂

Reblog this post [with Zemanta]

Creativity Prompt #12 – Make Your Own Mini Clear Album From Scratch

Friday, July 25th, 2008

Getting married in the digital cameras era means you have thousands of photos from your special day. The photos are capturing all the highlights of the day together with all the people surrounding you. your wedding day brings all your loved ones – both friends and family – together and you end up with a large variety of pictures.

for this project I wanted to pick up pictures with just the two of us on them. Only my husband and I.  The photos are featuring different aspects of our wedding day. The photo-shoot in the country, the traditional ceremony and the party itself. Concentrating on pictures with only us two, brings to the front all the emotions involved in getting married.

I have never used clear albums before and as this trend gets hotter and hotter I have had a strong urge to have my go with it. Mostly having my own way at something means I am trying to make it from scratch, to enhance my “ownership” on the project.

You don’t have to go that way. If you prefer to concentrate your efforts on the content rather than on the platform, there is a great variety of gorgeous ready-made clear albums. Just to name a few, look at clear albums from these merchants:

This week’s prompt is to make your own clear album. Here’s how I did it:

Supply-

Embellishments –

Instructions –

  1. Start by choosing the photos and cropping them to size (mine are all 2″x3″). As we are dealing with a mini, go for photos with a common denominator you can showcase on that mini-album.
  2. Cut your acrylic sheets to the desired size. The great thing about making your own album is that you can choose whatever size you need and also use various different sizes on the same album. (mine are 5″x7″).
  3. With your trusty Crop-a-dile, punch two holes through all your clear pages on the side, approximately 1/8″ from the edge. If the height of your album is longer than 5 inches, you should consider punching 3 holes.
  4. Thread the ribbon through the holes you have punched and tie it in a secure knot. (I applied diamond glaze to the edges of the ribbon to avoid fraying). Your album is done. The key to a clear album layering is adhering all your photos and patterned papers back to back. Now have fun in building everything up and embellishing it to death 🙂

My finished mini-album: