
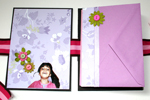
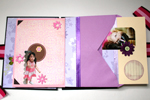
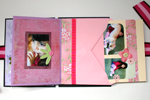
This week’s project is also quick and easy to put together. You decide how much time you want to spend embellishing each page later on…
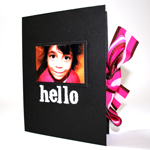
All you need is a bunch of envelopes, 2 pieces of chipboard and a long piece of ribbon. Pretty straightforward.
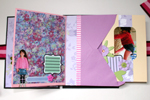
You can take your time and decorate each page individually, or just adhere a photo on the back of each envelope and insert your journaling in each corresponding envelope. The sky is the limit for you.
Tools & Supply
- Paper trimmer (mine can cut through chipboard)
- Scissors
- Chipboard
- Ribbon
- Envelopes (each brand/ size/ style will do)
- cardstock
- Strong double sided tape
- packaging tape
How To
Watch on You Tube
[Music by Kevin MacLeod with permission]
Step By Step Instructions
- Cut 2 pieces of chipboard – ½” taller and wider than your envelopes.
- Stick a strong double sided tape at the center of each chipboard piece. You can use the markings of your cutting mat for easy alignment.
- Adhere your ribbon to both pieces of chipboard, while leaving a ½” gap between them.
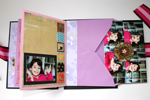
- Adhere each envelope to the next at the base with plain packaging/wrapping tape. Make sure you keep the orientation of the envelopes.
- Cut the excess tape off the sides of the envelopes stack.
- Adhere the envelopes stack to the chipboard with some more strong double sided tape.
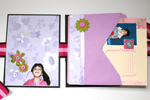
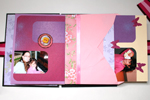
- Cut the envelope inserts out of cardstock. Make them ½” shorter and narrower than your envelopes.
- Insert a piece of cardstock into each envelope.
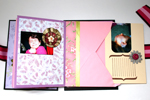
- Embellish and… Voilà !
Share
If you have any question, suggestion or remark – don’t hesitate to contact me – either leave a comment here, use the contact form or start a new thread on the Creativity Prompt Flickr Group!!!
I would also be very happy to see your own creations, so don’t be shy and share 🙂
Tags: chipboard, creativity, creativity prompt, envelope, envelopes, mini-album, Tutorial, Video, Video Tutorial


This is SO cute! I love the envelopes. I’ll be linking.
Thanks, Rachel. This is also very easy to make.
Cute album! What kind of “strong double sided tape” did you use? I don’t think I’ve ever seen some that wide on a roll like that.
I used an OLD tape I bought at Office Depot way back. I wouldn’t recommend getting it as I really struggle in peeling off the backing paper.
It’s 1/2″ wide and I linked to a Martha Stewart tape with the same width (look at the supply list above). Provo craft also make a great double sided tape (with a plastic backing that peels off very easily). It’s called: “Terrifically Tacky Tape” and it comes in various widths including 1/2″.
I love this project! I’m just trying to figure out how to do it though, and i can’t view the video. I don’t really understand how you attach the envelopes to each other without the tape showing…
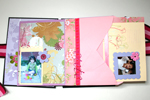
Thanks. You may follow the written instructions here if you can’t watch You Tube videos. The tape is showing after the first stage and later disguised by the patterned paper you adhere on top.
Ohhh…. Thanks!! Yeah, your written instructions explain the process well, it was just that one point… Thanks!
[…] Mini Album @ Creative Prompt […]