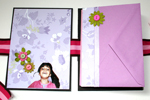
This week’s project is also quick and easy to put together. You decide how much time you want to spend embellishing each page later on…
All you need is a bunch of envelopes, 2 pieces of chipboard and a long piece of ribbon. Pretty straightforward.
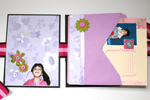
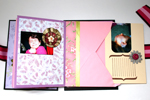
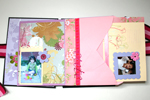
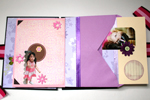
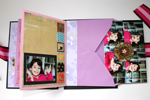
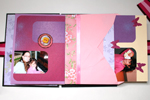
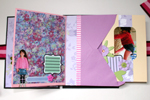
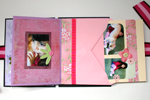
You can take your time and decorate each page individually, or just adhere a photo on the back of each envelope and insert your journaling in each corresponding envelope. The sky is the limit for you.
Cut 2 pieces of chipboard – ½” taller and wider than your envelopes.
Stick a strong double sided tape at the center of each chipboard piece. You can use the markings of your cutting mat for easy alignment.
Adhere your ribbon to both pieces of chipboard, while leaving a ½” gap between them.
Adhere each envelope to the next at the base with plain packaging/wrapping tape. Make sure you keep the orientation of the envelopes.
Cut the excess tape off the sides of the envelopes stack.
Adhere the envelopes stack to the chipboard with some more strong double sided tape.
Cut the envelope inserts out of cardstock. Make them ½” shorter and narrower than your envelopes.
Insert a piece of cardstock into each envelope.
Embellish and… Voilà !
Share
If you have any question, suggestion or remark – don’t hesitate to contact me – either leave a comment here, use the contact form or start a new thread on the Creativity Prompt Flickr Group!!!
I would also be very happy to see your own creations, so don’t be shy and share 🙂
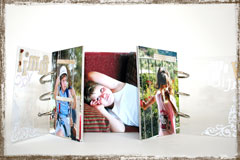
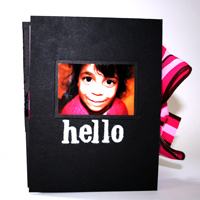
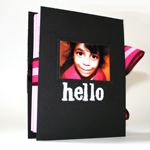
How would you like to put together a beautiful mini album – from start to finish – in about an hour?
Sounds good, doesn’t it?
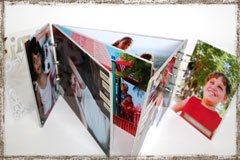
You know what, let me throw in a special feature that will turn your mini album from a beautiful albeit simple board-book into an intricate gate-album that is guaranteed to extract some “oohs and ahs” [I am pretty sure it’s a technical term. Please correct me if I’m wrong].
Are you interested? Yes? Then keep reading.
Oh, wait. Have I mentioned there’s a video tutorial included in the package?
Tools and Supply
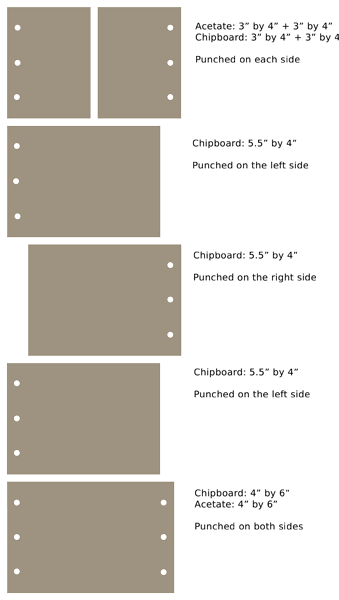
2 Heavy-weight acetate or acrylic sheets – 4″ by 6″ each.
5 pieces of heavy-weight chipboard (about an 1/8″ thick) – 4″ by 6″ each
[Music with permission is by Josh Woodward from his album “Here Today”]
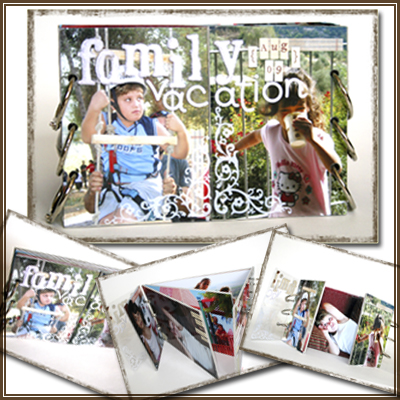
Step By Step Instructions
Cut all your acetate and chipboard pieces to size and arrange them according to the following chart:
The top and bottom acetate (or acrylic) pieces protect your photos. You may leave those pieces out if you wish.
Mark a 1/4″ line – lengthwise – on the respective edges and mark 3 dots on that line – 1 dot in the center and 2 other dots 1″ above and below the center one. Punch these marks with a Crop-A-Dile.
After you have punched 3 holes on each side on one piece, you may use it to mark the holes on the other pieces and punch them accordingly.
Adhere each photo to the chipboard with a generous application of glue stick. Start with one side, use a brayer to insure strong adhesion, and re-punch the holes before moving on to adhering the photo to the backside.
You may replace each photo with a 4″ by 6″ sheet of patterned paper or cardstock – whatever works best for your needs.
If the photo is bigger than the chipboard piece, trim the excess with a sharp craft knife.
Double check the orientation of each photo, before you adhere it.
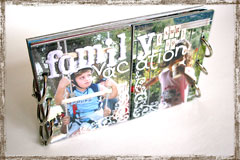
Assemble all your layers, following the chart above, and attach together with binding rings.
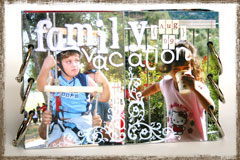
Embellish!
Share
If you have any question, suggestion or remark – don’t hesitate to contact me – either leave a comment here, use the contact form or start a new thread on the Creativity Prompt Flickr Group!!!
I would also be very happy to see your own creations, so don’t be shy and share 🙂
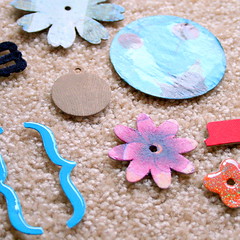
This is post is the second in the series of Embellishing Embellishments. A couple weeks ago I suggested ways of embellishing paper flowers and this week we are going to embellish raw chipboard shapes.
Chipboard is a great way to add some dimension to your project, without adding too much bulk. Chipboard is basically a bunch of layers of paper, pressed firmly together, therefore it provides a slight raise, when adhered on regular cardstock or paper.
Saying that, chipboard, in its raw state, is rather… well… ugly. Many companies provide covered chipboard shapes but the price tag can rise up and you never get EXACTLY the color, texture, finish you want on your project.
There are many companies offering raw chipboard shapes. Usually the price does play a role in telling the quality of the chipboard. For the sake of this tutorial I was using Colorbok’s chipboard shapes, they retail for 1$ but they are very thin and the layers are easily separated (especially in techniques that requires gel medium). I do recommend Maya Road’s chipboard. It has high quality yet isn’t very expensive.
The techniques I am showing on this week’s video are:
Each technique requires different tools and supply, and you may not want to experiment with all of the techniques, so I will list a separate supply and tools list for each technique below. I will also post a small picture of the chipboard, after the technique had been applied on it. You can click on each photo for a larger view.
Apply crackle paint to chipboard with the brush that comes with it. If you want, you can dilute the paint with a drop of water. Avoid bumps and clumps, but don’t apply it too thinly.
Let dry completely.
For an “epoxy” look, cover in Diamond Glaze and let dry for a few hours.
Apply gel medium to chipboard (you can put a base coat of ink before, if you want the final result to be tinted).
Separate the top layer of the napkin and lay it on the chipboard – right side up.
Apply a second coat of gel medium on top of napkin.
Wait until it dries completely. I was impatient and it made everything more complicated than it should be, So LET IT DRY!!!
Cut around the chipboard shape with micro-tip scissors. (you can poke them in any hole or cavity of the shape).
Apply a thin layer of gel medium to the edges of the shape. It will straighten all stray pieces of napkin as well as prevent the chipboard from separating.
Apply gel medium to the chipboard and lay the printed transparency over it, inked side down.
Apply pressure to the transparency with a brayer and rub the image off with a bone folder.
Gently peel off the transparency and make sure the top layer of the chipboard isn’t stuck to the transparency. If it is stuck, peel it gently with the tip of your craft knife’s blade and adhere it back on with some more gel medium.
Apply another coat of gel medium on top – but make sure it is completely dry first.
Share –
If you have any question, suggestion or remark – don’t hesitate to contact me – either leave a comment here, use the contact form or start a new thread on the Creativity Prompt Flickr Group!!!
Can you think of other ways to embellish chipboard? Which technique is your favorite? Which technique have you used before? Share your thoughts by leaving a comment on this post.
I would also be very happy to see your own creations, so don’t be shy and share a link 🙂

 How would you like to put together a beautiful mini album – from start to finish – in about an hour?