/** Font types */

Posts Tagged ‘creativity’

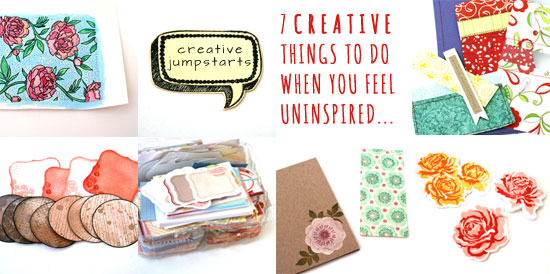
Creative Jumpstarts || 7 Creative Things To Do When You Feel Uninspired

Wednesday, August 29th, 2012

Seven Creative Jumpstarts

If you like it

I often find myself wanting to do something creative but feeling a bit uninspired, as if I’ve lost my creative mojo. I know I want to experiment with new products or to try new techniques but I can’t think of a solid idea for a specific project.

On these occasions I try to make mini, one-step projects that are still creative but do not require any pre-planning.

Many times these itsy bitsy pieces spark my creative spirit and bring back my mojo. On other times, I still have something I can use later on, when I have a solid idea but less time…

Here are some of the stuff I do:
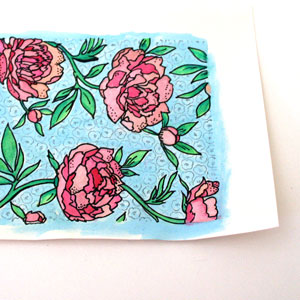
Watercolor Stamped BackgroundsWatercolor stamped backgrounds.
I love the watercolor look that seems to appear everywhere on the creative-web-sphere. The thing is that watercoloring takes time, even for the most basic applications (such as mine). For one thing, post cleanup is required. Plus you have to get water and blotting paper and special watercolor paper…

Do you see my point?

Therefore, I find these inspiration-twilight-zones perfect for a mini watercolor project. Simply stamp a background stamp with a water-resistant ink (such as Stazon) on watercolor paper and color away. Later you can use it as an element on a page or a card. Add some black details with a broad-tip pen for a bolder look.
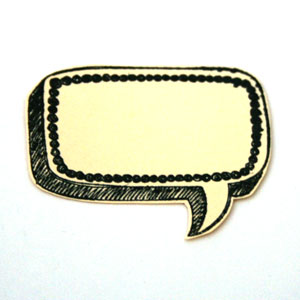

Stamp and cut.Stamp and cut.
This one is a spin on watercoloring a stamped piece, for times you don’t feel motivated to break out the watercolors, water, brushes, etc.

For that mini micro project you only need one ink pad, some cute, easy-to-cut stamps and any paper.

When I shop for new stamps I always think of images I can stamp, cut and stow for later use… When the time comes to make an actual card, scrapbook layout, mini album or even to wrap up a gift – you would LOVE to have that stash of pre-cut images to use in a snap.

After all, by the time you get really inspired, you want to use your precious time for designing cool stuff, not on technicalities, right!?
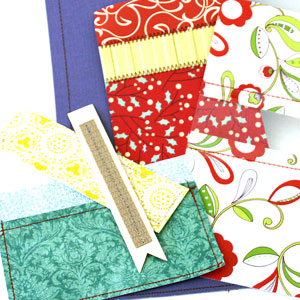

Sew random paper stripsSew random paper strips.
This creative jumpstart performs a double duty: (1) It’s easy and does not require ANY pre-planning; (b) It’s an AWESOME way to use your scraps and if you are anything like me, you have a ton of them.

I am not very good with the sewing machine (= that’s the understatement of the year). That humble stack of randomly sewn pieces is the combined effort of several mini-sewing-sessions, with months apart… Having said that, I really love the machine-stitched look. I think that it adds a new dimension and texture to any project, not to mention a more finished look.

The great thing about machine stitched elements is that you can’t tell when they were carefully sewn on the project or added later as an afterthought… Which is why I think it’s so great to simply stitch random pieces of paper together. The time will come when those sewn panels and pockets and strips will perform their duty, honorably, on a future project.
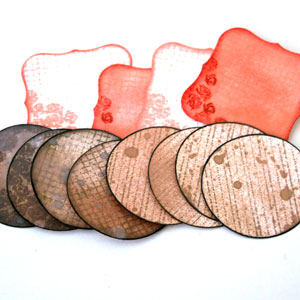
Make your own journaling spots.Make your own journaling spots.
This is another great example of something small that you can do that gives you an opportunity to experiment with different techniques and stamps and can be very useful in the future.

Either punch or die-cut your journaling spots in advance or stamp them first and cut around the stamp image. Then simply play with them => Add distress inks and stains, mist them, stamp on them, doodle, use letter and word stickers on them.

Just have fun and experiment and get as messy or as tidy as you want.

Finally, store them with the rest of your stash for later use.
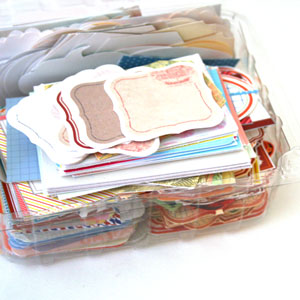

Cut pre-made journaling spots.Cut pre-made journaling spots.
OR you can simply print one of my MANY free printable journaling spots, cut them and stash them in an old strawberries container, just like I do… [see picture on the left]

You may also use cuter and more tightly closed containers, if you so wish.

I’m not sure I should say so myself…, but they are so useful. I almost always use a piece on every scrapbooking project I make.

Having these ready-to-go pieces is making it much easier to use them. I don’t think I would ever start searching my file folders for a specific journaling labels set, then printing it and cutting it – all just for a specific journaling spot on a specific page of a specific project. I don’t think so.
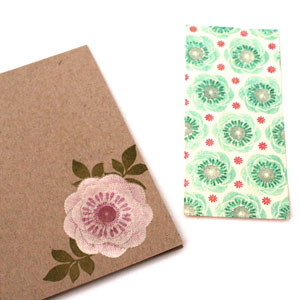
Pre-stamp cards.Pre-stamp cards.
I am notorious for buying stamps just because they look cute. I admit it. I used to get them and not be exactly sure what to do with them. Oops.

That was before I decided to simply use them. Duh. I just stamp them on plain card-bases and set it aside until my creative mojo strikes or until I need a quick card and have no time to make it. Whichever comes first. Guess what comes first more often…

Sometimes I just add the cute image to the card base (as you can see on the right) and sometimes I stamp on a 5½” panel that I can add to a card later (as you can see on the left), with or without foam adhesive. Sometimes I also add Stickles, because I’m feeling extra sassy…, but shhh, please don’t tell.

It was very smart of me to use a limited edition stamp set that isn’t available anymore…
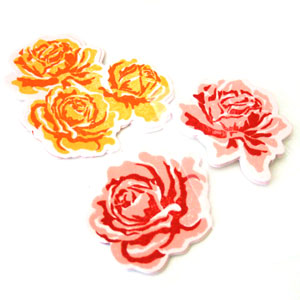
Die cut and stamp.Die cut and stamp.
To finish up, I have another spin on the stamp-and-cut suggestion. Wait for it… it’s a die-cut-and-stamp suggestion. Did I tell you how ‘smart’ I am feeling today? Oh, I just did. Okay.

Many brands offer combinations of stamp sets with matching dies. These are perfect for creating mini professionally-looking embellishments that you can use in so many different ways and on so many different projects. You only need a one-time investment in the dies and stamps set and that’s it. Each additional die-cut embellishment you create is practically free.

Make as many as you need, at any color combination you love at the moment or that suits your stash of paper/cardstock/printed photos…

Share

Do you have other suggestions for creative jumpstarts that need no pre-planning, just some free creative time? If you do, please share in the comments section below!
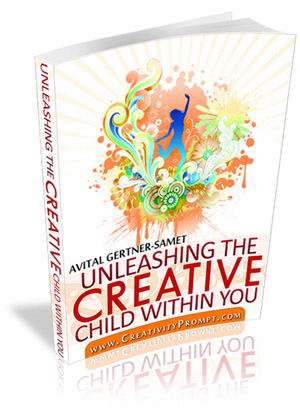
Unleashing The Creative Child Within You
Back when we were kids creativity came naturally to us. Everything was possible and our prolific imagination was the only limit we knew.
Through the years we have grown apart from our inner creative child and along with that – have lost our pristine and utter joy of creation.

In this e-book I will pave your way back to your inner creative child, brick by brick.

“Unleashing The Creative Child Within You” will explain why you became distant from your core creativity and will reveal the secret to getting it back.

With exercises designed specifically to help you find the inner child within you, regain its confidence and unleash it – you are bound to get your mojo back faster than you think.

Get “Unleashing The Creative Child Within You” for your Kindle
for only $4.99.

You can read the Kindle book on Kindle devices, on your smart phones or on your PC or MAC.

Unleashing The Creative Child Within You

Monday, July 2nd, 2012

Creativity Prompt's BookPlease allow me to introduce or perhaps reintroduce my book: “Unleashing The Creative Child Within You”.

This book contains the secret key to unlock your creativity.

  • Have you lost touch with your creativity?
  • Do you regret not finishing your scrapbook layouts or other crafty projects?
  • Do you miss the simple and utter joy of creation that you once knew as a child?
  • Would you welcome a way to get it back? And with it, the passion, purpose and fulfillment that’s been missing from your life?
  • If any of these questions make you stop and think… then this is the perfect book for you.

    Wouldn’t it feel wonderful to experience that sense of creative freedom again? And to feel it on a regular basis?

    Creativity is available to anyone, no matter who they are or what they do. Because that spark of creativity you knew as a child continues to smolder within you, awaiting your summons. In other words, that creative child within you still wants to come out and play…

    In this e-book you will discover…

    • A simple formula to increase YOUR creativity, rather than mold and shape your creativity to the standards of others…
    • How to recognize and get rid of the creativity blocks in your life.
    • How to think outside the box and discover the joy of making your own creative way in the world.
    • A process to regain the creative enthusiasm you had as a child.
    • Carefully designed exercises to help you reinvigorate your creativity and recognize the joy and reward that comes from creative expression.
    • How you can live your life in a more creative way.
    • The one technique to stop listening to the marketing prompts that invade our consciousness daily and rob us of true creativity.
    • The system to create a direct and immediate link to your creative inner child, who is waiting to come out and play.

    There is no fluff here, no rhetoric and no shallow new-age promises. This book is a concise roadmap toward enabling your renewed creative expression.

    Once you begin this journey, there is no looking back. Because when you live creatively, the only place you’ll want to look is to the future, where the next creative reward awaits.

    Get “Unleashing the Creative Child Within You” on your Kindle today for just $4.99 and let your creativity grow! [or borrow it for free if you are an Amazon Prime member!]

    Do you not own a Kindle device? No problem! You can read Kindle books on your smart phones or on your PC or MAC. Downloading the Kindle App or software is absolutely free.

    Book Review: The Skinny On Creativity

    Tuesday, August 10th, 2010

    A few weeks ago I was contacted by Michael Cassidy of Rand Media Co. and asked whether i would like to receive a pre-released copy of “The Skinny On Creativity” for review.

    This book is part of a series of publications entitled “The Skinny On”.

    To better understand the idea behind this series, let me quote from the introduction to the book:

    “In our time-starved and information-overload culture, most of us have far too little time to read. As a result, our understanding of important subjects often tends to float on the surface – without the insights of writings from thinkers and teachers who have spent years studying these subjects.

    Our series is intended to address this situation. Our team of readers and researchers has done a ton of homework preparing our books for you. We read everything we could find on the topic at hand and spoke with the experts. Then we mixed in our experiences and distilled what we have learned into this skinny book for your benefit.”

    The book “The Skinny on Creativity” is no different.

    It is well written in a very clear and concise way.

    At first glance I thought the book is too simplistic because of its unique style. However, I quickly understood the book is designed to be perceived differently by each individual who reads it.

    I can either read the snippets as they are conveyed and move on quickly or I can pause after reading each notion to ponder and contemplate about it.

    In other words, I can read it either very fast or very slowly, depending on what I wish to get out of this book and I absolutely love it. Not to mention that I may want to read it slowly at first but have the option to go through it quickly later on.

    Before writing my own book, “Unleashing The Creative Child Within You”, I conducted an extensive research on creativity. I read a ton of books and essays and covered the subject of creativity from A to Z. Therefore the ideas presented in the book The Skinny On Creativity were not new to me, but still I could find a fresh outlook on these ideas by the connections the author made between them and the order he decided to put them on.

    I also enjoyed the humor the author injected to the otherwise very theoretical book. It made my reading much more joyful and several times it led me to an entirely different outlook on the subject matter.

    In Short

    I think this book is perfect for someone who is looking for an extensive overview on the subject of creativity but without having the time for the extensive reading required.

    In addition, the wittiness and pithiness of the book are very inspiring and were actually honing my creativity while I was reading it. I kept coming up with new project ideas which is always a delightful characteristic in a book on creativity.

    Share

    Have you read any of the “The Skinny On” books? If so, what did you think about them?
    Have you read another good book lately that you’d like to recommend? Please share by leaving a comment on this post.

    Welcome Little One Workshop
    Check out Creativity Prompt’s new and unique self paced workshop: “Welcome Little One”. This workshop will provide you with everything you need, and then some, to make a fabulous handmade mini album to record the first moments of a new born baby.

    A quick Spike Of Creativity

    Thursday, April 8th, 2010

    I have recently received an e-mail from Emma Taylor of Accreditedonlinecolleges.com.

    She has graciously sent me a link to an article on her website: “25 Talks to Ignite & Unleash Your Creativity“.

    This article offers many sources of fire to ignite your smoldering creativity.

    You may like to take a look 🙂

    Unleashing The Creative Child Within You
    Back when we were kids creativity came naturally to us. Everything was possible and our prolific imagination was the only limit we knew.
    Through the years we have grown apart from our inner creative child and along with that – have lost our pristine and utter joy of creation.

    In this e-book I will pave your way back to your inner creative child, brick by brick.

    “Unleashing The Creative Child Within You” will explain why you became distant from your core creativity and will reveal the secret to getting it back.
    With exercises designed specifically to help you find the inner child within you, regain its confidence and unleash it – you are bound to get your mojo back faster than you think.

    Your inner creative child wants to come out and play, so don’t disappoint it and get “Unleashing The Creative Child Within You“.

    Unleashing The Creative Child Within You

    Wednesday, March 31st, 2010

    Unleashing The Creative Child Within You

    I wrote “Unleashing The Creative Child Within You” while we were living in Dublin, Ireland.

    This e-book is, in a way, a travel journal. In it I reduced to writing the journey I had embarked on to find my own inner creative child.

    After leaving my country, my family, my friends, my job and my profession I found comfort in reuniting with my core creativity.

    My inner child embraced me with pure love, like only children know how. My inner child accepted me unconditionally, like only children (and moms) know how.

    Finding the joy of creativity again, recognizing the reasons I had lost it in the first place, was a marvelous gift I gave myself with this journey.

    In this e-book, which is available for immediate download as a pdf file, I will pave your way to your inner creative child, brick by brick.

    “Unleashing The Creative Child Within You” will explain why you became distant from your core creativity and will reveal the secret to getting it back. With exercises designed specifically to help you find the inner child within you, regain its confidence and unleash it – you are bound to get your mojo back faster than you think.

    Your inner creative child wants to come out and play, so don’t disappoint it and get “Unleashing The Creative Child Within You“.

    [If you purchased a workshop lately and waiting for response, please read this important notice.]

    Creativity Prompt – Reuse A Bottle Lid To Create Your Own Patterned Paper

    Friday, November 6th, 2009

    Reuse A Bottle Lid To Create Your Own Patterned Paper

    Every time I manage to find a new use to something that would otherwise find itself in the recycling bin, I am happy, even skittish… (I will deny if you tell).

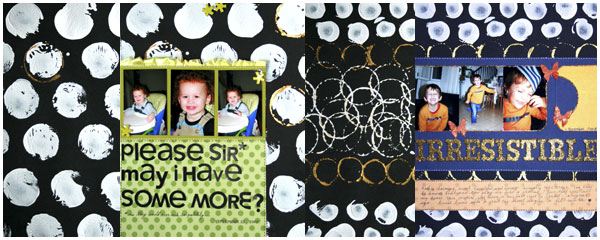
    In this week’s creativity prompt I am reusing bottle lids to create artistic patterned papers.

    The polka-dot-circular-spotty look is extremely popular right now and almost ALL the patterned paper manufacturers have a few in their latest collections. Before you reach your hand to the wallet and buy some new papers why not stopping at the recycling bin and make your own ones?

    If you are interested in some ideas, then keep on reading.

    Tools & Supply

    How To

    Watch on You Tube.
    [I have had lots of comments requesting me to speak on my videos. I hate talking because my funny accent shines through. This time I took a deep breath and created a voice over – with my voice (I have to write it to believe it). Tell me the truth, don’t you want the fabulous music back?]

    Step By Step Instructions

    1. Dip the lid in a pool of acrylic paint and stamp over the cardstock. To get a good impression of the lid make sure its entire surface is covered with paint. You may also use a brush to apply the paint more evenly to the lid. Apply some pressure on the lid, but beware of the paint’s slipperiness. I was going for the artistic look so I didn’t mind the imperfect stamping.
    2. You may use the opposite side of the lid to create a circular outline. Use it as a frame, or as an outline to the solid circle you stamped with the other side of the lid.
    3. Experiment –

      • Create different patterns.
      • Use different sizes of lids.
      • Use other mediums (instead of acrylic paint):

        • Ink pads.
        • Embossing ink + embossing powder.
        • Glue + glitter/ flock/ foil.
      • Use different objects to stamp with:

        • Toilette paper rolls.
        • Paper swirls.
        • Cardstock/ corrugated cardstock.
        • Old credit or gift cards.
        • Vegetables (if they went bad…)

    Share

    If you have any question, suggestion or remark – don’t hesitate to contact me – either leave a comment here, use the contact form or start a new thread on the Creativity Prompt Flickr Group!!!

    I would also be very happy to see your own creations, so don’t be shy and share 🙂

    Make Your Own Planner Workshop
    Check out the new “Make Your Own Planner” workshop and you may solve this year’s holiday gift shopping problem. An affordable workshop that keeps on giving…

    Freebie – Printable Journaling Labels

    Friday, October 30th, 2009

    What can I say? Life happens.

    I don’t know if I mentioned this before, but for the past 3 months my husband and I have decided to transform our lives into healthier ones. Non of us was really heavy but we were gaining weight – little by little – and feeling bad, both physically and emotionally.

    Weight can really creep up on you. From being a skinny teenager that eats chocolate non stop and only seem to get smaller, you become an adult that can gain weight from merely standing in close proximity to food. That’s life.

    So we took control over our bodies, started eating healthier (that doesn’t mean less food. It means healthier, more nutritious food) and we wake up each day at 6:30 a.m. and go together to the gym for a strenuous workout that includes both aerobic and weight training.

    We see results. GREAT results (especially my beautiful husband).

    But every once in a blue moon we have a day in which we feel more tired and energy-less than usual.

    This is such a day. So there will be no free tutorial this week.

    HOWEVER – I am not missing a tutorial without leaving something nice for you guys instead. So I am including a freebie printable journaling labels for my fabulous readers to play with (right click on the link and opt for the ‘save link as…” option).

    Just print on cardstock and cut out with scissors. I used cream colored cardstock and it looked great on it.

    Print as many as you want for personal use only.

    Share

    If you print out and use these labels please leave a comment and tell me if you liked them. Thank you!

    Creativity Prompt – Make an Artist Trading Card (ATC)

    Friday, October 23rd, 2009

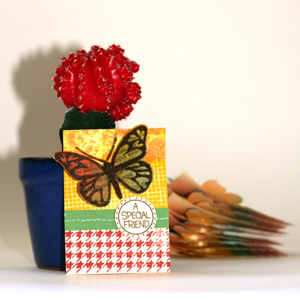
    Artist Trading Card (ATC)An Artist Trading Card (aka: ATC) is basically a 2½” by 3½” piece of original artwork which is traded among artists.
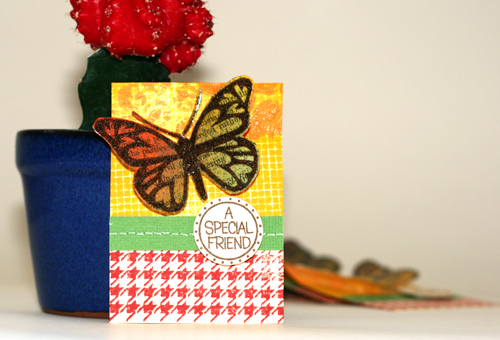
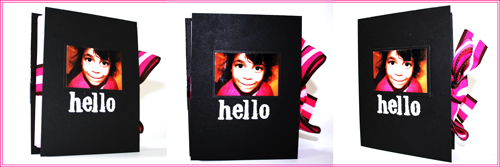
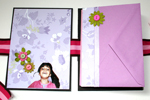
    Participating in an ATC swap is a great way to express yourself creatively without being overwhelmed with a huge blank canvas. It is also a great way to get to know other artists and expand your artistic world.

    As soon as I heard that Hero Arts is arranging an ATC swap I knew I had to participate.

    On this week’s creativity prompt I want to walk you through the process of creating my ATC for the swap.

    If you want to find out how I made this ATC (plus learn some valuable tips and tricks) then keep on reading:

    Step by Step Instructions

    1. Cut your cardstock to the traditional 2½” by 3½” size. To make the most out of an 8½” by 11″ sheet of cardstock, start by cutting it at 2½” lengthwise twice and then you’ll end up with a 3½” strip.
    2. Adhere a vintage text paper (from an old book. I used an old text book about Roman Law…) to another piece of non-textured cardstock with a glue stick.
    3. Color the vintage paper with distress ink using the foam applicator with a swirling motion, from the outside in. Blend a few colors together. I used: Broken China, Fired Brick, Peeled Paint and Mustard Seed.
    4. Stamp the heart winged butterfly image in dark brown ink over the colored vintage background. Try to stamp the images as close as possible, but leave a small gap between them. Let the ink dry completely.
    5. Mask off 2/3 of the ATC with a post-it note and stamp the houndstooth background stamp using one of the distress inks.
    6. Take off the post it and use it again, masking the part you’ve just stamped. Then stamp over it with the screen shadow stamp.
    7. Take a small piece of bubble wrap and apply a layer of distress crackle paint over it. Use the wet bubble wrap to “stamp” with it over the screen shadow background. Let dry.
    8. After the crackle paint is completely dry cover it with a thin layer of clear glue or glaze to prevent the paint from breaking and falling off.
    9. In the meantime stamp the circular greeting on another piece of non textured cardstock using the same dark brown ink (I used the Clear Design: Who Loves You – CL309 – stamp set by Hero Arts, but it is no longer available). Punch the greetings out with a 1″ circle punch.
    10. Cut a green textured cardstock to 2½” by ½” strips. Poke a line of holes, 1/8″ apart from each other, along the middle of the strip and “connect the dots” with a white gel pen. Adhere the strip to the border where the two different background patterns meet.
    11. Cut the butterfly images with precision scissors. I am using Fiskars spring action micro tip scissors and I absolutely love them.
    12. Cover the butterfly images with an embossing ink and dip it into a mix of 1 part glitter to 3 parts clear embossing powder. Set with a heat gun.
    13. Attach the circular greeting to the cardstock strip with a foam dot.
    14. Attach the butterfly above the strip in an angle using some mini glue dots behind its body and some pop up glue dots behind its wings.
    15. Don’t forget to add your name, date and signature on the back!

    Artist Trading Card (ATC)

    Share

    Have you ever participated in an ATC swap? Are you interested in assembling an ATC swap group here on creativity prompt? If you are, please leave a comment and show your interest.

    If you have any question, suggestion or remark – don’t hesitate to contact me – either leave a comment here, use the contact form or start a new thread on the Creativity Prompt Flickr Group!!!

    I would also be very happy to see your own creations, so don’t be shy and share 🙂

    Creativity Prompt – How To: Envelopes Mini Album

    Friday, October 16th, 2009

    Envelopes Mini Album

    This week’s project is also quick and easy to put together. You decide how much time you want to spend embellishing each page later on…

    All you need is a bunch of envelopes, 2 pieces of chipboard and a long piece of ribbon. Pretty straightforward.

    You can take your time and decorate each page individually, or just adhere a photo on the back of each envelope and insert your journaling in each corresponding envelope. The sky is the limit for you.

    Tools & Supply

    How To


    Watch on You Tube
    [Music by Kevin MacLeod with permission]

    Step By Step Instructions

    1. Cut 2 pieces of chipboard – ½” taller and wider than your envelopes.
    2. Stick a strong double sided tape at the center of each chipboard piece. You can use the markings of your cutting mat for easy alignment.
    3. Adhere your ribbon to both pieces of chipboard, while leaving a ½” gap between them.
    4. Adhere each envelope to the next at the base with plain packaging/wrapping tape. Make sure you keep the orientation of the envelopes.
    5. Cut the excess tape off the sides of the envelopes stack.
    6. Adhere the envelopes stack to the chipboard with some more strong double sided tape.
    7. Cut the envelope inserts out of cardstock. Make them ½” shorter and narrower than your envelopes.
    8. Insert a piece of cardstock into each envelope.
    9. Embellish and… Voilà!

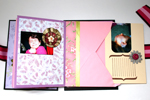
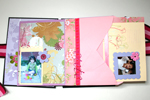
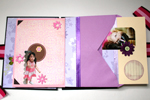
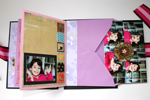
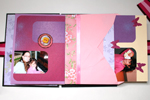
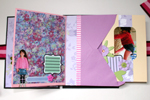
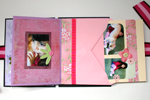
    Envelopes Mini AlbumEnvelopes Mini AlbumEnvelopes Mini Album
    Envelopes Mini AlbumEnvelopes Mini AlbumEnvelopes Mini Album
    Envelopes Mini AlbumEnvelopes Mini AlbumEnvelopes Mini Album
    Envelopes Mini AlbumEnvelopes Mini AlbumEnvelopes Mini Album


    Share

    If you have any question, suggestion or remark – don’t hesitate to contact me – either leave a comment here, use the contact form or start a new thread on the Creativity Prompt Flickr Group!!!

    I would also be very happy to see your own creations, so don’t be shy and share 🙂

    Inspiration Prompt – Keri Smith’s 100 Ideas

    Monday, October 12th, 2009

    For this week’s inspiration prompt I want to share a different kind of inspiration – creative inspiration.

    Sometimes no matter how hard we try we feel uninspired, blocked and cannot seem to come up with any new ideas or make anything that pleases us.

    Our creativity needs refueling as much as our body needs food, as much as our car needs gasoline and as much as our cellphone needs battery…

    Keri Smith, an amazing artist and author has compiled a list of 100 ideas that can help you rekindle an extinguished inspiration. 100 sparks of creativity, any of which can relight your fire.

    Take a look. Try some of her brilliant ideas. Try each and every one of her ideas, an idea a day.

    Fuel your creativity!

    Share

    Have you tried any of these ideas? How do you fuel up your creativity? share by leaving a comment on this post.