/** Font types */

Posts Tagged ‘challenge’

On World Card Making Day I made… Cards

Saturday, October 6th, 2012

Argyle Cards | Featuring Everyday Hexagons stamp set by Creativity Prompt

If you like it –

Happy World Card Making Day (WCMD) everyone!

What have you been doing today? Have you celebrated this special holiday?

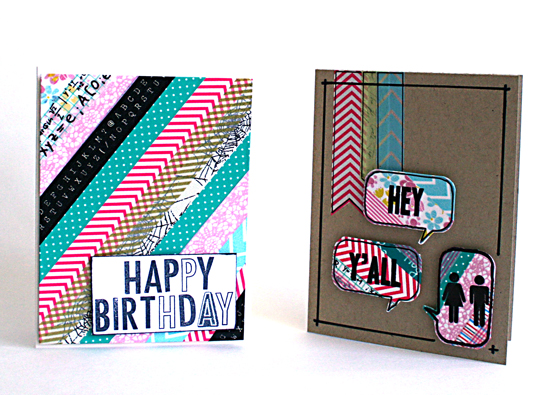
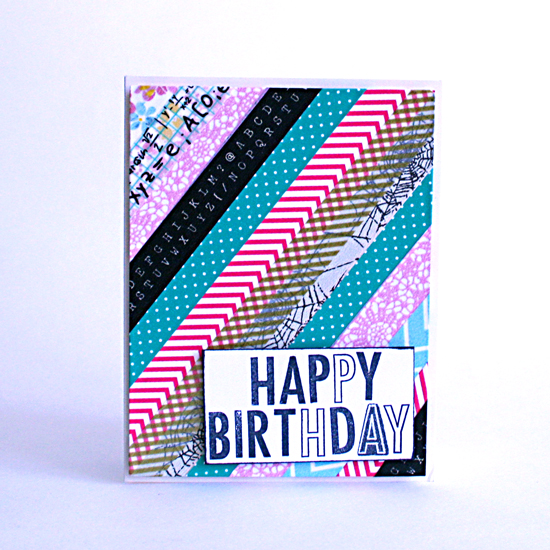
I made a bunch of cards…

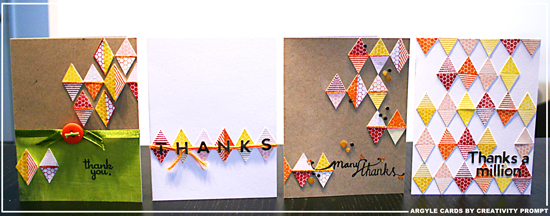
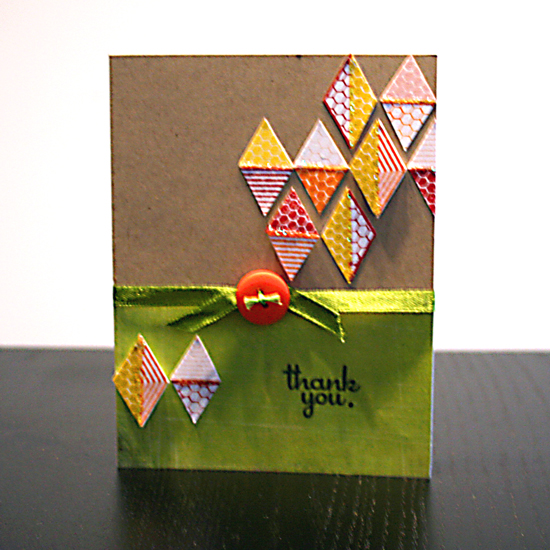
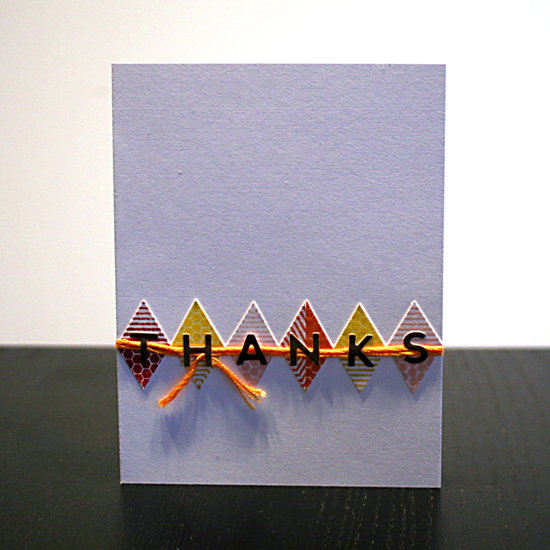
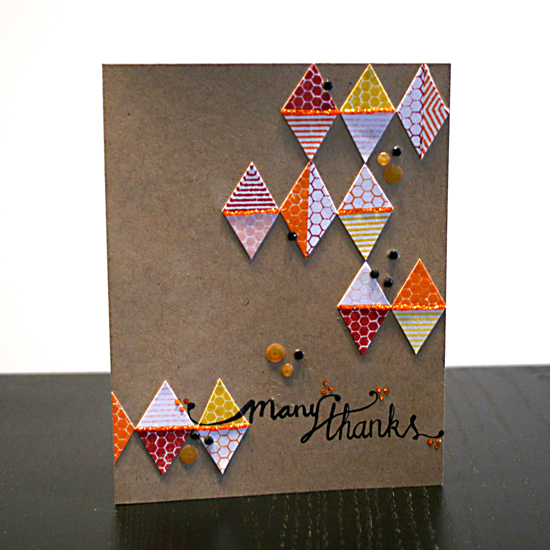
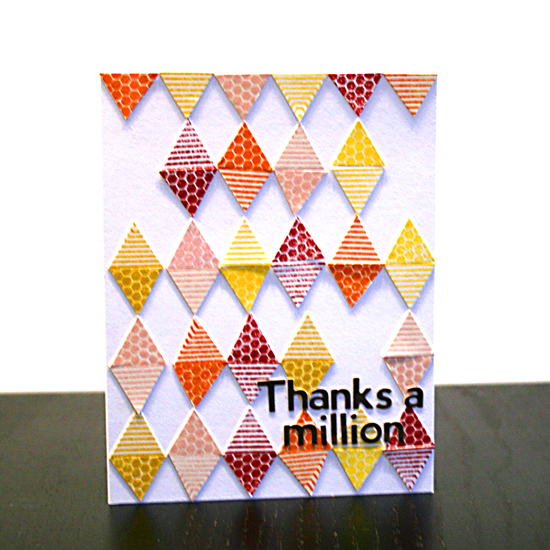
It all started when I went through my Google reader and saw all the WCMD challenges. Then one challenge in particular had caught my eye, Robyn’s Argyle challenge on Studio Calico’s blog. As soon as I saw it I thought about using my Everyday Hexagons stamps to create the argyle with a little bit of paper piecing, as each hexagon is made out of 6 equilateral triangles. Perfect!

So I took a few stamps and inked them with some Distress and Jenni Bowlin inks and started cutting them into triangles… Then all I had left was assembly. Pretty easy.

Here’s a closer look at each card and the supply used to make them at the end (Each card is made with pretty much the same supply and tools):

Thank You

Thank you card | Featuring Everyday Hexagons stamp set by Creativity Prompt

Thanks

Thanks Card | Featuring Everyday Hexagons stamp set by Creativity Prompt

Many Thanks

Many Thanks Card | Featuring Everyday Hexagons stamp set by Creativity Prompt

Thanks A Million

Thanks A Million Card | Featuring Everyday Hexagons stamp set by Creativity Prompt

Supply

Put A Stamp On It Challenge

Monday, September 10th, 2012

Washi tape cards

As soon as I saw this cute challenge on Simon Says Stamp’s challenge blog I knew I have to participate.

It’s the perfect challenge to test out all the washi tapes from different brands I’ve been amassing.

Hello washi tape!

If you like it –

Here are my cards –

Washi tape Happy Birthday card

On this card I wrapped an entire mat (which measures 4″ by 5¼”) with strips of washi tape. Then I adhered it to the center of the card fron with foam dots – a ton of them, to prevent it from sinking down. I then aligned my Stepping Stones stamps on my new Fiskars Compact Stamp Press (check out the link below for a good price on Amazon…) and when I needed more than 1 letter, I just used the outlined version… I also stamped one ‘A’ on the flip-side and then stamped the outlined version with Versamark ink and white embossed it on top. I love the quirky look. Great for a masculine birthday card.

Washi tape Hey Y'All card

This time I used the exact same technique, only instead of wrapping a mat, I wrapped three stamped speech bubbles cut-outs from the ‘Hey Y’All’ stamp set. After wrapping it with washi tapes I re-stamped the images with Stazon Jet Black ink and went over it with a permanent marker to make the outline look neater. I also stamped the sentiment and the cute restroom images (how would you call them!?) from that stamp set – again with Stazon and a touch of a permanent marker. To complete the card I added a few washi tape banners on the top left side and outlined everything with the same permanent marker.

So,… what do you think?

If you like it –

Supply


JM-S2 | Signs
Bring life to your projects with handmade epoxy stickers.

Just $3.00 per package.
6 stickers in each package.
Each sticker measures approximately ¾â€ by ¾â€.

Buy Now

Participate In A Creative Challenge To Break A Block- Creativity Prompt

Wednesday, January 13th, 2010

Participate In A Creative Challenge

[Cardstock: Papertrey Ink; Patterned paper: Basic Grey; Ribbon + letter stamps – Michael’s; Baby stamp set – Panduro, Norway; Punches: 2″ circle squeeze punch and Apron Lace by Fiskars; Corner Chomper – We R Memory Keepers; Ink: Papertrey Ink + Versamark; Embossing powder and Rock Candy Stickles – Ranger Industries.]

Raspberry Suite Color challenge #21It may sound counterintuitive but when you feel blocked one of the best ways to break out of the creative rut is to confine yourself to a limited set of colors or to a certain sketch.

This week I decided to participate in Dawn McVey‘s Raspberry Suite Color Challenge.

The colors were already picked for me and all I had to do is to come up with the design. My design is inspired by Kristina Werner’s last MACM.

As you can see I took the colors and the design idea and had made them mine, but more importantly, I have shattered my creative block and kept on creating other cards, layouts and ATCs afterward.

Step-by-Step Instructions

  1. Cut your card base (8½” by 5½”) and fold in half (into 4¼” by 5½” card).
  2. Cut the yellow patterned paper to 3″ by 5″.
  3. Stamp the yellow strip with the border text stamp with versamark ink and heat emboss it with clear embossing powder.
  4. Stamp your greeting on the bottom of the yellow strip with permanent brown ink, using individual letter stamps.
  5. Punch a circle at the center of the top part of the strip.
  6. Tie a ribbon around the yellow strip.
  7. Cut 2″ strip of the brown patterned paper and punch one side with the border punch.
  8. Adhere the brown strip to the back side of the yellow strip, by applying adhesive to the edge of the yellow strip. Allow only the decorative border to show.
  9. Before adhering the patterned paper to the card base, lay it over the card base where you’d like to position it and mark the circle with a pencil.
  10. Stamp your image inside the pencil circle with brown ink, then heat emboss the image with clear embossing powder.
  11. When the ink is completely dry, erase the pencil mark and adhere the patterned paper with foam dots.
  12. Round the corners of the card base.
  13. Go over the image with a layer of Stickles glitter glue and let dry.

Share

If you have any question, suggestion or remark – don’t hesitate to contact me – either leave a comment here, use the contact form or start a new thread on the Creativity Prompt Flickr Group!!!

I would also be very happy to see your own creations, so don’t be shy and share 🙂

Make Your Own Planner Workshop
Check out “Make Your Own Planner” workshop for an affordable monthly and weekly planner in a workshop that keeps on giving…

Inspiration Prompt – The Domino Effect

Monday, May 25th, 2009
The Domino Effect
[Photo by: Wikipedia]

Creativity pertains to the domino effect on two different levels.

First. The domino effect represents a state of flow. After the first tile has dropped, the entire line of tiles is falling, one-by-one, until there is no tile left standing.

So is working in a state of creative flow. After the first couple of awkward lines has been put onto the paper or the first couple of sentences has been typed, there is no stop until a masterpiece emerges.

Second. The domino effect also represents a creative way to deal with mishaps or accidental occurrences. A whole new game (and perhaps a sport) evolved by chance. I remember my grandmother and grandfather used to play domino on the big dining room table, only instead of laying the tiles horizontally they laid it vertically. Looking at them playing, I can imagine how the falling dominoes game was invented…

So are many creative projects. One mistake. One wrong stroke, over heating or mixing the wrong materials can bring to wonderful creations of fine art.

For this week’s inspiration prompt I suggest to derive inspiration from the domino effect. We can benefit both from its representation of creative flow and of dealing with mishaps creatively.

This prompt was inspired by one of my readers – Alexander Gartley – who made this wonderful project, together with his co-workers, to promote a creativity and innovation festival at the Rochester Institute of Technology, where they work:

Dominoes Everywhere from Jared Lyon on Vimeo.

Enjoy the domino effect and get creative!

Share

Share your ideas and thoughts on creativity and the domino effect and leave a comment 🙂

Inspiration Prompt – Keep On Trying and Don’t Be afraid To Get Help

Monday, May 18th, 2009
Keep On Trying
[Photo by: Joiseyshowaa]

Whether we ask for it or not life has in store for us an abundance of challenges. As long as we are trying we will never fail. As long as we believe in our ability to overcome – we will succeed. Though there is one thing we should learn how to do and it is to allow ourselves to get help.

Getting help from a friend or a kind person is not failure, it is the means to success.

Every problem has its solution and some problems can be solved only by mutual work. Getting help doesn’t mean we are unable to solve the problem. It merely means we have identified the solution and it includes another person in it.

Be open. Be hopeful and optimistic. Keep on trying and don’t refuse a helping hand.

I saw this video on You Tube and it conveys this inspiration prompt wonderfully:

Share

Are you willing to keep on trying and get help when you need it? Share your thoughts and comment on this post.

Have a fahhhhhbulous day!!!