/** Font types */

Posts Tagged ‘stamping’

List It Yourself Blog Hop

Friday, March 1st, 2013

Hop over to Monika‘s, Alexandra‘s and Britta‘s blogs for a fabulous introduction to my new stamp set: List It Yourself. You will get a huge amount of eye candy as well as 3 chances to win!

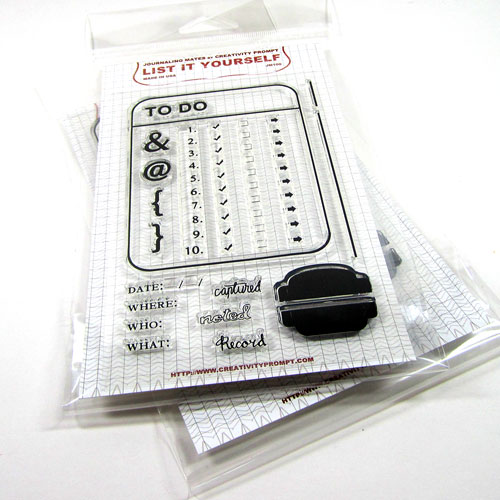
Journaling Mates - List It Yourself

This stamp set includes 21 stamps in total, as follows: 8 memory keeping phrases stamps, 2 tab stamps, 4 element stamps, 4 list stamps, 1 journaling box frame stamp and 2 additional box frame organizers stamps.

Mix and match these stamps to create awesome, custom-made journaling spots for your memory-keeping projects as well as to get organized with your day-to-day tasks.

The frame stamp measure just under 3″ by 4″, to fit pre-made 3″ by 4″ journaling cards.

Use the list stamps to revamp your plain post-it notes and to-do lists. It is also perfect for stamping in your journals.

Made in the U.S.A.

NOTE: To fit all those great stamps (21!!!) onto one stamp set, the journaling box frame isn’t fully backed. To make sure you stamp it perfectly on your project, simply toss it a few times on a scratch paper and it’ll conform to its original shape. Then put your acrylic block on it and lift it. Apply ink, and stamp away. You can always test-stamp on a scratch paper, just to make sure it’s perfectly straight each time.

List It Yourself Journaling Mates Stamp Set
$14.00

On World Card Making Day I made… Cards

Saturday, October 6th, 2012

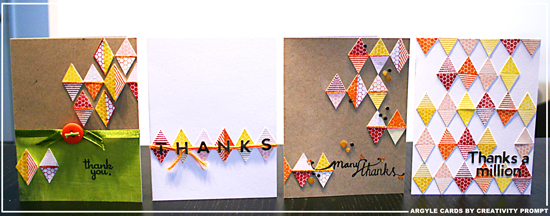
Argyle Cards | Featuring Everyday Hexagons stamp set by Creativity Prompt

If you like it –

Happy World Card Making Day (WCMD) everyone!

What have you been doing today? Have you celebrated this special holiday?

I made a bunch of cards…

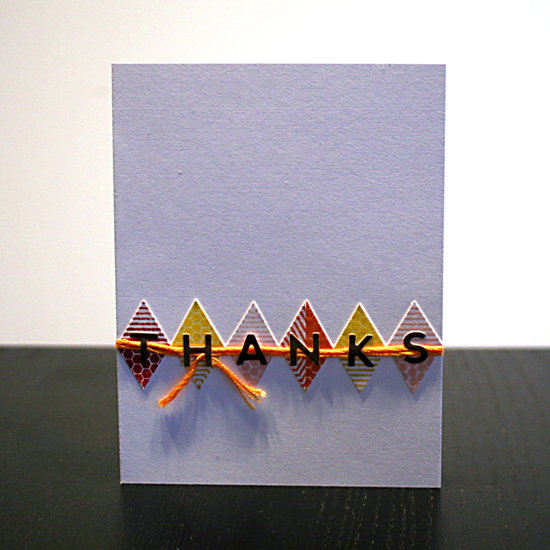
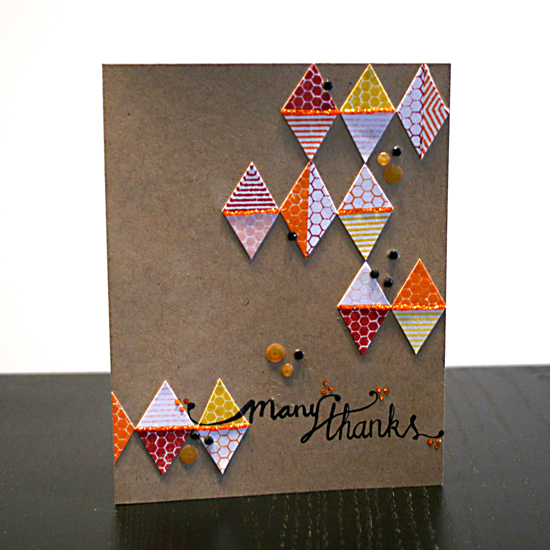
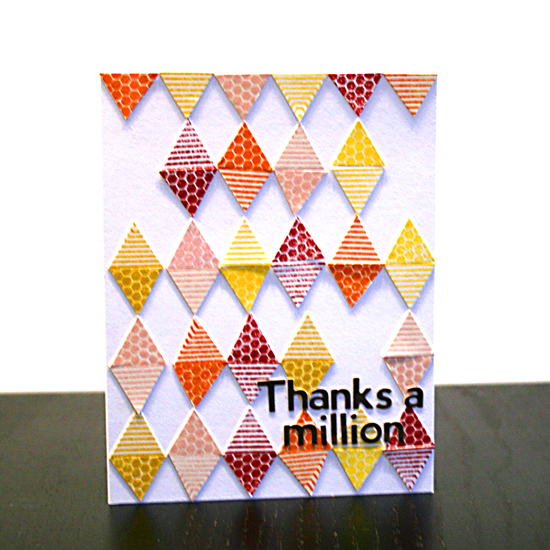
It all started when I went through my Google reader and saw all the WCMD challenges. Then one challenge in particular had caught my eye, Robyn’s Argyle challenge on Studio Calico’s blog. As soon as I saw it I thought about using my Everyday Hexagons stamps to create the argyle with a little bit of paper piecing, as each hexagon is made out of 6 equilateral triangles. Perfect!

So I took a few stamps and inked them with some Distress and Jenni Bowlin inks and started cutting them into triangles… Then all I had left was assembly. Pretty easy.

Here’s a closer look at each card and the supply used to make them at the end (Each card is made with pretty much the same supply and tools):

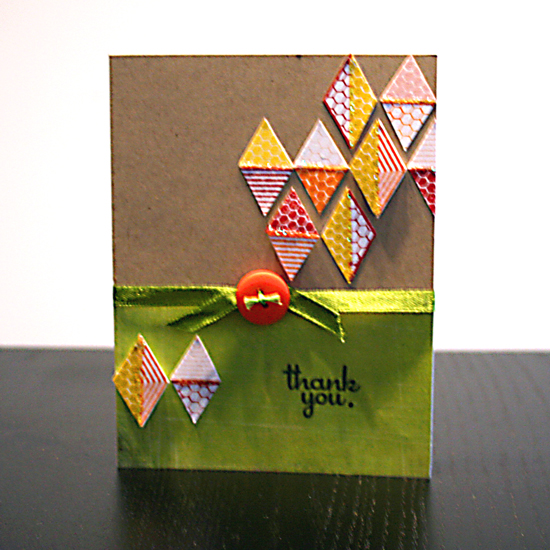
Thank You

Thank you card | Featuring Everyday Hexagons stamp set by Creativity Prompt

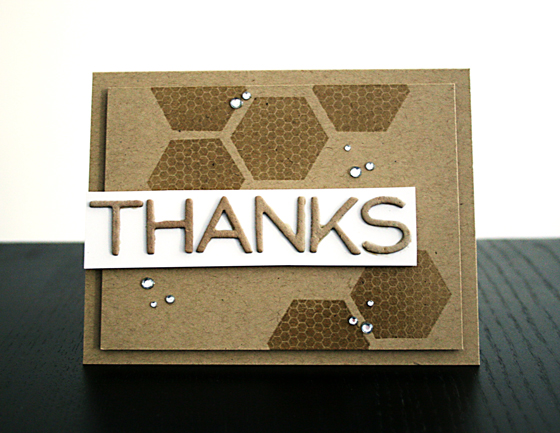
Thanks

Thanks Card | Featuring Everyday Hexagons stamp set by Creativity Prompt

Many Thanks

Many Thanks Card | Featuring Everyday Hexagons stamp set by Creativity Prompt

Thanks A Million

Thanks A Million Card | Featuring Everyday Hexagons stamp set by Creativity Prompt

Supply

Introducing Everyday Hexagons | Blog Hop

Thursday, September 27th, 2012

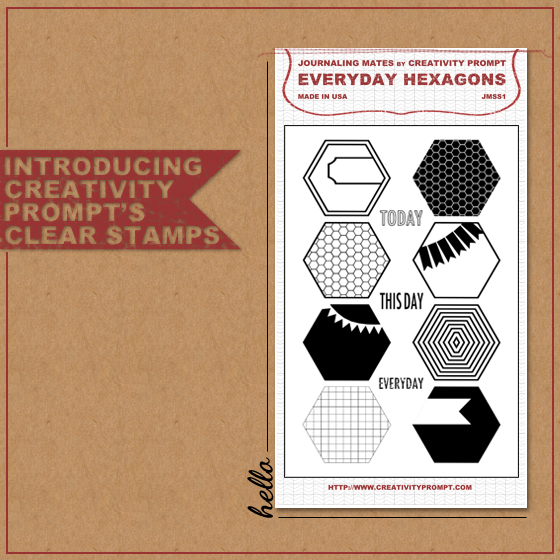
Introducing Everyday Hexagons


I am so excited to introduce my first set of clear stamps, inspired by my free Journaling printables.

These stamps are made of very high quality photopolymer stamps, in the U.S.A. You’ve got 11 stamps in total: 8 hexagon stamps that you can mix and match – all align together perfectly; as well as 3 journaling stamps: ‘Today’ ‘This Day’ and ‘Everyday’.

The stamp set retails for $14.00 and is currently available exclusively at Creativity Prompt’s online store [S&H and Taxes may apply].

The stamps are great for scrapbooking layouts as well as for cards or any paper crafting projects. Use them to create cute backgrounds or as stand alone accents.

The mix of outline and negative space stamps opens the door to a ton of techniques too.

Another thing I really love about these stamps is that the shape is so simple that ‘fussy cutting’ isn’t fussy it all. Six snips and you have a perfect stamped die-cut.

Check out this video introduction:


Here is a closer look at the card I made on video:
Thank You Card by Creativity Prompt

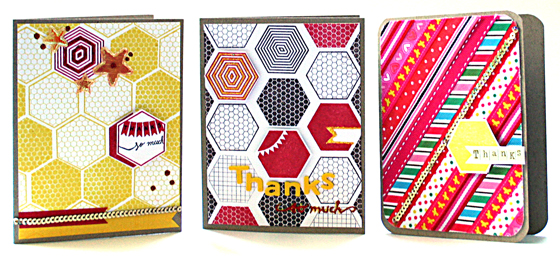
Here are some more cards I made, using Everyday Hexagons:
Thank You Cards by Creativity Prompt

And Now To The Blog Hop

These cards were sent to the extremely talented and extremely generous Monika, Lisa and Alexandra who are participating in this very special blog hop.

Make sure you head over to each of their blogs [Monika, Lisa and Alexandra] for a fabulous eye candy and more chances to win this stamp set!

Did I say more? Yes, I did!

I am also giving away an Everyday Hexagons stamp set, here, on Creativity Prompt! Yay!!!

For a chance to win a set of Everyday Hexagone clear stamp, check out this Rafflecopter quick and easy form. You have until Sunday, September 30th to enter, as many times as you can ๐Ÿ™‚
I will announce the winner here on Monday!

a Rafflecopter giveaway

Note, that quantities of the first release, before the next shipment arrives (in a month or so, due to clear stamp manufacturing interruption), are very limited. So the first to purchase this awesome stamp set will be the first in line to get it. If you will have already purchased a stamp set and win the giveaway – you will receive a full refund!

Put A Stamp On It Challenge

Monday, September 10th, 2012

Washi tape cards

As soon as I saw this cute challenge on Simon Says Stamp’s challenge blog I knew I have to participate.

It’s the perfect challenge to test out all the washi tapes from different brands I’ve been amassing.

Hello washi tape!

If you like it –

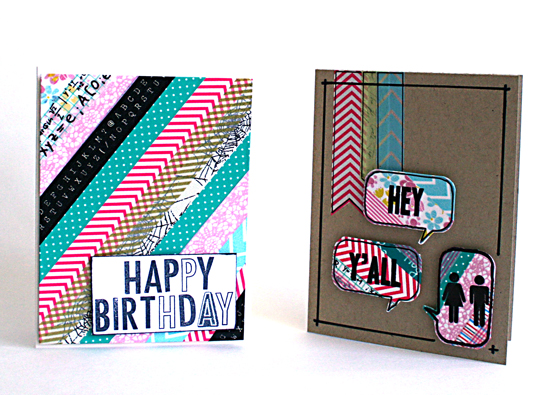
Here are my cards –

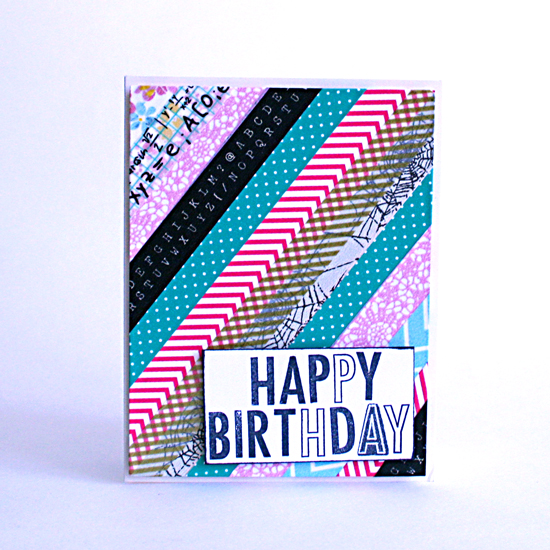
Washi tape Happy Birthday card

On this card I wrapped an entire mat (which measures 4″ by 5¼”) with strips of washi tape. Then I adhered it to the center of the card fron with foam dots – a ton of them, to prevent it from sinking down. I then aligned my Stepping Stones stamps on my new Fiskars Compact Stamp Press (check out the link below for a good price on Amazon…) and when I needed more than 1 letter, I just used the outlined version… I also stamped one ‘A’ on the flip-side and then stamped the outlined version with Versamark ink and white embossed it on top. I love the quirky look. Great for a masculine birthday card.

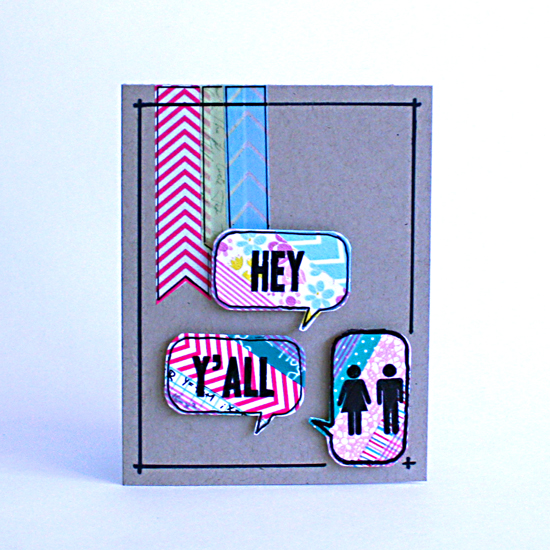
Washi tape Hey Y'All card

This time I used the exact same technique, only instead of wrapping a mat, I wrapped three stamped speech bubbles cut-outs from the ‘Hey Y’All’ stamp set. After wrapping it with washi tapes I re-stamped the images with Stazon Jet Black ink and went over it with a permanent marker to make the outline look neater. I also stamped the sentiment and the cute restroom images (how would you call them!?) from that stamp set – again with Stazon and a touch of a permanent marker. To complete the card I added a few washi tape banners on the top left side and outlined everything with the same permanent marker.

So,… what do you think?

If you like it –

Supply


JM-S2 | Signs
Bring life to your projects with handmade epoxy stickers.

Just $3.00 per package.
6 stickers in each package.
Each sticker measures approximately ¾รขโ‚ฌย by ¾รขโ‚ฌย.

Buy Now

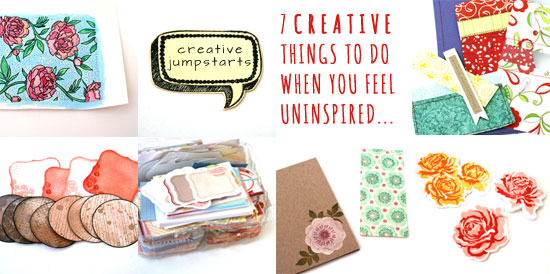
Creative Jumpstarts || 7 Creative Things To Do When You Feel Uninspired

Wednesday, August 29th, 2012

Seven Creative Jumpstarts

If you like it

I often find myself wanting to do something creative but feeling a bit uninspired, as if I’ve lost my creative mojo. I know I want to experiment with new products or to try new techniques but I can’t think of a solid idea for a specific project.

On these occasions I try to make mini, one-step projects that are still creative but do not require any pre-planning.

Many times these itsy bitsy pieces spark my creative spirit and bring back my mojo. On other times, I still have something I can use later on, when I have a solid idea but less time…

Here are some of the stuff I do:
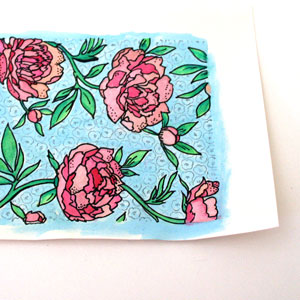
Watercolor Stamped BackgroundsWatercolor stamped backgrounds.
I love the watercolor look that seems to appear everywhere on the creative-web-sphere. The thing is that watercoloring takes time, even for the most basic applications (such as mine). For one thing, post cleanup is required. Plus you have to get water and blotting paper and special watercolor paper…

Do you see my point?

Therefore, I find these inspiration-twilight-zones perfect for a mini watercolor project. Simply stamp a background stamp with a water-resistant ink (such as Stazon) on watercolor paper and color away. Later you can use it as an element on a page or a card. Add some black details with a broad-tip pen for a bolder look.

Stamp and cut.Stamp and cut.
This one is a spin on watercoloring a stamped piece, for times you don’t feel motivated to break out the watercolors, water, brushes, etc.

For that mini micro project you only need one ink pad, some cute, easy-to-cut stamps and any paper.

When I shop for new stamps I always think of images I can stamp, cut and stow for later use… When the time comes to make an actual card, scrapbook layout, mini album or even to wrap up a gift – you would LOVE to have that stash of pre-cut images to use in a snap.

After all, by the time you get really inspired, you want to use your precious time for designing cool stuff, not on technicalities, right!?

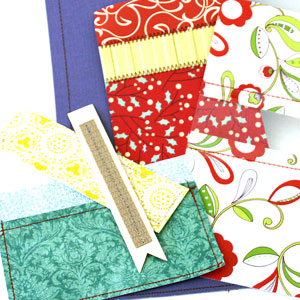
Sew random paper stripsSew random paper strips.
This creative jumpstart performs a double duty: (1) It’s easy and does not require ANY pre-planning; (b) It’s an AWESOME way to use your scraps and if you are anything like me, you have a ton of them.

I am not very good with the sewing machine (= that’s the understatement of the year). That humble stack of randomly sewn pieces is the combined effort of several mini-sewing-sessions, with months apart… Having said that, I really love the machine-stitched look. I think that it adds a new dimension and texture to any project, not to mention a more finished look.

The great thing about machine stitched elements is that you can’t tell when they were carefully sewn on the project or added later as an afterthought… Which is why I think it’s so great to simply stitch random pieces of paper together. The time will come when those sewn panels and pockets and strips will perform their duty, honorably, on a future project.
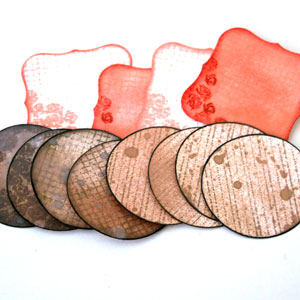
Make your own journaling spots.Make your own journaling spots.
This is another great example of something small that you can do that gives you an opportunity to experiment with different techniques and stamps and can be very useful in the future.

Either punch or die-cut your journaling spots in advance or stamp them first and cut around the stamp image. Then simply play with them => Add distress inks and stains, mist them, stamp on them, doodle, use letter and word stickers on them.

Just have fun and experiment and get as messy or as tidy as you want.

Finally, store them with the rest of your stash for later use.


Cut pre-made journaling spots.Cut pre-made journaling spots.
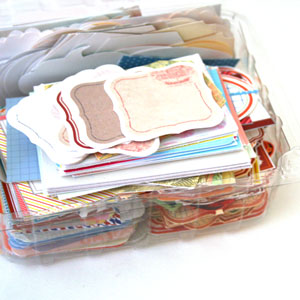
OR you can simply print one of my MANY free printable journaling spots, cut them and stash them in an old strawberries container, just like I do… [see picture on the left]

You may also use cuter and more tightly closed containers, if you so wish.

I’m not sure I should say so myself…, but they are so useful. I almost always use a piece on every scrapbooking project I make.

Having these ready-to-go pieces is making it much easier to use them. I don’t think I would ever start searching my file folders for a specific journaling labels set, then printing it and cutting it – all just for a specific journaling spot on a specific page of a specific project. I don’t think so.
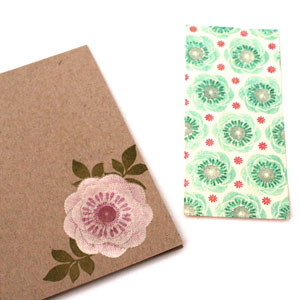
Pre-stamp cards.Pre-stamp cards.
I am notorious for buying stamps just because they look cute. I admit it. I used to get them and not be exactly sure what to do with them. Oops.

That was before I decided to simply use them. Duh. I just stamp them on plain card-bases and set it aside until my creative mojo strikes or until I need a quick card and have no time to make it. Whichever comes first. Guess what comes first more often…

Sometimes I just add the cute image to the card base (as you can see on the right) and sometimes I stamp on a 5½” panel that I can add to a card later (as you can see on the left), with or without foam adhesive. Sometimes I also add Stickles, because I’m feeling extra sassy…, but shhh, please don’t tell.

It was very smart of me to use a limited edition stamp set that isn’t available anymore…
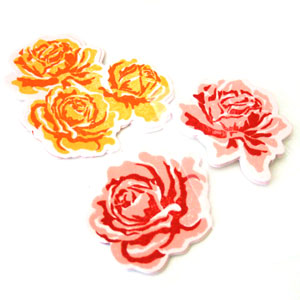
Die cut and stamp.Die cut and stamp.
To finish up, I have another spin on the stamp-and-cut suggestion. Wait for it… it’s a die-cut-and-stamp suggestion. Did I tell you how ‘smart’ I am feeling today? Oh, I just did. Okay.

Many brands offer combinations of stamp sets with matching dies. These are perfect for creating mini professionally-looking embellishments that you can use in so many different ways and on so many different projects. You only need a one-time investment in the dies and stamps set and that’s it. Each additional die-cut embellishment you create is practically free.

Make as many as you need, at any color combination you love at the moment or that suits your stash of paper/cardstock/printed photos…

Share

Do you have other suggestions for creative jumpstarts that need no pre-planning, just some free creative time? If you do, please share in the comments section below!
Unleashing The Creative Child Within You
Back when we were kids creativity came naturally to us. Everything was possible and our prolific imagination was the only limit we knew.
Through the years we have grown apart from our inner creative child and along with that – have lost our pristine and utter joy of creation.

In this e-book I will pave your way back to your inner creative child, brick by brick.

“Unleashing The Creative Child Within You” will explain why you became distant from your core creativity and will reveal the secret to getting it back.

With exercises designed specifically to help you find the inner child within you, regain its confidence and unleash it – you are bound to get your mojo back faster than you think.

Get “Unleashing The Creative Child Within You” for your Kindle
for only $4.99.

You can read the Kindle book on Kindle devices, on your smart phones or on your PC or MAC.

Card Inspiration – Just For You

Wednesday, August 1st, 2012

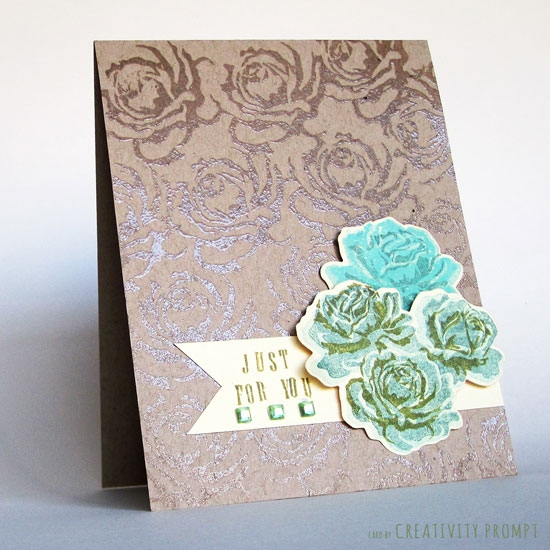
Just For You Card

Ever since I saw the sneak peek of this stamp set from Papertrey Ink‘s last release (‘The Sweet Life’) I wanted to have them.

Luckily my parents had bought me that stamp set (along with a few other things). Thanks so much!

It took forever (well, a week and a half) to get them and in the meantime I saw this gorgeous card by Alexandra, made with that exact same stamp set. What a tease…

I finally received my Papertrey Ink order yesterday, and this is the first card I made with the stamps.

I used Papertrey Ink’s ink and I must say it isn’t my favorite. I find it a bit splotchy, even with a fresh new ink pad. What do you think about their ink?

Other Supply

How-To

  1. To create the portrait card base I cut the kraft cardstock, widthwise, at 4¼” and folded at 5½”. I used Martha Stewart’s scoring board with a stylus but it isn’t necessary, just helpful.
  2. Next I took the large detail rose stamp from Papertrey Ink’s set and repeatedly stamped it with the versamark ink, starting from the bottom left and making my way up.
  3. Then I covered the stamped images with clear embossing powder and set it with a heat tool.
  4. To create the accent flowers I used the three-steps stamps from the set and the matching dies (they went like butter through my ancient Cuttlebug machine). As the dies aren’t see-through I first cut the ivory cardstock and then temporarily adhered the ‘naked’ die-cuts to a scrap paper and stamped, starting from the least detailed stamp with the lightest ink color and moving on to the most detailed stamp with the darkest color.
  5. Then I cut a 1″ strip of the Ivory cardstock and shaped its end into a banner shape, by cutting a slit in the middle and matching up the ends from each edge of the cardstock strip. I adhered it to the card with permanent tape adhesive and stamped the greeting with individual letter stamps (I actually did the stamping after adhering the accents, but this is not recommended…).
  6. Next I adhered the flowers die cuts. I attached the bottoms with regular tape adhesive and the tops with pop dots to add interest.
  7. To finish off the card I added some bling… How can I not, right!?

If you like it –

Unleashing The Creative Child Within You
Back when we were kids creativity came naturally to us. Everything was possible and our prolific imagination was the only limit we knew.
Through the years we have grown apart from our inner creative child and along with that – have lost our pristine and utter joy of creation.

In this e-book I will pave your way back to your inner creative child, brick by brick.

“Unleashing The Creative Child Within You” will explain why you became distant from your core creativity and will reveal the secret to getting it back.

With exercises designed specifically to help you find the inner child within you, regain its confidence and unleash it – you are bound to get your mojo back faster than you think.

Get “Unleashing The Creative Child Within You” for your Kindle
for only $4.99.

You can read the Kindle book on Kindle devices, on your smart phones or on your PC or MAC.

How To Make A Gift Card (pun intended) – Creativity Prompt

Friday, December 18th, 2009

Gift Card

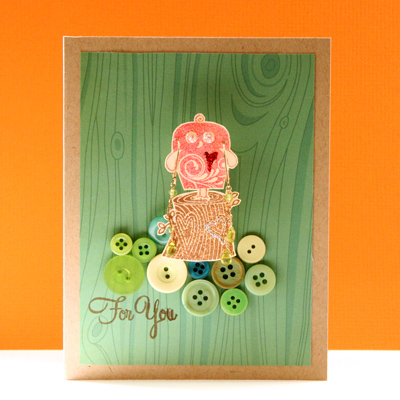
The Hero Arts blog has sparked this idea in my head when they came up with a gift card challenge. I’m always up for a challenge and instead of thinking about a fun way to incorporate money or a store gift card in the card, I thought why not incorporating the gift itself and the idea for this card emerged.

Another fun idea is to stamp and cut a tree image and to wrap a necklace around it, like a twinkling ornament chain.

Tools & Supply

How To


[Watch on You Tube – while there, please rate, comment & subscribe]

Step-by-Step Instructions

  1. Stamp the images over a smooth light cardstock.
  2. Cut around the images with precision scissors, while rotating the cardstock and leaving the scissors at the same position.
  3. Adhere the background piece of the patterned paper centered on the card base with permanent tape adhesive.
  4. Temporarily lay the tree image on the background paper and arrange green buttons around it to simulate a grassy hill. When you are pleased with the buttons’ arrangement – adhere them with glue dots.
  5. Adhere the tree image in its place on top of the buttons with a thick foam adhesive. Either use a ½” thick piece of foam adhesive or layer a few thinner foam adhesive pieces together.
  6. Pierce holes in the owl “ears” and put on the earing. Then adhere the owl on top of the tree with another piece of thick foam adhesive. The thickness of the foam gives room to the earing’s stubs.
  7. Add some more interest and texture with a few touches of glitter glue here and there.
  8. Stamp your greeting with brown ink. Attach the stamp to the left side of the acrylic block, so the buttons won’t stand in your way.
  9. Give the gift card to someone you love and get a smile in return.

Share

If you have any question, suggestion or remark – don’t hesitate to contact me – either leave a comment here, use the contact form or start a new thread on the Creativity Prompt Flickr Group!!!

I would also be very happy to see your own creations, so don’t be shy and share ๐Ÿ™‚

Make Your Own Planner Workshop
Jump start your creativity for 2010 and Make Your Own Planner with an affordable workshop that keeps on giving with an unlimited personal use license…

Make Your Own Planner Workshop
“Capture Your Dream” workshop is relaunching as a self-paced workshop. Isn’t this the perfect time for you to capture your dream and make it happen?

Creativity Prompt – Embellishing Raw Chipboard shapes

Friday, March 27th, 2009

Chipboard Embellishments
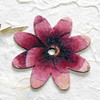
This is post is the second in the series of Embellishing Embellishments. A couple weeks ago I suggested ways of embellishing paper flowers and this week we are going to embellish raw chipboard shapes.

Chipboard is a great way to add some dimension to your project, without adding too much bulk. Chipboard is basically a bunch of layers of paper, pressed firmly together, therefore it provides a slight raise, when adhered on regular cardstock or paper.

Saying that, chipboard, in its raw state, is rather… well… ugly. Many companies provide covered chipboard shapes but the price tag can rise up and you never get EXACTLY the color, texture, finish you want on your project.

There are many companies offering raw chipboard shapes. Usually the price does play a role in telling the quality of the chipboard. For the sake of this tutorial I was using Colorbok’s chipboard shapes, they retail for 1$ but they are very thin and the layers are easily separated (especially in techniques that requires gel medium). I do recommend Maya Road’s chipboard. It has high quality yet isn’t very expensive.

The techniques I am showing on this week’s video are:

Each technique requires different tools and supply, and you may not want to experiment with all of the techniques, so I will list a separate supply and tools list for each technique below. I will also post a small picture of the chipboard, after the technique had been applied on it. You can click on each photo for a larger view.

How To –

Step By Step Instructions –

Painting with crackle paint


Painting with crackle paint Painting with crackle paint

Tools and supply –

Instructions –

  1. Apply crackle paint to chipboard with the brush that comes with it. If you want, you can dilute the paint with a drop of water. Avoid bumps and clumps, but don’t apply it too thinly.
  2. Let dry completely.
  3. For an “epoxy” look, cover in Diamond Glaze and let dry for a few hours.

Flocking


Flocking
Tools and supply –

Instructions –

  1. Apply a generous layer of glue and cover with flocking material.
  2. Pat on flocking material with your finger. (Don’t press too hard).
  3. Let dry for a minute or so.
  4. Shake off excess flock.
  5. Repeat on “bald” areas (The step you will need patience for…).

Covering in glitter


Covering in glitter
Tools and supply –

Instructions –

  1. Apply a generous layer of glue and cover with glitter.
  2. Pat on flocking material with your finger. (Don’t hesitate to apply pressure this time).
  3. Let dry for a minute or so.
  4. Shake off excess glitter.
  5. Cover in Diamond Glaze (avoid bubbles) and let dry for a few hours.
  6. Alternatively –

    Cover chipboard with colored glitter glue and let dry completely.

Covering with cardstock/patterned paper


Covering with cardstock
Tools and supply –

Instructions –

  1. Apply glue to the right side of the chipboard in a very thing layer.
  2. Adhere chipboard to cardstock or paper, while its right side is facing down.
  3. Let dry completely and then cut around with a sharp craft knife.
  4. File the excess off.

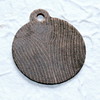
Stamping


Stamping
Tools and supply –
You can use any stamp (rubber or photopolymer/clear) and any ink, I’ll list the ones I used on the video.

Instructions –

  1. Apply a base layer of ink to the chipboard. (I really like the smoothness of the chalk ink).
  2. Ink up the stamp well and stamp on the chipboard. Apply a good amount of pressure to make sure the image will transfer evenly and completely.

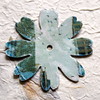
Decoupage


Decoupage
Tools and supply –

Instructions –

  1. Apply gel medium to chipboard (you can put a base coat of ink before, if you want the final result to be tinted).
  2. Separate the top layer of the napkin and lay it on the chipboard – right side up.
  3. Apply a second coat of gel medium on top of napkin.
  4. Wait until it dries completely. I was impatient and it made everything more complicated than it should be, So LET IT DRY!!!
  5. Cut around the chipboard shape with micro-tip scissors. (you can poke them in any hole or cavity of the shape).
  6. Apply a thin layer of gel medium to the edges of the shape. It will straighten all stray pieces of napkin as well as prevent the chipboard from separating.

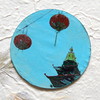
Photo Transfer


Photo transfer Photo transfer

Tools and supply –

Instructions –

  1. Start by choosing your photos and printing them on transparency with an inkjet printer. I am using Canon MP620 Wireless All-in-One Photo Printer.
  2. Apply a base coat of ink to the chipboard.
  3. Apply gel medium to the chipboard and lay the printed transparency over it, inked side down.
  4. Apply pressure to the transparency with a brayer and rub the image off with a bone folder.
  5. Gently peel off the transparency and make sure the top layer of the chipboard isn’t stuck to the transparency. If it is stuck, peel it gently with the tip of your craft knife’s blade and adhere it back on with some more gel medium.
  6. Apply another coat of gel medium on top – but make sure it is completely dry first.

Share –

If you have any question, suggestion or remark – don’t hesitate to contact me – either leave a comment here, use the contact form or start a new thread on the Creativity Prompt Flickr Group!!!

Can you think of other ways to embellish chipboard? Which technique is your favorite? Which technique have you used before? Share your thoughts by leaving a comment on this post.

I would also be very happy to see your own creations, so don’t be shy and share a link ๐Ÿ™‚