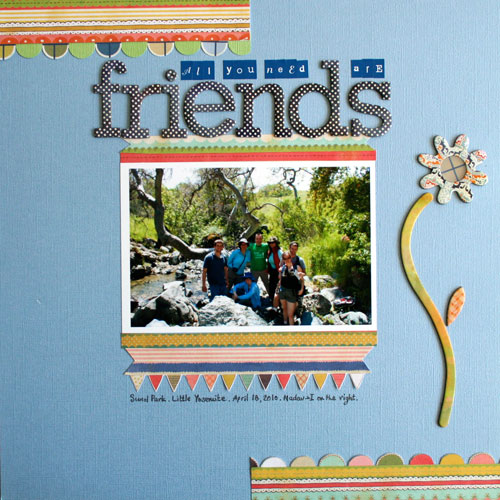
You live your life and along the road you get friends.
You have your kindergarten friends.
You have your school friends.
Your college and graduate school’s friends.
Your work friends.
Your neighbor friends.
New friends. Life long friends.
You get to have so many friends.
Then you move thousands of miles away and you get to know how is it to have no friends at all.
Then you meet new friends and all is good again 🙂
Have you stopped for a moment to appreciate a friend lately? If not, take a moment to do that. It’ll feel so good.
This picture was taken on a hiking trip with a few of our new and very dear friends. Nadav and I are on the right.
Supply Used
Technique
Scalloped Borders
Most of the borders I used were cut outs of a single paper from Crate Paper’s paper pad. I simply followed the shape of the circle and pennants on it. But on the top left corner I wanted to create a fast border to mimic the same look. Here’s how I did that.
- I punched some mini circles from an old polka dot paper I had a scrap of (utilizing the circular shape) and also punched a few mini circles from a scrap of green cardstock.
- I adhered a strip of tape to the back of the border strip and adhered the circles on it, one by one, so that only half of them would show on the other side, making sure that they all laid flush with one another.
- Then I finished off by cutting the excess circles that popped out of the strip.
You can use the same technique with different kinds of punches to achieve different type of scalloped edges. For instance, I used a starburst (pinked circle) shape on a different layout that I will share soon.

Back when we were kids creativity came naturally to us. Everything was possible and our prolific imagination was the only limit we knew.
Through the years we have grown apart from our inner creative child and along with that – have lost our pristine and utter joy of creation.
In this e-book I will pave your way back to your inner creative child, brick by brick.
“Unleashing The Creative Child Within You” will explain why you became distant from your core creativity and will reveal the secret to getting it back.
With exercises designed specifically to help you find the inner child within you, regain its confidence and unleash it – you are bound to get your mojo back faster than you think.
Your inner creative child wants to come out and play, so click here to get “Unleashing The Creative Child Within You” now.
Tags: creativity prompt, layout, scrapbook, scrapbook layout, scrapbooking
Posted in creativity prompt | 4 Comments »
July 22nd, 2011
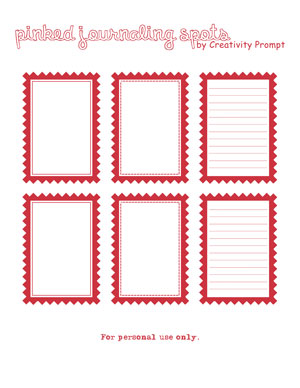
This week I am sharing a set of FREE pinked journaling spots with you guys (for personal use only).
To download it simply click on the image (or the link) and if it doesn’t work try to right-click on it and opt for the “save target as…†option (it may be phrased a bit differently on different operating systems – but do NOT opt for the “save image as†option, as you will get the low resolution tiny preview image).
I hope you like it and have lots and lots and lots of fun with it.
Make sure you didn’t miss the rest of the free printables on Creativity Prompt.
Share
How are you going to use these labels? Please leave a comment and share.
Back when we were kids creativity came naturally to us. Everything was possible and our prolific imagination was the only limit we knew.
Through the years we have grown apart from our inner creative child and along with that – have lost our pristine and utter joy of creation.
In this e-book I will pave your way back to your inner creative child, brick by brick.
“Unleashing The Creative Child Within You” will explain why you became distant from your core creativity and will reveal the secret to getting it back.
With exercises designed specifically to help you find the inner child within you, regain its confidence and unleash it – you are bound to get your mojo back faster than you think.
Your inner creative child wants to come out and play, so click here to get “Unleashing The Creative Child Within You” now.
Tags: freebie, Journaling Cards, journaling labels, Journaling spots, journaling tags, printable
Posted in Freebie | 5 Comments »
July 15th, 2011
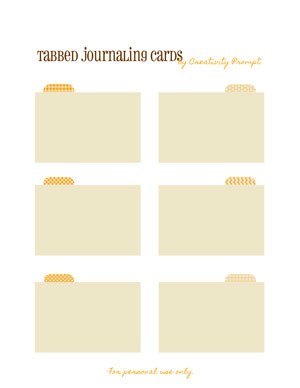
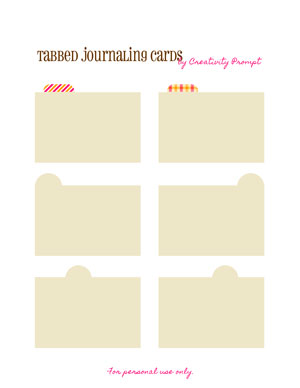
This week I am sharing a set of more tabbed journaling cards with you guys (for personal use only).
These tabbed cards coordinate with the cards I shared last week, so go ahead and use them together to double the fun (and fatten your micro-mini-album up…)
To download it simply click on the image (or the link) and if it doesn’t work try to right-click on it and opt for the “save target as…†option (it may be phrased a bit differently on different operating systems – but do NOT opt for the “save image as†option, as you will get the low resolution tiny preview image).
I hope you like it and have lots and lots and lots of fun with it.
Make sure you didn’t miss the rest of the free printables on Creativity Prompt.
Share
How are you going to use these cards? Please leave a comment and share.

Check out Creativity Prompt’s new and unique self paced workshop: “Welcome Little One”. This workshop will provide you with everything you need, and then some, to make a fabulous handmade mini album to record the first moments of a new born baby.
Tags: freebie, Journaling Cards, journaling labels, Journaling spots, journaling tags, printable
Posted in Freebie | 6 Comments »
July 14th, 2011
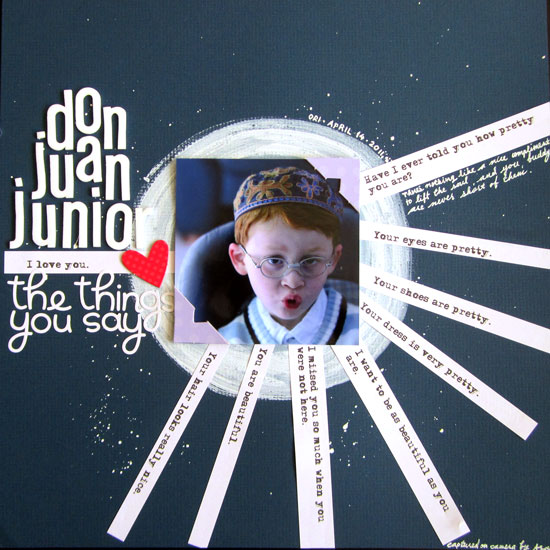
My nephew, Ori, is such an hilarious little boy.
He cannot see a girl without complimenting her.
How beautiful her eyes are.
How stunning her new haircut looks.
How pretty her dress is.
And so on and so forth.
With two quiet and shy parents, I have no idea where did he get that.
But it is SO CUTE.
[By the way, this photo was also taken by his 7-year old brother, Asaf – who is shy & quiet]
Products Used
Techniques
Acrylic Paint Accents
- I made a circle mask with plain copy paper and placed it where I wanted to place my photo eventually.
- I diluted a blob of acrylic paint with a couple squirts of water from a water mister and picked a very small amount of paint with a dry brush and followed the line of the mask lightly, just to get the idea of the shape and size of circle I wanted.
- I put away the mask and filled up the circle with long, circular strokes of the brush. Making sure it is almost dry each time I touch the cardstock with it.
- Then, when I was pleased with the circle, I diluted the remaining paint some more (but not too much), picked up color with the brush and flicked it over the cardstock to create the small paint droplets.
Starburst Journaling
- I created a 4″ wide text box with Photoshop [you can use any word editing software] and wrote my journaling with spaces between each sentence my nephew says.
- I printed the text on patterned paper and cut each sentence separately.
- Then I lightly laid the photo in place to make sure it won’t conceal any part of the journaling and adhered each strip individually with a line of liquid glue while following the curve of the circle I painted before.
- To finish it off, I trimmed all the excess paper that went out of the page.

This year you can really make your dream come true!
“Capture Your Dream” workshop is a self-paced, six weeks long workshop, that will walk you through a journey of capturing your biggest dream and making it come true.
In the process of making your dream happen – with lots of inspiration and guided self-exploration, you will also create a mixed media mini album from scratch and learn many tips and techniques – including some photography pointers that will add character to your photos and will help you take better pictures of your projects.
The workshop includes 30 printable PDF lessons with step-by-step pictures and instructions as well as several printable templates you may use in other projects too.
I am confident you will enjoy it and find it helpful so I also offer full money back guarantee while the workshop lasts.
Tags: creativity prompt, layout, scrapbook, scrapbook layout, scrapbooking
Posted in creativity prompt | 4 Comments »
July 13th, 2011
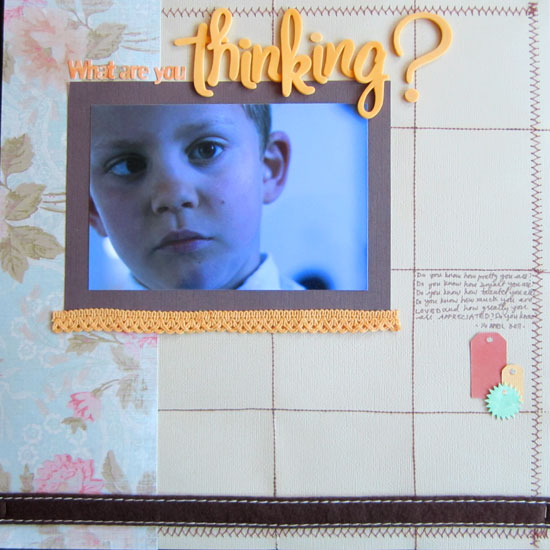
Sometimes the little ones have such profound look on their face that you cannot help but wonder:
what is going on inside their minds?
What are they thinking about?
Do they know how much they are loved?
[A LOT]
Do they know how amazing are they?
[VERY MUCH SO]
I really hope they do…
Products Used
Technique
Machine Stitching
- First I lightly scored the grid with my Martha Stewart Scoring Board. For a 12″ by 12″ page I scored at: 3″, 6″ and 9″ on both directions – horizontally and vertically.
- Then I went through the scored lines with my sewing machine with a simple running stitch. I picked a longer stitch size to avoid any tearing.
- To finish it off I stitched a nice, big again, zig-zag stitch all around the edges of the page.
- To secure the stitching I put a blob of Glossy Accents on each stitch and thread “intersection” at the back.
Back when we were kids creativity came naturally to us. Everything was possible and our prolific imagination was the only limit we knew.
Through the years we have grown apart from our inner creative child and along with that – have lost our pristine and utter joy of creation.
In this e-book I will pave your way back to your inner creative child, brick by brick.
“Unleashing The Creative Child Within You” will explain why you became distant from your core creativity and will reveal the secret to getting it back.
With exercises designed specifically to help you find the inner child within you, regain its confidence and unleash it – you are bound to get your mojo back faster than you think.
Your inner creative child wants to come out and play, so click here to get “Unleashing The Creative Child Within You” now.
Tags: creativity prompt, layout, scrapbook, scrapbook layout, scrapbooking
Posted in creativity prompt | Comments Off on What Are You Thinking?
July 12th, 2011
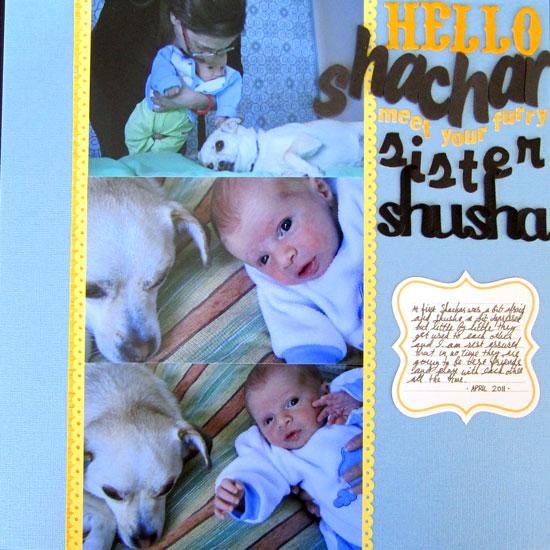
This is the formal introduction of Shachar, my new nephew, and his
furry sister, Shusha.
There’s still some work in that field.
Neither seems to be interested.
But that is going to change, pretty soon…
Products Used
Check out Creativity Prompt’s new and unique self paced workshop: “Welcome Little One”. This workshop will provide you with everything you need, and then some, to make a fabulous handmade mini album to record the first moments of a new born baby.
Tags: creativity prompt, layout, scrapbook, scrapbook layout, scrapbooking
Posted in creativity prompt | 2 Comments »
July 11th, 2011
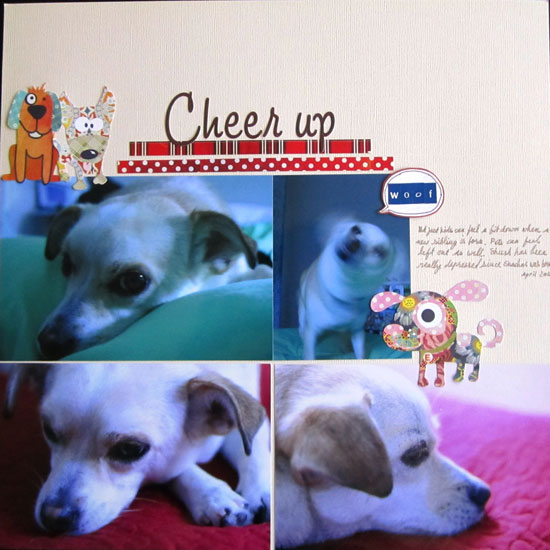
When a new child is born,
his siblings may go through a rough patch.
However, a family’s pet may also experience the same difficulties.
It too may feel a bit neglected, left out.
It too may feel frustrated that although it wants to play with the new siblings, mommy and daddy say “No!” and push it away.
Shusha, too, feels a wee bit depressed.
Just look at that sad face.
I’m sure that in no time they are going to be best friends and play together all the time.
Products Used
- Patterned paper by Basic Grey from the June Bug Collection – in Aggie. [I used both the dogs, the speech bubble and strips from the polka dot backside – very versatile. The tartan pattern is also from that collection.]
- Basic Grey alphabet stickers. [I used an older sheet]
- My Little Shoebox cardstock mini alphabet stickers.
Check out Creativity Prompt’s new and unique self paced workshop: “Welcome Little One”. This workshop will provide you with everything you need, and then some, to make a fabulous handmade mini album to record the first moments of a new born baby.
Tags: creativity prompt, layout, scrapbook, scrapbook layout, scrapbooking
Posted in creativity prompt | 1 Comment »
July 8th, 2011
This week I am sharing a set of FREE tabbed journaling cards with you guys (for personal use only).
To download it simply click on the image (or the link) and if it doesn’t work try to right-click on it and opt for the “save target as…†option (it may be phrased a bit differently on different operating systems – but do NOT opt for the “save image as†option, as you will get the low resolution tiny preview image).
I hope you like it and have lots and lots and lots of fun with it.
Do I see a micro-mini-album in your near future??? If so, please share!
Make sure you didn’t miss the rest of the free printables on Creativity Prompt.
Share
How are you going to use these cards? Please leave a comment and share.
Check out Creativity Prompt’s new and unique self paced workshop: “Welcome Little One”. This workshop will provide you with everything you need, and then some, to make a fabulous handmade mini album to record the first moments of a new born baby.
Tags: freebie, Journaling Cards, journaling labels, Journaling spots, journaling tags, printable
Posted in Freebie | 5 Comments »
July 7th, 2011
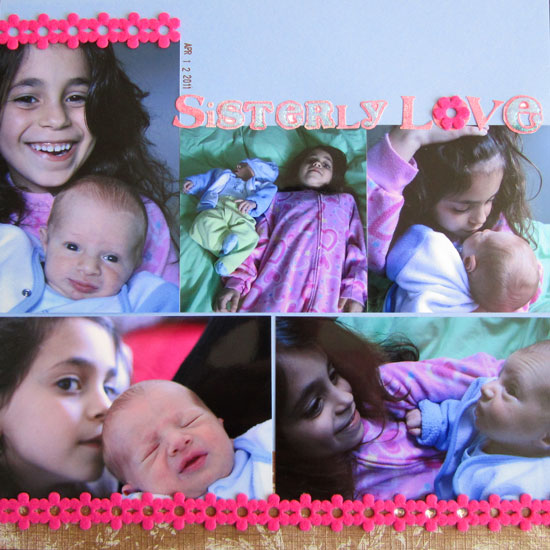
My niece is the same age I was when my young sister was born.
8 years old.
Such a lovely age.
Which is why I understand completely the love-hate relationship between them.
On the one hand, she loves him wholeheartedly and wants to look after him.
On the other hand, she gets frustrated when her mom doesn’t think 8 is old enough to be trusted alone with him.
Plus… he did take away some of the attention.
What I didn’t know and she doesn’t know, is that she is still very much loved.
She is still the little princess in the family.
I just hope the little guy won’t hold a grudge against her.
I know that my little sister did does.
Sorry.
It was all out of love.
Products Used
- Cardstock by Bazzil.
- Patterned Paper by K & Company.
- Trim by Michael’s.
- Letter stickers by Basic Grey.
- Stickles glitter glue in Crystal.
- Smash date stamp by K & Company.
Technique
- To use up my sticker sheet I cut around the outline of letter stickers I’ve already used with precision scissors.
- Then I filled up the outline with Stickles. Which in retrospective, wasn’t the best idea. I think using Glossy Accents would have been better to achieve my dimensional goal.
Back when we were kids creativity came naturally to us. Everything was possible and our prolific imagination was the only limit we knew.
Through the years we have grown apart from our inner creative child and along with that – have lost our pristine and utter joy of creation.
In this e-book I will pave your way back to your inner creative child, brick by brick.
“Unleashing The Creative Child Within You” will explain why you became distant from your core creativity and will reveal the secret to getting it back.
With exercises designed specifically to help you find the inner child within you, regain its confidence and unleash it – you are bound to get your mojo back faster than you think.
Your inner creative child wants to come out and play, so click here to get “Unleashing The Creative Child Within You” now.
Tags: creativity prompt, layout, scrapbook, scrapbook layout, scrapbooking
Posted in creativity prompt | Comments Off on Sisterly Love