/** Font types */

Posts Tagged ‘scrapbook layout’

Project Educate Avital | Layout Inspiration

Wednesday, September 19th, 2012

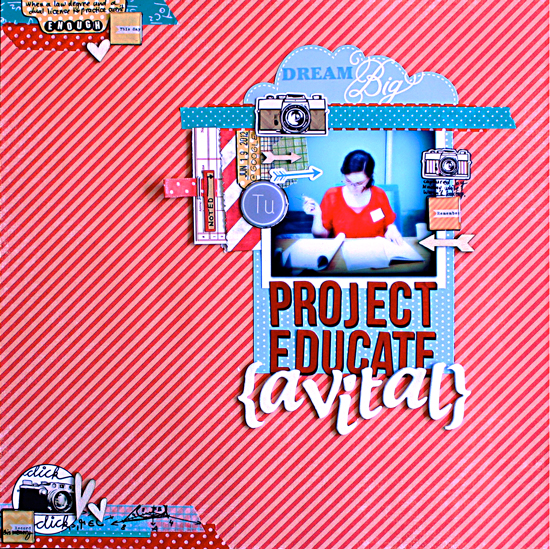
Project Educate Avital Layout

If you like it –

My husband captured this moment with his Android when I wasn’t looking and I really liked the fact that he encapsulated not only the moment but a theme in my current life.

I added a scribble on the top left side of the layout “When a law degree and a dual license to practice aren’t enough”, as I felt it gives the story a bit more depth, as this is not a picture of me studying for a class, but a picture of me acquiring more knowledge and absorbing more information in a quest to swallow the world of knowledge that is out there. A quest that has no rhyme or reason to it and has no specific path. I’m taking coding classes, mathematic classes, history classes, English literature classes, Ethics classes – as well as classes for my Continuing Legal Education credits quota. I’m nuts like that. Whenever I feel especially overwhelmed with lack of time and pressure to finish things, I just add another class that I either self-study or take online.

In this layout I tried a layered look that I usually do not go for, as I am a linear type of person. [a.k.a geek]

It was fun trying a new look, but you can tell that layering isn’t my strong suit… Mainly because I lose patience along the way and start adhering things down too soon.

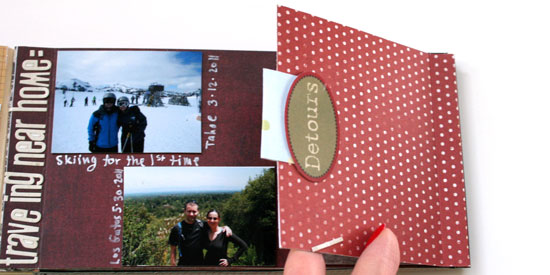
I also added some concealed journaling inside the itty bitty envelope under the photo to include more details and personal notes. I glued an old ribbon that looked exactly like my washi tape to pull the journaling spot from its place.

Supply


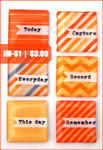
JM-S1 | Record
Spice up your everyday memories with handmade epoxy stickers.

Just $3.00 per package.
6 stickers in each package.
Each sticker measures approximately ¾â€ by ¾â€.

Buy Now

Is It A Card? Is It A Mini Album? It’s A Birthday Gift.

Monday, September 3rd, 2012

Birthday Mini Album and Card

Today my dear husband is celebrating his birthday.

So here comes the proverbial question – what do you get for someone who has everything?

[Mainly because he always wants so little]

The answer is obvious – get him something handmade.

My husband always loves the mini albums and cards that I make for him [or so he pretends…]

This time I decided to make a hybrid – a card which is also a mini album.

It starts with a simple greeting on the cover and it goes on and on and on and on…

It’s basically a very long greeting, illustrated by photos, paper and embellishments.

There is a bonus here… 99.9% of the mini album is from ONE PAPER KIT by Simple Stories.

Plus, I only used about a third of it…

It comes ready with cute stickers, word stickers, letter stickers, border stickers as well as already designed 4″ by 6″ and 3″ by 4″ double sided pages (and other sizes as well). It also contains some 4″ by 6″ transparencies that I used as well (and still have more leftover for other projects).

So all I had to do is come up with the greeting… and the photos and add a few more letter stickers here and there from my stash. I also added a few old Maya Road chipboard arrows. But really – it’s mostly made out of this one paper kit.

Take a look, see for yourselves =>

…and if you like it – please

The Pages

Mini Album Spread by Creativity Prompt

Mini Album Spread by Creativity Prompt

Mini Album Spread by Creativity Prompt

Mini Album Spread by Creativity Prompt

Mini Album Spread by Creativity Prompt

Mini Album Spread by Creativity Prompt

Mini Album Spread by Creativity Prompt

Mini Album Spread by Creativity Prompt

Mini Album Spread by Creativity Prompt

Mini Album Spread by Creativity Prompt

Mini Album Spread by Creativity Prompt

Mini Album Spread by Creativity Prompt

Mini Album Spread by Creativity Prompt

Mini Album Spread by Creativity Prompt

Mini Album Spread by Creativity Prompt

Mini Album Spread by Creativity Prompt

Supply


JM-S2 | Signs
Bring life to your projects with handmade epoxy stickers.

Just $3.00 per package.
6 stickers in each package.
Each sticker measures approximately ¾â€ by ¾â€.


Travel || Oregon Mini Album

Monday, August 27th, 2012

Vacation Mini Album

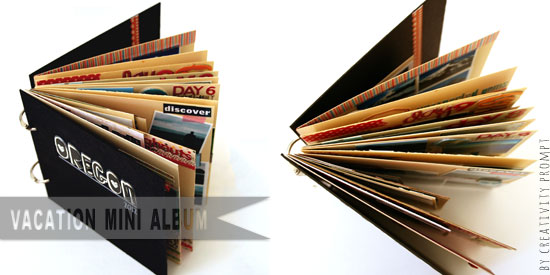
My Oregon mini album is finally done.
That means that I decided that it’s good enough for me.
This decision must come at some point, otherwise nothing will ever get done.

I went for a very simple set-up – just plain 6″ by 6″ cardstock pages and chipboard cover with some pages that are smaller, to accent a place or a memory or a certain day.

If you like it –

The Pages…

Prepare for a long, photo heavy, journey 🙂
I hope your scroll-finger won’t hurt too much…

Travel Mini Album

Travel Mini Album

Travel Mini Album

Travel Mini Album

Travel Mini Album

Travel Mini Album

Travel Mini Album

Travel Mini Album

Travel Mini Album

Travel Mini Album

Travel Mini Album

Travel Mini Album

Travel Mini Album

Travel Mini Album

Travel Mini Album

Travel Mini Album

Travel Mini Album

Travel Mini Album

Supply

I simply raided my stash. I used a ton of letter stickers, word stickers border stickers and mini paper pads.

Unfortunately, not all of them are available for purchase. Some are REALLY old.

I love combining new and old products.

I also used quite a few of my Journaling Mates and my printables.

Here are some of the products I used that are still available (click on the image to be directed to the online store):

You Must Be Really Really Happy To Have Me – Playing With Templates

Monday, March 19th, 2012

scrapbook layout

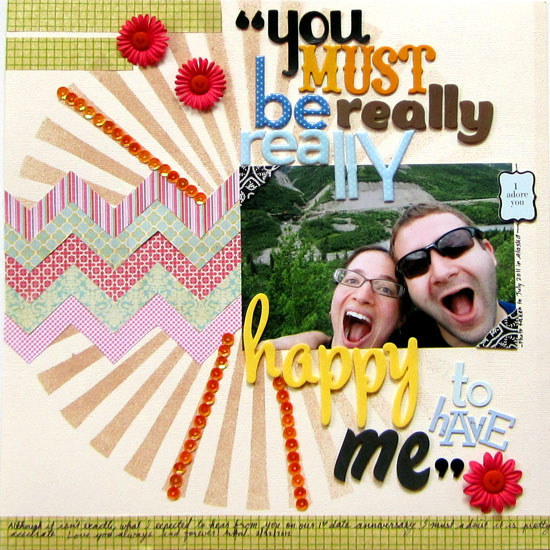
Admittedly, that was not what I expected to hear from my husband on our first-date anniversary but this witty, sarcastic and very vulnerable remark is extremely characteristic of him.

Truth be told, this blurb is pretty accurate – I am thrilled to have him in my life.

So I decided to dedicate a full 12″ by 12″ layout for it 🙂

Supply

How To

  1. First I laid out the large Starburst template so that the left edge of the pattern is aligned with the left edge of the background cardstock and sprayed on it, concentrating the mist to the left side. In retrospective, I should have protected the right and bottom exposed edges with some scratch paper…
  2. Then I took a few coordinating patterned papers and outlined the top 1 and 3 lines in the Mini Chevron template with a pencil, on the back of the patterned paper. Next I cut the pattern off – it’s all straight lines so no major scissor-cutting-deftness is required. Perfect for me.
  3. I then adhered the chevron strips, one by one, aligned to the left edge of the cardstock and placed the photo in a way that would conceal the mini starburst shape in the middle of the template.
  4. Next, I adhered the title with a bunch of different letter stickers, all vary in size/font/texture.
  5. I added a strip of washi tape for the journaling and to conceal the spray on the bottom of the page and added 2 more strips at the top left to balance it out.
  6. I then added three flowers and embellished them with a threaded button.
  7. For the finishing touches and to bring the yellowish orange color from the title I added 3 stripes of sequins. All I did was to put a line of liquid adhesive in the middle of 3 of the ‘rays’ and assemble the sequins in a line on it… Again, Pretty straightforward – just for me.


Unleashing The Creative Child Within You
Back when we were kids creativity came naturally to us. Everything was possible and our prolific imagination was the only limit we knew.
Through the years we have grown apart from our inner creative child and along with that – have lost our pristine and utter joy of creation.

In this e-book I will pave your way back to your inner creative child, brick by brick.

“Unleashing The Creative Child Within You” will explain why you became distant from your core creativity and will reveal the secret to getting it back.

With exercises designed specifically to help you find the inner child within you, regain its confidence and unleash it – you are bound to get your mojo back faster than you think.

Get “Unleashing The Creative Child Within You” for your Kindle
for only $4.99.

You can read the Kindle book on Kindle devices, on your smart phones or on your PC or MAC.

Whether You Are … I Will Always Love You – Mini Album Tutorial

Friday, March 9th, 2012

Mini Album Page

This is what I call a ‘just because’ mini album.
I didn’t make it for a special occasion.
I didn’t make it to document a specific event or trip or day [although the pictures were all taken at the same time, on a ferry in Alaska].
I just had a crafty date and we decided to make mini albums with mini photos and I happen to really like this goofy set of photos of my husband making faces to protest against me taking pictures of him… The idea for the mini album just presented itself – no matter how my husband is at a certain moment – I always and will always love him.

Individual Layouts & Supply

This is a very minimalistic mini album. The reason is threefold: 1. Because I love minimalism. 2. I didn’t want to use anything chunky on the pages themselves, other than on the cover. 3. We wanted to complete the project in one crafty-date, after a full day of work.

Mini Album Page

This is the cover page. I used a couple of dimensional flowers by Basic Grey from the Sweet Threads collection. The paper is by Lily Bee Design from the Head Over Heels collection (how suitable…). The fabric letter stickers are Thickers by American Crafts.

Mini Album Page

The paper is by Lily Bee Design from the Head Over Heels collection and the photo ‘mat’ is one of my free printables… The black letter stickers (on all the pages) are from various Lily Bee letter stickers sheets. The cool flower stickers are actually a border sticker by Crate Paper [from their Portrait Collection], cut into 2 pieces…

Mini Album Page

Here I also used the same Lily Bee papers and stickers as well as a paper by My Mind’s Eye from the Everyday Flair collection.

Mini Album Page

Super simple page… I simply used my free printables and the same Lily Bee’s paper and stickers.

Mini Album Page

Same here…

Mini Album Page

More of that Lily Bee paper as well as a few stickers from Basic Grey’s Sweet Threads collection. Plus a couple of my free printables to add visual interest.

Mini Album Page

Same. Same, with some old and thin strips of fabric tape and additional paper from Lily Bee’s Memorandum and My Mind’s Eye Everyday Flair collections.

Mini Album Page

Here I used Crate Paper’s Emma’s Shoppe paper as well as a small mat from My Mind’s Eye Everyday Flair and the same Lily Bee’s letter stickers.

Mini Album Page

Some more paper from Lily Bee’s ‘Head Over Heels’, a strip of an old Anna Griffin paper tape and letter stickers by Prima.

Mini Album Page

Same good ol’ Lily Bee’s ‘Head Over Heels’ paper and same good ol’ Lily bee’s letter stickers. Can you see the lame pun?

Mini Album Page

To spice it up I used Lily Bee’s ‘Head Over Heels’ paper and Prima letter stickers. Just to make it a bit different…

Just kidding.

It’s always quick and easy to use the same collection for a project, that way everything is tied together.

The chipboard I used to make the actual album is by Grafix and the size is just perfect. I cut each sheet in two and it corresponds to a half sheet of patterned paper from a 6″ by 6″ pad or an 1/8th of a 12″ by 12″ sheet of patterned paper. It doesn’t get easier than that…

How To Make The Body of the Album

  1. Cut a sheet of cardstock to a 3″ wide strip.
  2. Score the strip, lengthwise, every ½”. I am using Martha Stewart’s scoring board – it makes scoring at specific increments really easy.
  3. Fold the scored strip in an accordion fold (peaks and valleys) and attach each chipboard page to the edge of each fold.
  4. Cut the extra folded cardstock when you have enough pages for your album (I needed 12 pages for mine).
  5. To make the spine sturdier, adhere the back side of the folds together.
  6. Adhere patterned paper to each page.
  7. Adhere a piece of 3″ by 3″ pattern paper at the spine and over the edges of the cover pages – apply adhesive only on the edges, and not where the spine is.

Easy Peasy.

First Date Anniversary Mini Album

Tuesday, February 14th, 2012

Anniversary Album

On February 22 (2012) my husband and I are going to celebrate 11 years of togetherness. We’ve been married 4½ years and have been having fun this entire time. Our love just gets bigger, stronger and deeper.

Beware, this is going to be a long and picture heavy post…

I made the mini board album from scratch. All I did was to take an 11″ by 3″ strip of cardstock and score it every ½”. Then I did an accordion fold on that piece and attached 3″ by 6″ pieces of chipboard to each fold (plus 2 pieces of hard plastic I purchased 3 years ago in Dublin, Ireland… that I added as cover.) To complete the look I wrapped a 3″ by 3″ piece of patterned paper around the spine. That is all…

Layouts and supply:

[As this is a personal project, in essence, I blurred a few details. Sorry.]

mini album layout

This is the cover page. I just used an old K&Company patterned paper (to wrap around the spine), an old Heidi Swapp paper tape and fabric Thickers.

mini album layout

Here I used an old Anna Griffin paper tape (red) and Crate Paper patterned paper from the Portrait collection.

mini album layout

Here I used another Crate Paper’s Portrait patterned paper and my free printables which I used all through this album…

mini album layout

Here I used Basic Grey’s Oxford patterned paper and my new obsession- washi tape by Sweet Bella!!!

mini album layout

Here I also used Basic Grey’s Oxford patterned paper and another one of my free journaling spots and Prima’s tiny alpha letter stickers for the title.

mini album layout

mini album layout

Here is another one of my journaling cards, used as a page. What happened is that I was “printer-happy” and had more photos than pages, so I fixed that with a few extra pages that I attached to the album with the fabulous washi tape. So simple and effective. I also adhered a piece of Crate Paper’s Emma Shoppe’s paper to cover the back of the journaling card.

mini album layout

Here you can see the “tail” of the washi tape I used to adhere the extra page in place and for the layout I used another one of Basic Grey’s Oxford patterned paper with a fabric tape, so old I don’t even know where is it from… I always love to mix up old and new supply. This is my way of using up my stash without missing out on the new-ish collections.

mini album layout

Here I used the beautiful Crate Paper’s Emma Shoppe’s paper and my own printable Valentine’s Card that you might recognize from yesterday…

mini album layout

Yet another one of the gorgeous papers from Crate Paper’s Emma Shoppe’s collection and some Lily Bee Design letter stickers. I love the size and font of these stickers but I’m not nuts about their quality.

mini album layout

My love story with Crate Paper’s Emma Shoppe does not end. I used here yet another paper from this collection as well as some of that ancient fabric tape and Jenni Bowlin letter stickers (these are good quality stickers!)

mini album layout

Here I used Crate Paper’s Neighborhood paper and you can see the rest of the title with the fabulous Jenni Bowlin letter stickers. This is a layout about my husband’s healthy sense of humor. To demonstrate that I collected a few screen prints of the hilarious things he writes when we chat. Such a great memory.

mini album layout

Here I used another Basic Grey’s Oxford paper as well as 7 gypsies washi-ish tape that I also like a lot. It’s great for journaling!

mini album layout

This paper is from Crate Paper’s Neighborhood collection, which is great for journaling. I used that to list my notorious nicknames that although I don’t like any of them, my husband keeps calling me by them. I blurred them for 2 reasons: 1. I don’t like them. 2. I use some of them as passwords 😉

mini album layout

Here I used Basic Grey’s Life Of The Party paper as well as these Lily Bee letter stickers.

mini album layout

Here I used another paper from Basic Grey’s Life Of The Party collection and some more of these Prima letter stickers as well as two of my own printables. I blurred the journaling here because I listed all the addresses we’ve had during the last 11 years (quite a lot – in 3 different continents).
mini album layout

Here I used some old Making Memories fabric letter stickers and another paper from Basic Grey’s Oxford collection.
mini album layout

Here I used yet another paper from Basic Grey’s Oxford collection [it’s actually the other half of the page I used before…] and some of my freebie journaling spots and a strip of an a-d-o-r-a-b-l-e washi tape.
mini album layout

Here I used another paper from Crate Paper’s Emma’s Shoppe and some old American Crafts letter stickers [=> Remarks in Lax].
mini album layout

Here I used a woodgrain and striped paper from Basic Grey’s Life Of The Party collection and some Basic Grey’s micro letter stickers that are very hard to find at the moment. I also used some old 7 Gypsies word stickers to emphasizes our travels.
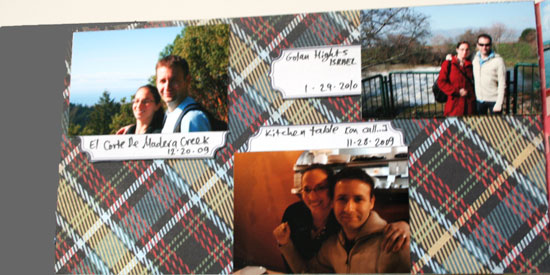
mini album layout

Here I used some more of my free journaling labels and paper from Basic Grey’s Oxford collection.
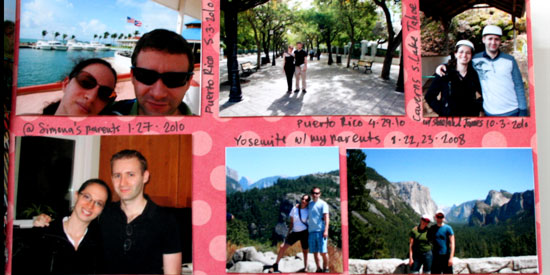
mini album layout

This one is easy. We travel way too much to get extra embellishments in… The background paper is again form Crate Paper’s Neighborhood collection.
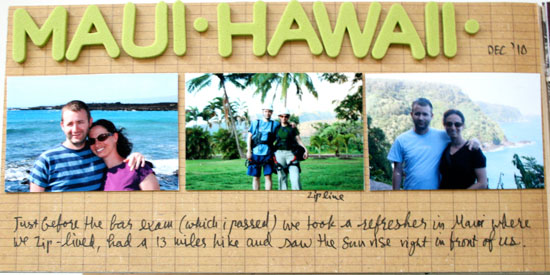
mini album layout

Another easy one… The paper is again from Crate Paper’s Neighborhood collection and the letter stickers are by American Crafts.
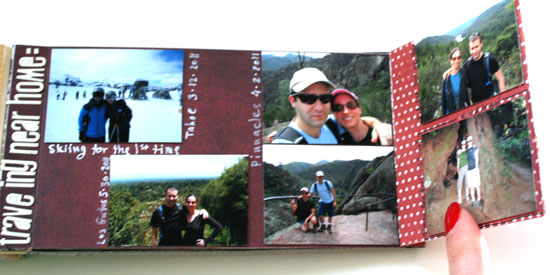
mini album layout

mini album layout

Here I added another page as a ‘flap’. To attach it I scored ½” at the end and applied adhesive to the scored part and adhered it to the end of the existing page. I added an old fabric tape to make an ‘handle’ for the flap. The papers I used are from Basic Grey’s Oxford collection and My Mind’s Eye’s Everyday Flair collection. The title was made with Lily Bee’s Harvest letter stickers [5 points if you spot the missing ‘l’].
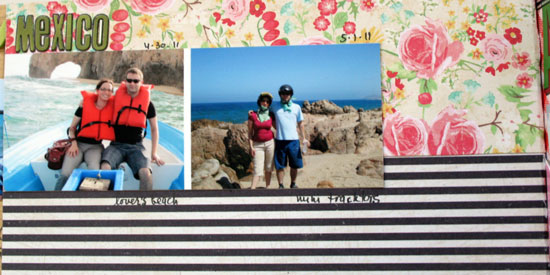
mini album layout

Here I used some more papers from Crate Paper’s Portrait collection and Emma’s Shoppe collection as well as some more of Lily bee’s Harvest letter stickers.
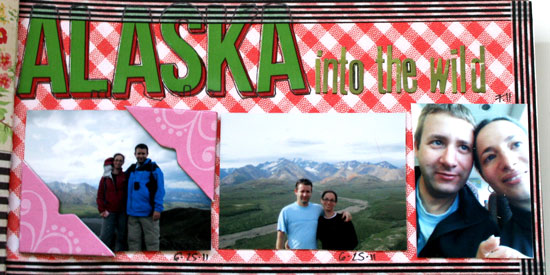
mini album layout

Here I used paper from My Mind’s Eye Everyday Flair collection as well as some more of Lily bee’s Harvest letter stickers and some more of Jenni Bowlin’s letter stickers. I also used some old chipboard photo corners and I also secured the page, after manipulating it too much, with some more of my beloved washi tape.

mini album layout

This is the back side of the page above, so you can see the ends of the washi tape. I also used some more of the old American Crafts Remarks letter stickers and the paper is again from Basic Grey’s The Life Of The Party collection (many woodgrain papers in there).
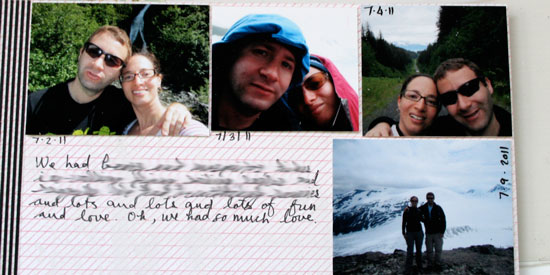
mini album layout

Here I used another paper from My Mind’s Eye Everyday Flair collection. This is a simple page. It’s mostly about the journaling, which you cannot see…
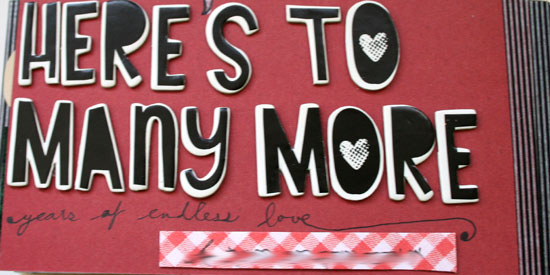
mini album layout

This is the last page of this album, but it represents our wish for many, many more years of love and togetherness. I used Cosmo Cricket’s chipboard letter stickers (that are on clearance…) and a piece of paper from My Mind’s Eye Everyday Flair collection (which is also on sale).

I hope you are not completely bored by now.
However, if you are still in focus, have you noticed that each and every photo is of the two of us together?

Thank you for stopping by!
The One And Only

Thursday, August 4th, 2011

The One And Only Layout

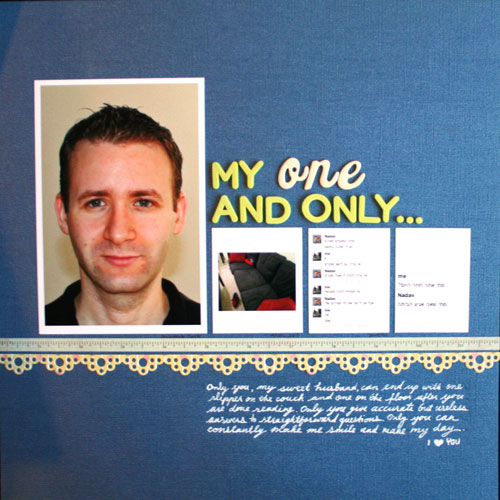
My husband has quite a unique personality.
Another reason why I love him so much.

When you ask him something you never know what kind of answer to expect.
And after he leaves a room, you never know what you’ll find there.
I decided to record those funny quirks so I’ll always remember him by it.

To do that I took a few screen shots of our Google chat, our main line of communication while he’s at work.

In those chats you can find one of his accurate but useless answers,
(“when will you come home” “when I’ll get there”)

one of his funny answers
(“we need to eat dinner early today” “So start working on that” “but I don’t have my pots and pans with me…”)

and a snapshot of something only he manages to do – leaving the sofa with one slipper on it and one on the floor…

I love him.

Supply

Unleashing The Creative Child Within You
Back when we were kids creativity came naturally to us. Everything was possible and our prolific imagination was the only limit we knew.
Through the years we have grown apart from our inner creative child and along with that – have lost our pristine and utter joy of creation.

In this e-book I will pave your way back to your inner creative child, brick by brick.

“Unleashing The Creative Child Within You” will explain why you became distant from your core creativity and will reveal the secret to getting it back.

With exercises designed specifically to help you find the inner child within you, regain its confidence and unleash it – you are bound to get your mojo back faster than you think.

Your inner creative child wants to come out and play, so click here to get “Unleashing The Creative Child Within You” now.

Spiced Hot Chocolate

Wednesday, August 3rd, 2011

Spiced Hot Chocolate

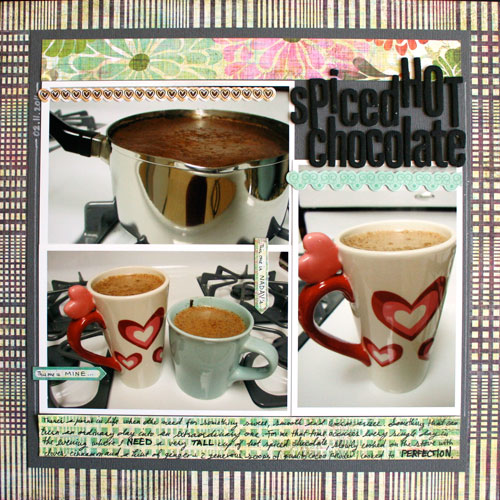
A while back I documented a new tradition we started at home.
A very sweet and rather scrumptious one.
[Check out the link for the recipes]
Each evening we drank a cup of hot chocolate and had a slice of cheesecake.
Nowadays, we still eat that light cheesecake quite often, but not every night.
And my husband neglected the daily hot chocolate altogether.
However, I still drink hot chocolate every single day
and I enjoy it very much.

In the layout you can see how there is no equality in our house when it comes to hot chocolate.
I get the big HUGE mug!

In this layout I tried to convey the warmth of the hot chocolate and spices with “comfy” patterns and a lot of colors.

Supply

Make Your Own Planner Workshop
This year you can really make your dream come true!

“Capture Your Dream” workshop is a self-paced, six weeks long workshop, that will walk you through a journey of capturing your biggest dream and making it come true.

In the process of making your dream happen – with lots of inspiration and guided self-exploration, you will also create a mixed media mini album from scratch and learn many tips and techniques – including some photography pointers that will add character to your photos and will help you take better pictures of your projects.

The workshop includes 30 printable PDF lessons with step-by-step pictures and instructions as well as several printable templates you may use in other projects too.

I am confident you will enjoy it and find it helpful so I also offer full money back guarantee while the workshop lasts.

Sock Of The Day

Tuesday, August 2nd, 2011

Sock Of The Day

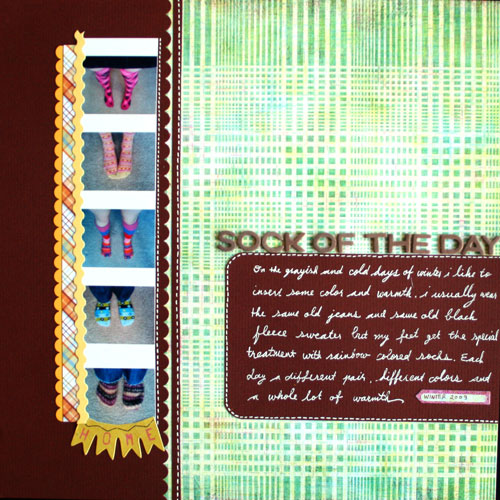
My feet get cold in the winter.
I like warm feet.
Thus I wear socks.
Very colorful socks.
That is all.

What makes you feel at home? What warms you up during winter and what keeps you cool during summer?

Supply

Make Your Own Planner Workshop
Check out Creativity Prompt’s self paced workshop: “Capture Your Dream”. In this workshop you will capture, follow and make your dream come true as well as document your journey in a fabulous mixed media mini album.

Just A Perfect Day

Monday, August 1st, 2011

Just A Perfect Day Layout

There are a million and one reasons why I love my husband so much.
This is one of them.

Last December we were trying to figure out our goals for 2011.
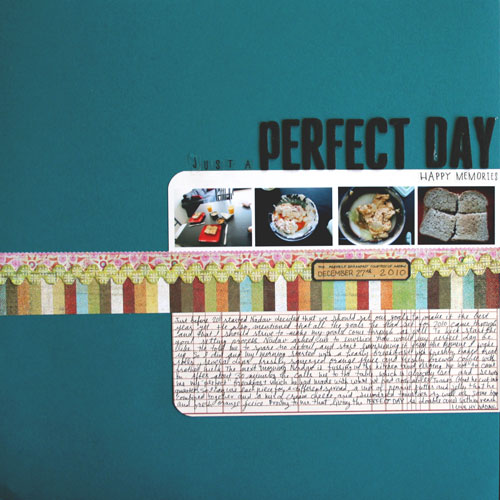
To get me into the New-Year’s mood, my husband told me to envision what would be a perfect day for me.
He told me that I should get down to the littlest of details and start from the moment I wake up.
So I went on and on, trying to see this perfect day in my mind’s eye.

The following day, I woke up and my husband was fussing at the kitchen.
I asked him what was going on but he told me to sit still and steer clear of the kitchen.
After about 30 minutes he called me and on the table waited the perfect breakfast.
The same one I envisioned the day before.
(or a close version thereof)
made with what we had at hand.
He even tried to make “specials” by mixing the peanut butter and jelly in a bowl and also mixing some sun-dried tomatoes with cream cheese, a-la-tapas…

I couldn’t believe my own eyes.
My husband whose recipe for a fried egg is: “Avital, I want a fried egg”,
initiated and executed all of that.

He wanted to teach me a lesson.
A lesson very well taught:

The road to making your dreams come true,
the alleyway to the perfect day,
exists.

All you have to do is take what you have at hand and go get it.

Lesson learned.

Supply

Share

How does your perfect day look like? Please leave a comment and share.

Make Your Own Planner Workshop
Check out Creativity Prompt’s self paced workshop: “Capture Your Dream”. In this workshop you will capture, follow and make your dream come true as well as document your journey in a fabulous mixed media mini album.