This project is also an easy one you can whip up in under 10 minutes. I love those type of projects and I can never have enough notebooks to sketch, doodle and write in. Can you?
I used the ribbon for the binding, as an alternative to the linen thread or embroidery floss I normally use for binding and as an added bonus, the ends of the ribbon also provide a nifty closure for the notebook.
If you are interested in making this sweet and simple notebook, then keep on reading for the supply, video how to and step-by-step instructions. Enjoy!
Tools & Supply
- Plain white paper (I used 10 papers for a 40 pages notebook)
- Cardstock (8½” by 5½”)
- Bone Folder
- Craft Knife
- Paper Trimmer
- Grid ruler
- Paper piercer
- Needle
- Satin or silk ribbon (1/8″ wide)
- Scissors
- Embellishments – buttons, Basic Grey “Indian Summer” paper, 5/8″ circle Punch, Diamond Glaze.
How To
[Watch on YouTube. While you’re there, please comment, rate & subscribe]
Step-by-Step Instructions
- Cut your papers 8″ wide and 5½” tall. Fold in half to 5½” by 4″.
- Straighten the edges of the paper stack with a grid ruler, aligned with the edge of the paper and a craft knife.
- Cut your cardstock 8½” wide and 5½” tall and wrap around the paper stack to adjust the spine.
- Lay the paper stack over the cardstock cover and mark the piercing holes: one at the center and one to each side – 1″ apart.
- Pierce the papers and cardstock following the marks you created before.
- Thread the ribbon through the needle so both ends would meet and start the binding stitching from the inside out, through one of the outer holes.
- Then go in through the opposite hole.
- Tie the ends together in a double knot and thread the needle out through the center hole and in again through the same hole.
- Thread the needle through the loop the tied ends create and then underneath the first stitch.
- Thread the needle out through the center hole again.
- Cut the ribbon off the needle and use the ends to close the notebook.
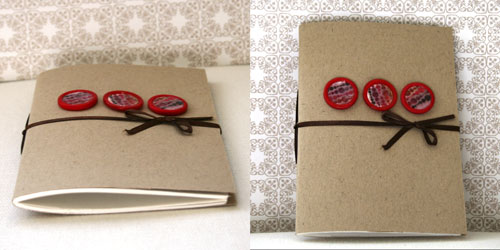
- To embellish the notebook I adhered 3 buttons with a dab of Diamond Glaze to the center of the notebook’s cover and adhered three punched out circles of patterned paper to the button. I then secured the patterned paper with another layer of Diamond Glaze.
Share
If you have any question, suggestion or remark – don’t hesitate to contact me – either leave a comment here, use the contact form or start a new thread on the Creativity Prompt Flickr Group!!!
I would also be very happy to see your own creations, so don’t be shy and share 🙂

“Capture Your Dream” workshop is relaunching as a self-paced workshop. Isn’t this the perfect time for you to capture your dream and make it happen?


