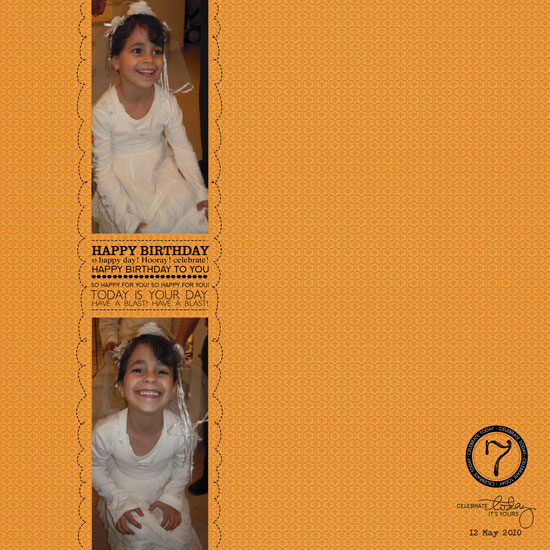
/** Font types */

Posts Tagged ‘Digital Brushes’

Remember When (Plus A Free Photoshop Template)

Thursday, September 9th, 2010

San Francisco with Dad

[Font: KD Everyday; Digital Kits:KD Rousti, KD Digi Essentials #2, KD Digi Essentials #5, KD Crush, KD Fly Girl – all font and kits by Karla Dudley. I made the polaroid frames myself.]

Free Download

You can get the polaroid template here. Either click on the link and unzip the file or right-click on it and opt for the “save file as” option.

(The template is for personal use only.)

The Story

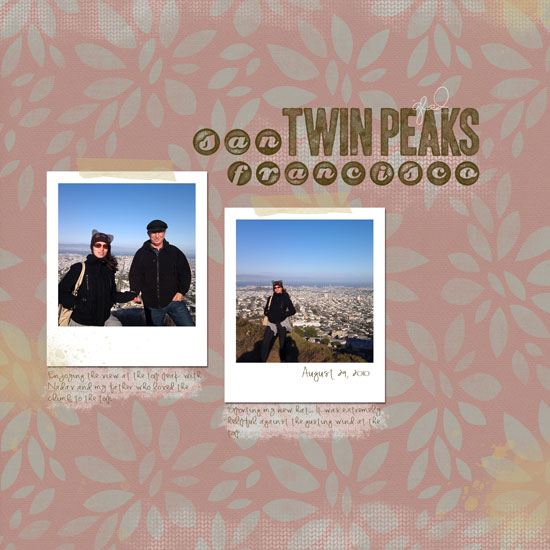
These photos were taken with my husband’s Nexus 1 phone a couple weeks ago.

It was the last day trip we took with my parents before they came back home. We went to San Francisco and enjoyed the beautiful urban landscape and great cuisine.

At the end of the day, as the last rays of sun shone above us we went to Twin Peaks for a marvelous bird eye view. As we climbed higher and higher the wind became almost violent and blew in gusts tight through us but the view became even more amazing.

I am so glad my father had the opportunity to join us for the short climb and enjoyed the extraordinary view of the city. The look on his face was so precious that I still remember and cherish it.

Share

What is your last cherished memory? Please share it with me by leaving a comment on this post.

Welcome Little One Workshop
Check out Creativity Prompt’s new and unique self paced workshop: “Welcome Little One”. This workshop will provide you with everything you need, and then some, to make a fabulous handmade mini album to record the first moments of a new born baby.


Make Your Own Planner Workshop
Check out Creativity Prompt’s self paced workshop: “Capture Your Dream”. In this workshop you will capture, follow and make your dream come true as well as document your journey in a fabulous mixed media mini album.

Employ Your Sense of Humor – Journaling Prompt

Monday, June 14th, 2010

My Shoes Addiction

[Font: VT Portable Remington; Digital Kits: KD Sun Kissed (background paper + frame), KD Handwritten Summer (accent brush), KD Stamp Alpha (title), KD Digi Essentials (stitches) – all by Karla Dudley.]

As far as journaling is concerned stop being so serious about it. Not every story has to be a masterpiece worthy of a Pulitzer prize.

Your sense of humor is also a part you would probably like to preserve for posterity.

Humor is especially called for in layouts featuring photos you took to capture a moment in life, rather than an actual story, a piece rather than the whole. When you look at your layouts you can remind yourself of that humorous moment or silly piece of life and read your journaling and have a good laugh.

After all, what more can you ask from a layout than making you feel better at time of distress?

My journaling reads:

The first step to a successful recovery is admitting you have a problem. I admit no such thing! I have absolutely no problem. It is completely reasonable to have a shoe to match every piece of clothing you own. It is totally natural to covet each shoe you see and do not already possess. It is purely logical to assume that painting your toe nails and wearing high heal studded shoes is enough to be considered fully clothed. It is customary to wear red open toe 5 inch heal and a patent leather flower to go grocery shopping, oh and it is totally acceptable to wear flip flops to negotiation meetings. All shoes are created equal. Yes. I do not have any problem!
April 2010

Digi Tip

To create the “stitched” strike-through line over the word ‘addiction’ in my title I used various pieces of the stitches image. All I did was to select a piece of the image with the rectangular selection tool and than with the move tool, to pick up the selected piece and lay it down on the title, next to the original image, slightly down. Than I used the move tool to nudge it sideways and repeated the process with another piece of the image. That gives the illusion of the sewing machine running back and forth. Sort of…

Share

Do you use humor or sarcasm in your layouts? How? Please share with me and leave a comment.


Make Your Own Planner Workshop
Check out Creativity Prompt’s self paced workshop: “Capture Your Dream”. In this workshop you will capture, follow and make your dream come true as well as document your journey in a fabulous mixed media mini album.

Nip and Tuck Your Digital Brushes

Thursday, June 3rd, 2010

Celebrate Seven

[Font: Adler; Digital Kits: KD Happy Day & KD Digi Essentials 5 (the number 7) – all by Karla Dudley.]

I may be prejudiced but I think my niece has the brightest, most beautiful smile I have ever seen.

I’d send some celebrities over for a red carpet seminar if I could. I really would.

Anyways…

This is the third birthday that I have missed and I am forever grateful that my sister takes the time to take the pictures as well as send them my way. I value these pictures so much, in fact, that I always immediately try to put together layouts with the stories behind the photos. As I only live vicariously through these photos, the stories I can tell aren’t so long and detail oriented. I mostly just try to capture the moment visually – as I imagine it had been.

In this layout I used Karla Dudley’s new kit: KD Happy Day, almost exclusively (minus the digit ‘7’). On the right corner of my layout you may find a word-art image: “Celebrate today, it’s yours”. If you take a moment and look at the kit, you won’t find this image as it shows on my layout. Why? Because I had engaged myself in a minor digital surgery… Nipping the second part of the sentence and tucking it underneath.

Rearranging a digital image is basically the same as snipping a clear stamp off and repositioning its parts to conform to your design and needs (or inking up a different part of the stamp each time). Here is how to do that:

How To

  1. Open your image on Photoshop Elements. (If you are concerned about writing over your original image, use the ‘open as’ option.)
  2. Pick the rectangle selection tool and by clicking and dragging, choose the part you wish to sever. When you are done you will see the marching ants sign around the outline of the image. Make sure you haven’t accidentally picked any other part of the image. If you did – just choose it, while clicking the ALT/OPT key, to deselect.
  3. Make sure the layer of the image is selected – it will be highlighted if so.
  4. Pick the move tool and click and drag the part you have selected to its new place – it’s that easy. (You may also delete it altogether by clicking the DELETE key while it’s selected).
  5. Be careful not to get addicted and makeover your entire stash of digital images.

Share

Have you ever tried to alter your digital stash (or your traditional stash…)? Please, do share. Just leave a message and brag.

Make Your Own Planner Workshop
Check out Creativity Prompt’s self paced workshop: “Capture Your Dream”. In this workshop you will capture, follow and make your dream come true as well as document your journey in a fabulous mixed media mini album.