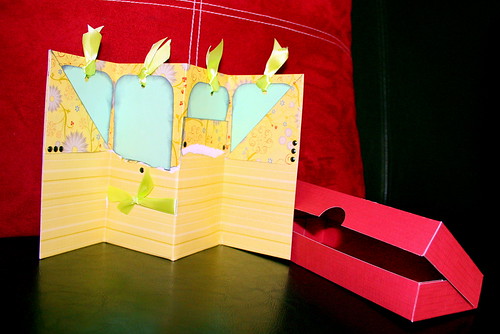
For this week’s creativity prompt I have a quick and easy project for you. All you need are 3 sheets of 12″ by 12″ cardstock (OK, and some double sided tape).
With such an easy and low maintenance project I am sure every single one of you can make this beautiful tag book, along with the cute little matching box. This makes a great keepsake for yourself or a thoughtful, yet very affordable, present for a loved one.
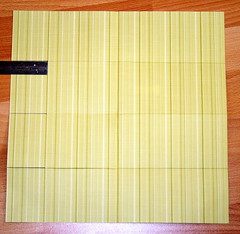
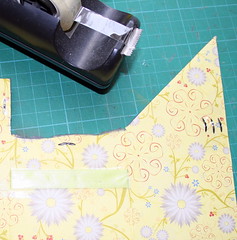
Score one side of the cardstock every 3 inches and the other side at 6 inches.
Cut 3″ down each 3″ score line on one side.
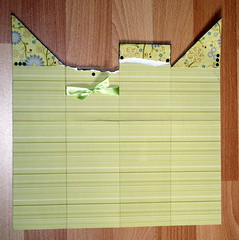
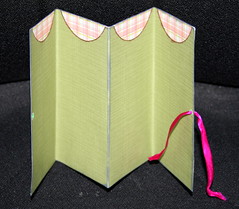
Fold and embellish the 4 flaps of the cardstock anyway you wish. You can get some ideas from this picture:
Here is another way of creating the pockets for the tags. You can create that with a circle punch:
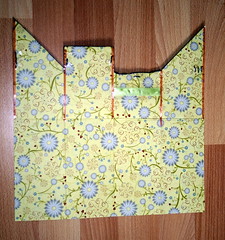
Optional – Apply short strips of packing tape to seal the tips of the brads and the ribbon on the inside of the pockets to prevent the tags from getting stuck inside.
Apply double sided tape to the seam of each fold line, as well as to the edges of the cardstock. Then fold along the 6″ line and adhere the two sides together. As an alternative, you can run all these lines through the sewing machine, and create the pockets after folding along the 6″ line.
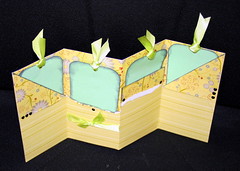
For the tags, cut 4 pieces of cardstock at: 2 5/8″ by 5½”
You can embellish the tags with an ink pad, a corner rounder and some ribbon – and your tag book is ready!!!
Cardstock Box
The box tutorial video is given as a courtesy of Jennifer Muraoka. Jennifer is an extremely talented artist and I enjoy following her creations both on her blog: “Kiyomi Krafts” and on her You-Tube channel. Apart from her wonderful creations, she also conveys her great personality through her tutorials and blog posts.
Share
Share your tag book creations on the Creativity Prompt Flickr group or by leaving a comment on this post with a link to your creation. You are also welcome to share your thoughts about this tag book and to suggest ideas on what to use it for. Your comments are always adding so much value to the prompts, so keep on commenting 🙂


![Reblog this post [with Zemanta]](http://img.zemanta.com/reblog_b.png?x-id=7bb7c0c2-91d3-4322-a395-829a6968bda7)


