 OK. I’ll admit it. I am addicted. Addicted to boxes… Luckily I have been moving a lot in the past years, so I got to buy boxes and treys over and over again. I just LOVE that everything has its place. Be it the tiniest of places, but a dedicated one.
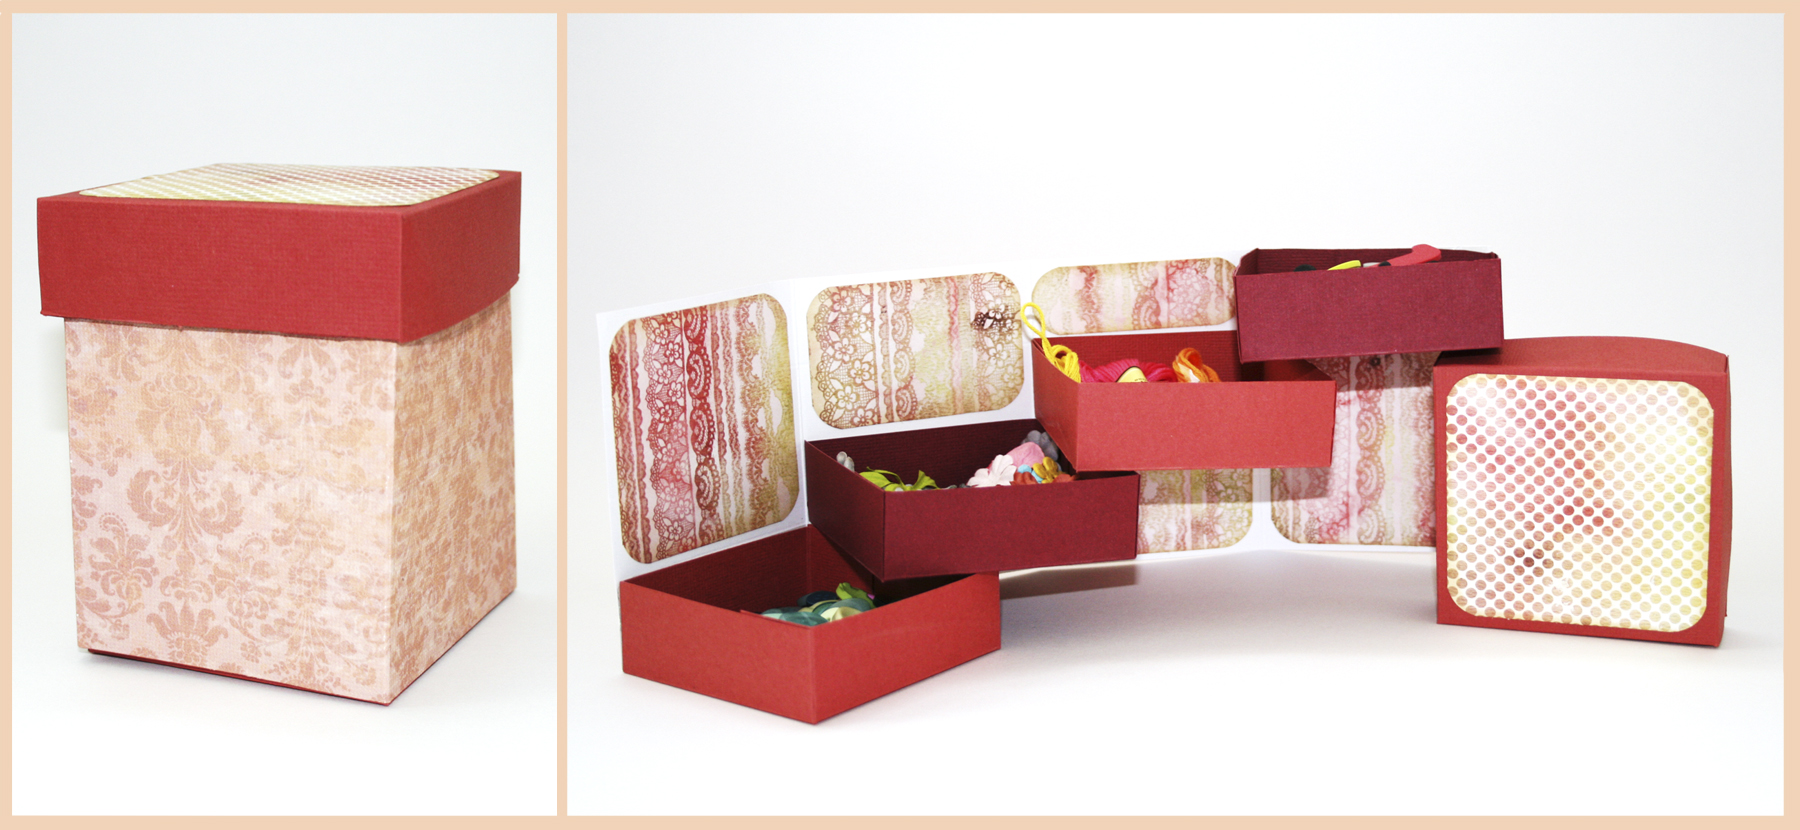
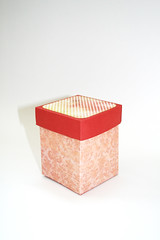
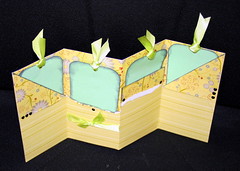
Therefore when I saw this idea of a box of drawers online (in numerous places) I immediately knew that this project is right up my alley. So I whipped up my own version of this project with a couple quick sketches and voilà , in about 20 minutes I had one more box to add to my collection.
Usage Ideas for the Box of Drawers
- Sewing kit – A place for your threads, threaders and needles.
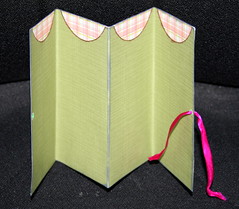
- Embellishments center (as shown above) – You can put your buttons, paper flowers, die cuts, eyelets and brads all in one place.
- Office supply organizer – A chic way to camouflage your paper clips and staples stash…
- Family “Mail-Box” – Attach a name tag to each drawer and leave heartfelt notes to each other. (This project can accommodate any family size, just alter the height of the drawers for a smaller family, or add more drawers and alter the height of the box for a bigger family).
I’d love to hear what ideas you come up with… so please do share!
So if you feel like making your own box of drawers keep on reading:
Tools & Supply
- Cardstock
- Patterned Paper
- Distress Ink
- Strong double-sided tape adhesive
- Tape runner
- Paper trimmer
- stylus
- bone folder
- scissors
- Corner rounder
How To
[The great music is by Josh Woodward from his album “Here Today”].
Step-by-step Instructions
- Drawers –
- Cut 4 pieces of 5″ by 5″ cardstock. [The following applies to each of the 4 pieces]
- Score at 1″ all around. To make it easier to score, align your cardstock with the 4″ mark on your paper trimmer.
- Fold all your score lines with a bone folder.
- Cut one slit on each flap up to the first score line.
- Apply strong adhesive to the back of each flap. Make sure the flap is covered entirely.
- Adhere all the flaps together to the edges of the drawer, aligning edge to edge.
- Body –
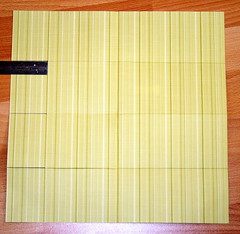
- Cut your cardstock at 4″ by 12″. You can use patterned cardstock.
- Score your cardstock at: 3″, 6″ & 9″ lengthwise and fold all your score lines with a bone folder.
- Score LIGHTLY widthwise at each 1″ to draw some guidelines for the placement of the drawers.
- Apply a strong double sided tape to each of the box’s walls in increments of 1″.
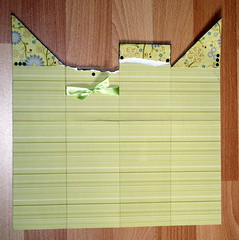
- To embellish the inside of the boxes cut 6 pieces of patterned paper, as follows: 2 pieces at 2¾” by 2¾”, 2 pieces at 1¾” by 2¾” and 2 pieces at ¾” by 2¾” – Round their corners and ink the edges with distress ink. Then adhere to their respective place on the interior of the box.
- Adhere the drawers to the box. Make sure not to place a drawer nor to apply adhesive on any of the score lines.
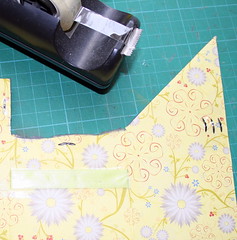
- Lid –
- Cut your cardstock at: 5¼” by 5¼”.
- Score at 1″ all around. [Again you can align your cardstock with the paper trimmer’s 4¼” mark].
- Cut a slit on each of the flaps up to the first score line.
- To decorate the lid, cut a piece of 3″ by 3″ patterned paper. Round its edges and ink it up with distress ink, then adhere to the center of your cardstock.
- Apply strong double-sided tape to the back of each of the flaps and adhere together, aligning edge with edge.

Share
If you have any question, suggestion or remark – don’t hesitate to contact me – either leave a comment here, use the contact form or start a new thread on the Creativity Prompt Flickr Group!!!
I would also be very happy to see your own creations, so don’t be shy and share 🙂

![Reblog this post [with Zemanta]](http://img.zemanta.com/reblog_b.png?x-id=7bb7c0c2-91d3-4322-a395-829a6968bda7)


