/** Font types */

Posts Tagged ‘Layout templates’

New Release – You Are Amazing by Shimelle Laine

Tuesday, June 1st, 2010

You are amazing

[Font: Adler; Digital Kits: You Are Amazing & Trip To Nature Papers – both by Shimelle Laine for Two Peas In A Bucket.]

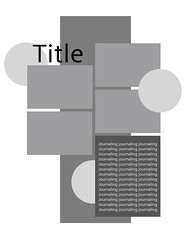
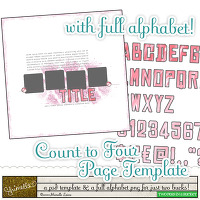
Shimelle has released another fabulous page template with a matching woodgrain alpha set. I love this new kit, it’s funky, but still very linear and clean.

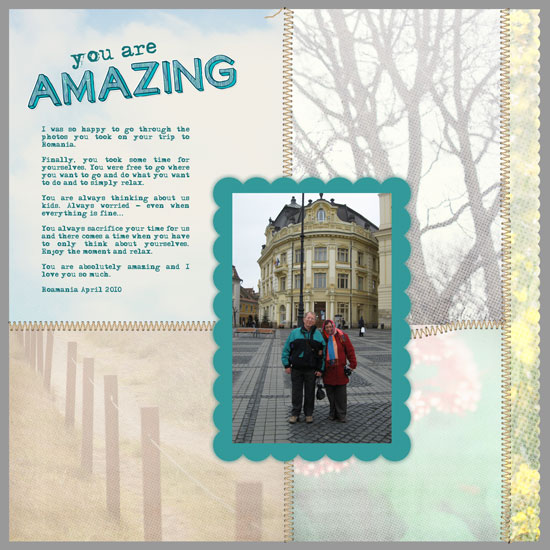
I made this page for my parents who keep living their lives for us and almost never taking time for themselves.
This photo was taken in one of the rare occasions they actually took the time…

I love them so much 🙂

Make Your Own Planner Workshop
Check out Creativity Prompt’s self paced workshop: “Capture Your Dream”. In this workshop you will capture, follow and make your dream come true as well as document your journey in a fabulous mixed media mini album.

Creativity Prompt – Flip Your Template

Thursday, May 27th, 2010

Mommy's Girl

[Font: Adler; Digital Kit: Count To Four by Shimelle Laine for Two Peas In A Bucket.]

Count To Four Kit Last week I used the Count To Four template and alpha kit as is, just tweaking the colors, adding a background paper and some accent flourishes.

This week I wanted to use the exact same template, which I really like, but to make it look completely different. I also had no more than a few minutes available to make it happen… Busy times.

Well, easy.

All I had to do was to flip the template [“image” => “rotate” => “90 degrees to the right”]. I also moved the text box and title around and ended up with a completely different layout with the same 2 Dollars template… Completed in about 15 minutes.

Does it get any easier than that?

It is really important to get the stories down before they are forgotten, but many times we just do not have the time to reinvent the wheel, come up with a great design and start from scratch. Using a template (or a sketch) is a great way to go about it, but there’s a limit to how many templates we can go out and buy, isn’t it?

So here’s a good way to utilize the template you already have (or the layouts you’ve already designed) – just flip them. Vertically, horizontally, sideways. Tweak them a bit here and there and get a fabulous completely new, well designed layout in a snap.

Share

Do you reuse loved layout designs? Please share your thoughts by leaving a comment.

Creativity Prompt – Working With Sketches – Scrapbook Layouts

Friday, May 15th, 2009

Last week we were using sketches to make handmade cards. This week we go back to our trusty Adobe Photoshop Elements 7.0 or handy-dandy grid paper and plan scrapbook layouts.

The idea is the same – planning the layout in advance helps in looking at the design as a whole, making sure it is harmonious, balanced and complete.

Also using a grid helps to figure out all the measurements for us and all we have left to do is to pull out our supply, cropped photos, paper trimmer and grid ruler and start playing.

In scrapbooking there is an additional advantage which is the ability to use the sketch as a layout template for digital scrapbooking. To learn how to use a digital layout template check out this nifty video by Jessica Sprague.

As a bonus to my fabulous readers I am making this week’s sketch available for a free download (for personal use only) both for digital and traditional scrapbookers. Just click on the right button below:

free template downloadfree template download

Translating the sketch into a layout –


[Music is by: Josh Woodward]

Some tips & techniques shared on the video

  • Use the grid ruler to find the center of your cardstock (or any other element) easily. After finding the center, it’s really easy to figure out the right placement.
  • Use the grid ruler to align your elements together. Just place the ruler on your element and make sure the grid line is aligned with the edge of your element and that the ruler protrudes from the edge at the exact size of your desired gap, then align the next element with the ruler’s edge.
  • Use your paper trimmer together with a stylus to create straight journaling guides. Just score your journaling box or journaling tag at every ¼”.
  • To create a perfect half circle notch, just temporary adhere your photos on a scrap piece of paper (junk mail will do just fine) with the same alignment as they are supposed to have on your layout. Then punch out your half circle, using an hand-held punch.
  • When using a colorful and vibrant photos on top of a bright-colored background you can add interest without overwhelming the eye by using either lace cardstock or an overlay instead of regular patterned paper.
  • Embossing adds texture and interest. To emphasize the embossing use a cardstock with a white core (or otherwise different colored core cardstock) and lightly sand it to reveal the core on the embossed image.

Share

If you have any question, suggestion or remark – don’t hesitate to contact me – either leave a comment here, use the contact form or start a new thread on the Creativity Prompt Flickr group!!!

I would be VERY happy to see your layouts based off of the sketch here, so don’t be shy and share – either leave a link at the comment section or share on the Creativity Prompt Flickr group‘s pool 🙂