Many people ask me how I make my printables.
My answer is: one layer at a time…
This is how you work with Photoshop.
You start thinking in layers.
I try to come up with shapes and styles and then, by trial and error, I create these on photoshop with the shape tools and all the masks and filters Photoshop has to offer.
Then I add other layers with lines, graph paper, patterns and brushes…
Today I wanted to share how I make one of these brushes I am talking about – a doily brush.
The same technique works with any other flat object. Lace trimmings? Why, yes!
So, without further ado:
I hope it was helpful and that you’ve enjoyed my tutorial.
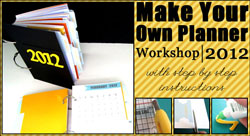
Check out Creativity Prompt’s unique self paced workshop: “Make Your Own Planner”. In this workshop you will make a beautiful handmade planner for 2012. Not only will you get the planner kit for instant download, but you will also get a high resolution video tutorial as well as printable instructions to guide you on each step of the way. Either treat yourself or get it to create wonderful gifts for your family and friends.
Join now – for only $12

Back when we were kids creativity came naturally to us. Everything was possible and our prolific imagination was the only limit we knew.
Through the years we have grown apart from our inner creative child and along with that – have lost our pristine and utter joy of creation.
In this e-book I will pave your way back to your inner creative child, brick by brick.
“Unleashing The Creative Child Within You” will explain why you became distant from your core creativity and will reveal the secret to getting it back.
With exercises designed specifically to help you find the inner child within you, regain its confidence and unleash it – you are bound to get your mojo back faster than you think.
Get “Unleashing The Creative Child Within You” for your Kindle
for only $4.99.
You can read the Kindle book on Kindle devices, on your smart phones or on your PC or MAC.