/** Font types */

Posts Tagged ‘Hybrid Scrapbooking’

Hybrid Mini Album – Step By Step

Monday, September 6th, 2010

Hybrid Mini Album - Collage

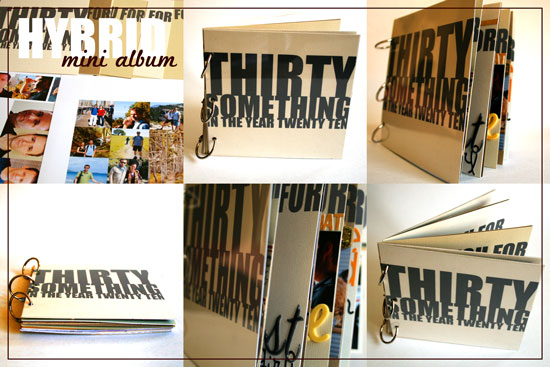
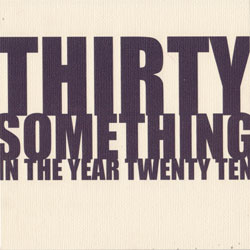
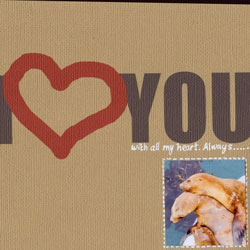
On Friday my husband turned thirty.

My beautiful, wonderful, perfect husband has joined the thirty something group and I will join him in October.

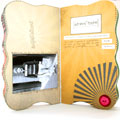
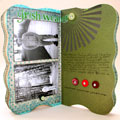
I wanted to make a book telling him how awesome he is while incorporating photos from the last year in our life (and one from 29 years ago…)

The easiest way for me to go about it was to make a hybrid mini album.

A hybrid is an album created partly digitally on the computer and partly traditionally with papers, adhesive and other scrapbooking goodies.

I created all the photo collages and titles for the album with Adobe’s Photoshop Elements 8.0 and the rest by hand, here is how I went about it:

Supply

In this album I was using a ton of different products I have had piled up in my office, so I will not tire you with the complete list. I will only highlight some of the main products I was using and loving.

Step By Step Instructions

Digital Part

  1. Open a letter size file with 300 DPI resolution.
  2. Use the rectangle shape tool to draw a 6 by 6 square in the middle of your page – that will be your page base. Choose a very faint color for the square, to save ink later…
  3. Create your design only on the 6″ by 6″ area. (I only used fonts, “Impact” in particular.)
  4. To print your design, click on the eye icon next to the layers with your page design, that will conceal everything but the 6 by 6 square.
  5. Print your page on plain copy paper. It will be used as your positioning guide later.
  6. Now conceal the square by clicking on the eye icon and reveal your design again.
  7. Adhere a 6″ by 6″ piece of cardstock to the printed rectangle on your copy paper. Use temporary adhesive to make its removal easier.
  8. Put your copy paper through your printer again, with the cardstock attached to it.
  9. Print your page design.
  10. Repeat. (You don’t have to print the positioning guide again if you don’t move the square on your screen.)
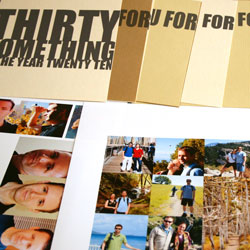
  11. For the photos I just cropped each photo individually to the size I wanted it and layered all the photos on a letter size document I then printed on photo paper.
  12. raw materials

Traditional Part

  1. Crop all your photos.
  2. Design your pages, add letter stickers to add texture to the rather flat printed titles.
  3. You may also use the free journaling tags you can find here, on Creativity Prompt. They will help you add your journaling in an easy and polished way.
  4. After you finished all the pages design, gather all the pages in the order you want them to be and make sure no page is rotated.
  5. I also added two 6″ by 6″ acetate pages to protect the front and back cover pages.
  6. Use the crop-a-dile to punch holes for the book rings. Punch them at 1″, 3″ and 5″, about ½” from the edge.

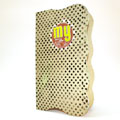
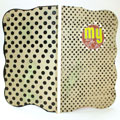
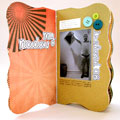
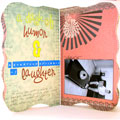
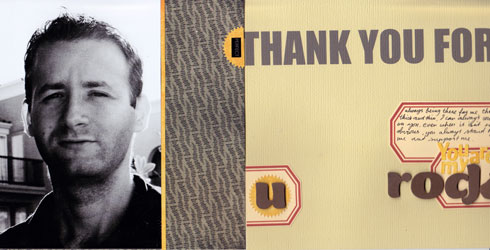
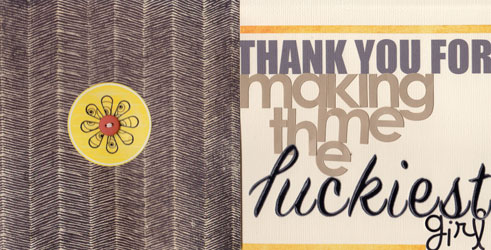
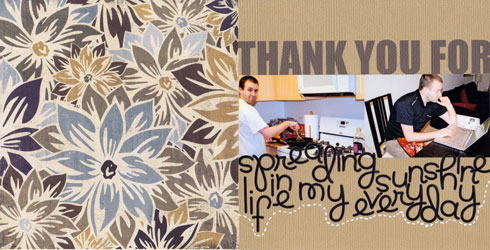
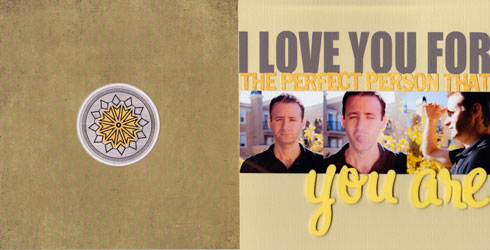
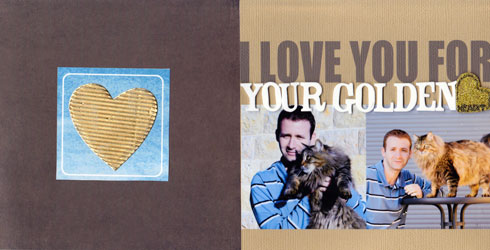
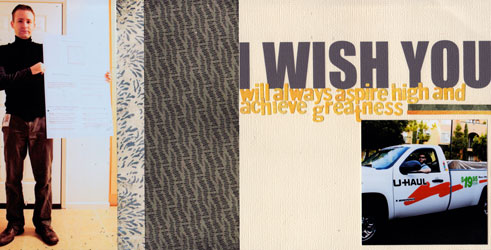
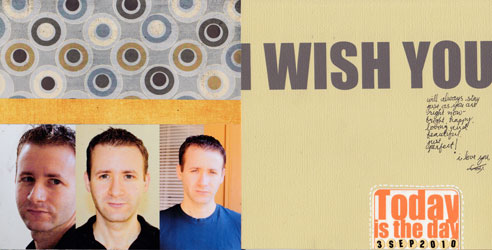
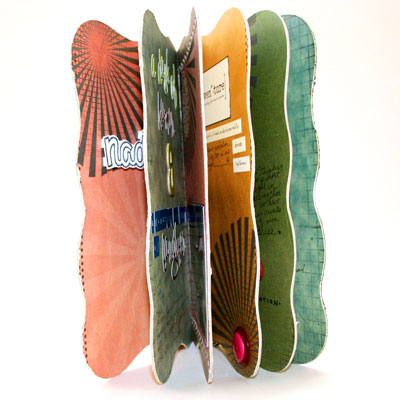
Photos of the Finished Mini Album

Hybrid Mini Album Pages

Hybrid Mini Album Pages

Hybrid Mini Album Pages

Hybrid Mini Album Pages

Hybrid Mini Album Pages

Hybrid Mini Album Pages

Hybrid Mini Album Pages

Hybrid Mini Album Pages

Hybrid Mini Album Pages

Hybrid Mini Album Pages

Hybrid Mini Album Pages

Share

Do you use the computer to add titles or other elements to your scrapbook pages? Please share by leaving a comment here.

Welcome Little One Workshop
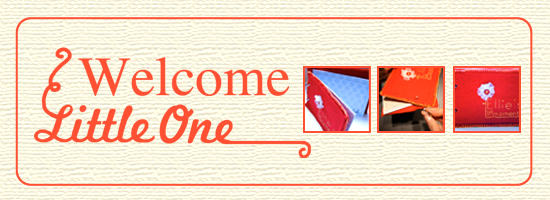
Check out Creativity Prompt’s new and unique self paced workshop: “Welcome Little One”. This workshop will provide you with everything you need, and then some, to make a fabulous handmade mini album to record the first moments of a new born baby.

New Workshop – Welcome Little One || REGISTRATION CLOSED

Tuesday, August 3rd, 2010

Workshop - Welcome Little One

I am super excited to announce the launching of a new unique workshop by Creativity Prompt.

Whether you are expecting a new baby soon, you have just had a new baby or you want to give a special gift to a new mom, “Welcome Little One” is exactly what you are looking for.

This workshop offers a quick and easy way for the busy new mom to put together a gorgeous mini album to capture and record the first moments of the precious new born child.

The workshop is unique by providing pre-designed pages with journaling prompts, all sized to the standard 4″ by 6″, so that all you have to do is to print the pages, add the photos and tell the stories.

All the guess work is left for the upbringing of the child, none for the child’s very first mini album.

In addition, by providing all the patterned papers and titles in the pre-designed pages, the workshop is also reducing the supply list down to the absolute minimum necessary.

In fact, chances are that you already have all the supply at home, especially if you like recycling old boxes for their chipboard and old clothing for their fabric. Thus, basically the cost of this mini album is limited to the cost of the workshop and prints. Thats it!

Not only that, but the workshop also provides a set of digital frames you may use on your digital pages, lay over photos or print on your own patterned papers or cardstock, in case you prefer your creative freedom over pre made templates.

Furthermore, as the workshop kit is digital, you may use it over and over again for the same low price.

The Workshop Includes:

  1. A pdf file with clear and concise step by step instructions, supported by color photos and supply list.
  2. 10 jpeg files with pre-designed pages – to be printed at home or online.
  3. 10 png files with digital frames, you may use with your photo editing software.
  4. An embroidery guide for the cover of your mini album (Plus instructions on how to make your own embroidered title guide).

Details

    Type: Self paced, downloadable workshop.
    Format: PDF, JPEG, PNG
    Price: $12.00
    Skill level: All levels.
    Software requirements: None. If you wish to use the digital frames you will need a photo editing software such as Photoshop or Photoshop Elements, but it is only optional.

How Does The Workshop Works?

  1. Immediately after the purchase you will be asked to confirm your membership, simply follow the instructions you will get on your e-mail.
  2. After the successful registration you will get instant access to all the workshop files with simple downloading instructions.

If you have any question, please leave a comment here or contact me via e-mail.

Creativity Prompt – Make a Hybrid Board Book

Friday, November 13th, 2009

Hybrid Board BookThis time I revisit an oldie, but a goodie – the altered board book.

This week there is a twist – I am going hybrid.

That means that part of the book is designed digitally and part of it – traditionally. Together it’s a great mix of new & old.

Using digital elements, such as patterned papers, word art and other digital embellishments helps in keeping a theme and a color scheme for the book. If you want to make this book as a gift, in multiples, then starting on your computer also allows you to include all your journaling on the pages and then printing them either once or a million times, with no extra effort.

Cool, huh?

Tools & Supply

How To


[Watch on You Tube]

Step-by-Step Instructions

  1. Start this project on the computer. Open your photo editing software and either crop or resize the digital patterned papers to the same width and height of your board book.

    Don’t forget to count the spine while making the pages for the cover, leave a gap the same width as your spine between them.

  2. Print your pages on cardstock. Plain paper won’t be opaque over the altered pages of the board book.

    Use the borderless printing setting, otherwise the printer will scale down your images to allow a white border around them and it’ll distort your measurement.

  3. Start working on the cover – trim off the excess paper and score your spine’s fold lines to get crisp creases. You may also go over the folds again with the bone folder, for an even crisper look.
  4. Adhere the cover by applying a generous layer of glue stick on the board book cover and burnish with a brayer. Let dry.
  5. In the meantime, start cutting the pages and your photos and any other digital element you have printed (word art, embellishments, journaling tags, etc.)
  6. Once the glue has dried, turn your page around and cut off the excess with a very sharp craft knife. If you get uneven edges, you can file them down with sand paper.
  7. Repeat the same process with the rest of the pages: adhere, go over it with a brayer, let dry and trim off the excess.

    Make sure you trim off the edges of a page before adhering the printed cardstock to the other side.

  8. Some ideas for embellishing your mini altered book:

    • Adhere your titles with foam pop-dots to give some extra dimension.
    • Stick to one type of embellishment (buttons in my case) to maintain cohesion.
    • Use different sizes of pen tips to create interesting handmade word art.
    • Outline your pictures, letter stickers and other elements with your journaling pen to anchor them to the page and add dimension.
    • Using 3D embellishments can make dents in your photos, so make sure both pages have the same “elevation” so the elements won’t touch the pictures themselves.
    • Have fun!!!

Hybrid Board BookHybrid Board BookHybrid Board BookHybrid Board Book
Hybrid Board BookHybrid Board BookHybrid Board Book

Share

If you have any question, suggestion or remark – don’t hesitate to contact me – either leave a comment here, use the contact form or start a new thread on the Creativity Prompt Flickr Group!!!

I would also be very happy to see your own creations, so don’t be shy and share 🙂

Make Your Own Planner Workshop
Check out the new “Make Your Own Planner” workshop and you may solve this year’s holiday gift shopping problem. An affordable workshop that keeps on giving…