/** Font types */

Posts Tagged ‘acrylic paint’

Monochrome Texture Technique Highlight

Wednesday, June 27th, 2012


Monochrome Texture Technique Highlight

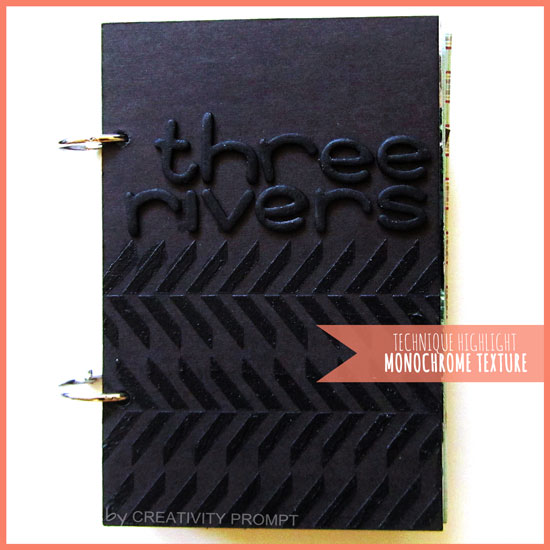
A lot of you commented and liked the monochromatic texture on the cover of my most recent travel mini album.

I am a great believer in giving credit where credit is due and in this case the credit belongs to my talented friend, Alexandra.

I was thinking about using a modeling paste with my stencils for a while but didn’t do anything about it UNTIL I saw this AMAZING page and technique highlight by Alexandra on creating your own background with masks. In this tutorial Alexandra created a gorgeous white on white texture using a modeling paste and one of Studio Calico’s masks.

After seeing how striking the result is I had to give it a go too.

Here is how I did it:

Supply

[Click on the image to find the product at Simon Says Stamp]
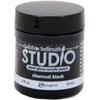
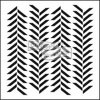
Liquitex MODELING PASTEBlack acrylic - Claudine Hellmuth Studio PAINTThe Crafter's Workshop MINI HERRINGBONE 6 x 6 Template

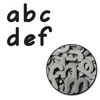
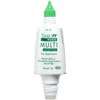
Maya Road DEBORAH MINI CHIPBOARD AlphabetTombow MONO MULTI Liquid Glue

How-To

Title

  1. Paint raw chipboard letters the same color of your background. Use a few thin layers of paint and let dry completely between layers, rather than slather on a thick layer of paint. Make sure to paint the sides of the letters as well to avoid the raw chipboard’s color peeking through.
  2. Let dry completely. Thin layers get completely dry very quickly.
  3. Adhere to your cover with a strong liquid adhesive that dries clear. Again, use minimal amount of glue. Just dot it a few times rather than applying thick lines of glue to avoid spilling.

Textured Pattern

  1. Affix the template to your background with a repositionable tape, such as painter’s tape or a washi tape.
  2. Mix the modeling paste with acrylic paint to create the same color as your background – skip this step if your are working on a white background.
  3. Apply a layer of the paste-paint mix with a spatula to make sure it spreads evenly on top of the template. Make sure that you apply pressure only vertically so you won’t accidentally push the paint underneath the template and mess up your pattern. If you don’t have a spatula you can use an old credit card or a plastic ID card. I’ve got a lifetime supply of fake credit cards from all the spam mail we receive in our mail box daily…
  4. If you want to create an imperfect pattern, mask off some of the template with the same low-tac tape you used to affix the template. Skip this step if you only wish to mimmic the template, as is.
  5. Remove the template carefully and let it dry completely.
  6. Marvel at your beautiful textured pattern. [Oops. Obviously this step is optional]

Share

Are you going to give this technique a go? Have you ever tried it? I would love to hear about your experience and any suggestion you may have!
JM-S2 | Signs
Bring life to your projects with handmade epoxy stickers.

Just $3.00 per package.
6 stickers in each package.
Each sticker measures approximately ¾â€ by ¾â€.


Creativity Prompt – Reuse A Bottle Lid To Create Your Own Patterned Paper

Friday, November 6th, 2009

Reuse A Bottle Lid To Create Your Own Patterned Paper

Every time I manage to find a new use to something that would otherwise find itself in the recycling bin, I am happy, even skittish… (I will deny if you tell).

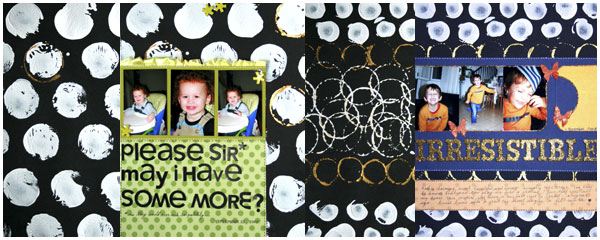
In this week’s creativity prompt I am reusing bottle lids to create artistic patterned papers.

The polka-dot-circular-spotty look is extremely popular right now and almost ALL the patterned paper manufacturers have a few in their latest collections. Before you reach your hand to the wallet and buy some new papers why not stopping at the recycling bin and make your own ones?

If you are interested in some ideas, then keep on reading.

Tools & Supply

How To

Watch on You Tube.
[I have had lots of comments requesting me to speak on my videos. I hate talking because my funny accent shines through. This time I took a deep breath and created a voice over – with my voice (I have to write it to believe it). Tell me the truth, don’t you want the fabulous music back?]

Step By Step Instructions

  1. Dip the lid in a pool of acrylic paint and stamp over the cardstock. To get a good impression of the lid make sure its entire surface is covered with paint. You may also use a brush to apply the paint more evenly to the lid. Apply some pressure on the lid, but beware of the paint’s slipperiness. I was going for the artistic look so I didn’t mind the imperfect stamping.
  2. You may use the opposite side of the lid to create a circular outline. Use it as a frame, or as an outline to the solid circle you stamped with the other side of the lid.
  3. Experiment –

    • Create different patterns.
    • Use different sizes of lids.
    • Use other mediums (instead of acrylic paint):

      • Ink pads.
      • Embossing ink + embossing powder.
      • Glue + glitter/ flock/ foil.
    • Use different objects to stamp with:

      • Toilette paper rolls.
      • Paper swirls.
      • Cardstock/ corrugated cardstock.
      • Old credit or gift cards.
      • Vegetables (if they went bad…)

Share

If you have any question, suggestion or remark – don’t hesitate to contact me – either leave a comment here, use the contact form or start a new thread on the Creativity Prompt Flickr Group!!!

I would also be very happy to see your own creations, so don’t be shy and share 🙂

Make Your Own Planner Workshop
Check out the new “Make Your Own Planner” workshop and you may solve this year’s holiday gift shopping problem. An affordable workshop that keeps on giving…