/** Font types */

Posts Tagged ‘gift’

Handmade – The Gift That Keeps On Giving

Monday, April 4th, 2011

handmade card sets

We are about to visit home soon, after more than a year away. In the midst of making all the “gift arrangements” I found out that what my sister remembers the most and uses the most is the bonus set of handmade cards I gave her last year. Not the fancy schmancy make up or the cool toys for the kids. Just a batch of cards that I made myself. What a revelation.

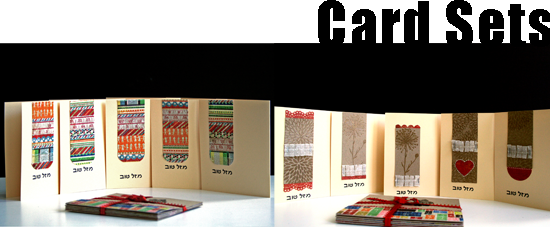
We are still up to our ears with boxes containing gifts and specialties, but I decided to add a bonus handmade card sets to each of my peeps back home.

As my family lives in Israel and greets its acquaintances in Habrew, I decided to create the greeting digitally and print the cards’ frame and build on it.

As for the design I wanted to make each set cohesive with a repetitive design element, in both layout and materials.

The best way for me to go about it was to choose one collection paper pad, one (or two similar) stamp and one additional embellishment.

I love the results.

To finish it off as a gift, I wrapped each bundle with a cute ribbon and infused it with love dust.

The “ingredients” are from my recent humongous purchase from Scrapbook.com after 6 months of scrap supply dryness…

Here is what my shopping cart included:

What do you think? Will all these goodies finally get me going?

Share

Did you buy anything you are really excited about lately?

Update

At the advice and sweet encouragement of wonderful Virginia I decided to add these card set to the Moxie Fab World’s challenge. Wish me luck 🙂


Welcome Little One Workshop
Check out Creativity Prompt’s new and unique self paced workshop: “Welcome Little One”. This workshop will provide you with everything you need, and then some, to make a fabulous handmade mini album to record the first moments of a new born baby.
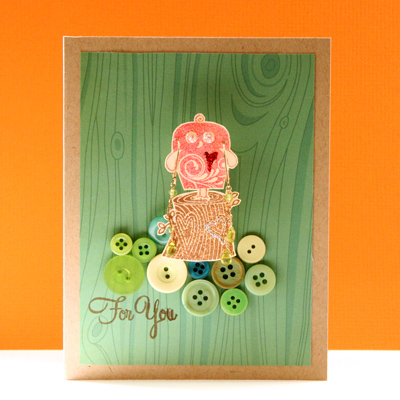
How To Make A Gift Card (pun intended) – Creativity Prompt

Friday, December 18th, 2009

Gift Card

The Hero Arts blog has sparked this idea in my head when they came up with a gift card challenge. I’m always up for a challenge and instead of thinking about a fun way to incorporate money or a store gift card in the card, I thought why not incorporating the gift itself and the idea for this card emerged.

Another fun idea is to stamp and cut a tree image and to wrap a necklace around it, like a twinkling ornament chain.

Tools & Supply

How To


[Watch on You Tube – while there, please rate, comment & subscribe]

Step-by-Step Instructions

  1. Stamp the images over a smooth light cardstock.
  2. Cut around the images with precision scissors, while rotating the cardstock and leaving the scissors at the same position.
  3. Adhere the background piece of the patterned paper centered on the card base with permanent tape adhesive.
  4. Temporarily lay the tree image on the background paper and arrange green buttons around it to simulate a grassy hill. When you are pleased with the buttons’ arrangement – adhere them with glue dots.
  5. Adhere the tree image in its place on top of the buttons with a thick foam adhesive. Either use a ½” thick piece of foam adhesive or layer a few thinner foam adhesive pieces together.
  6. Pierce holes in the owl “ears” and put on the earing. Then adhere the owl on top of the tree with another piece of thick foam adhesive. The thickness of the foam gives room to the earing’s stubs.
  7. Add some more interest and texture with a few touches of glitter glue here and there.
  8. Stamp your greeting with brown ink. Attach the stamp to the left side of the acrylic block, so the buttons won’t stand in your way.
  9. Give the gift card to someone you love and get a smile in return.

Share

If you have any question, suggestion or remark – don’t hesitate to contact me – either leave a comment here, use the contact form or start a new thread on the Creativity Prompt Flickr Group!!!

I would also be very happy to see your own creations, so don’t be shy and share 🙂

Make Your Own Planner Workshop
Jump start your creativity for 2010 and Make Your Own Planner with an affordable workshop that keeps on giving with an unlimited personal use license…

Make Your Own Planner Workshop
“Capture Your Dream” workshop is relaunching as a self-paced workshop. Isn’t this the perfect time for you to capture your dream and make it happen?

Creativity Prompt – Whip Up Quick Handmade Holiday Gifts – 10 Gifts In Under 10 Minutes

Friday, December 11th, 2009
Quick Handmade Holiday Gifts
[Photo by: Ginny]

The holidays are practically here and with all the preparations involved you may feel a little bit behind. As the holidays get closer, the lines at the stores get longer and the stress level – higher.

Let me help you by compiling a list of 10 handmade gifts that can be whipped up in less than 10 minutes. That is even quicker than driving to the store or than browsing online stores.

Each image is linked to the full video + step by step tutorial:

10 minute book - openedA Cute Box Of DrawersSimple Stitched Notebook
A SIMPLE Fabric Covered Mini AlbumStapled NotebookGate Fold Mini-AlbumHow To make An Accordion Brag Book
THE QUICKEST Mini AlbumHow To Make An Art JournalKraft No-Stitch NotebookWhat are you making this year?

…and one more gift idea –

Make Your Own Planner Workshop
Do you have last minute gift giving challenges? Check out the new “Make Your Own Planner” workshop and you may solve them…

Creativity Prompt – How To Make A Cute Box Of Drawers

Friday, May 22nd, 2009

A Cute Box Of Drawers
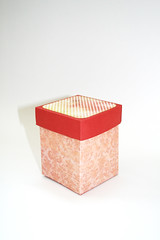
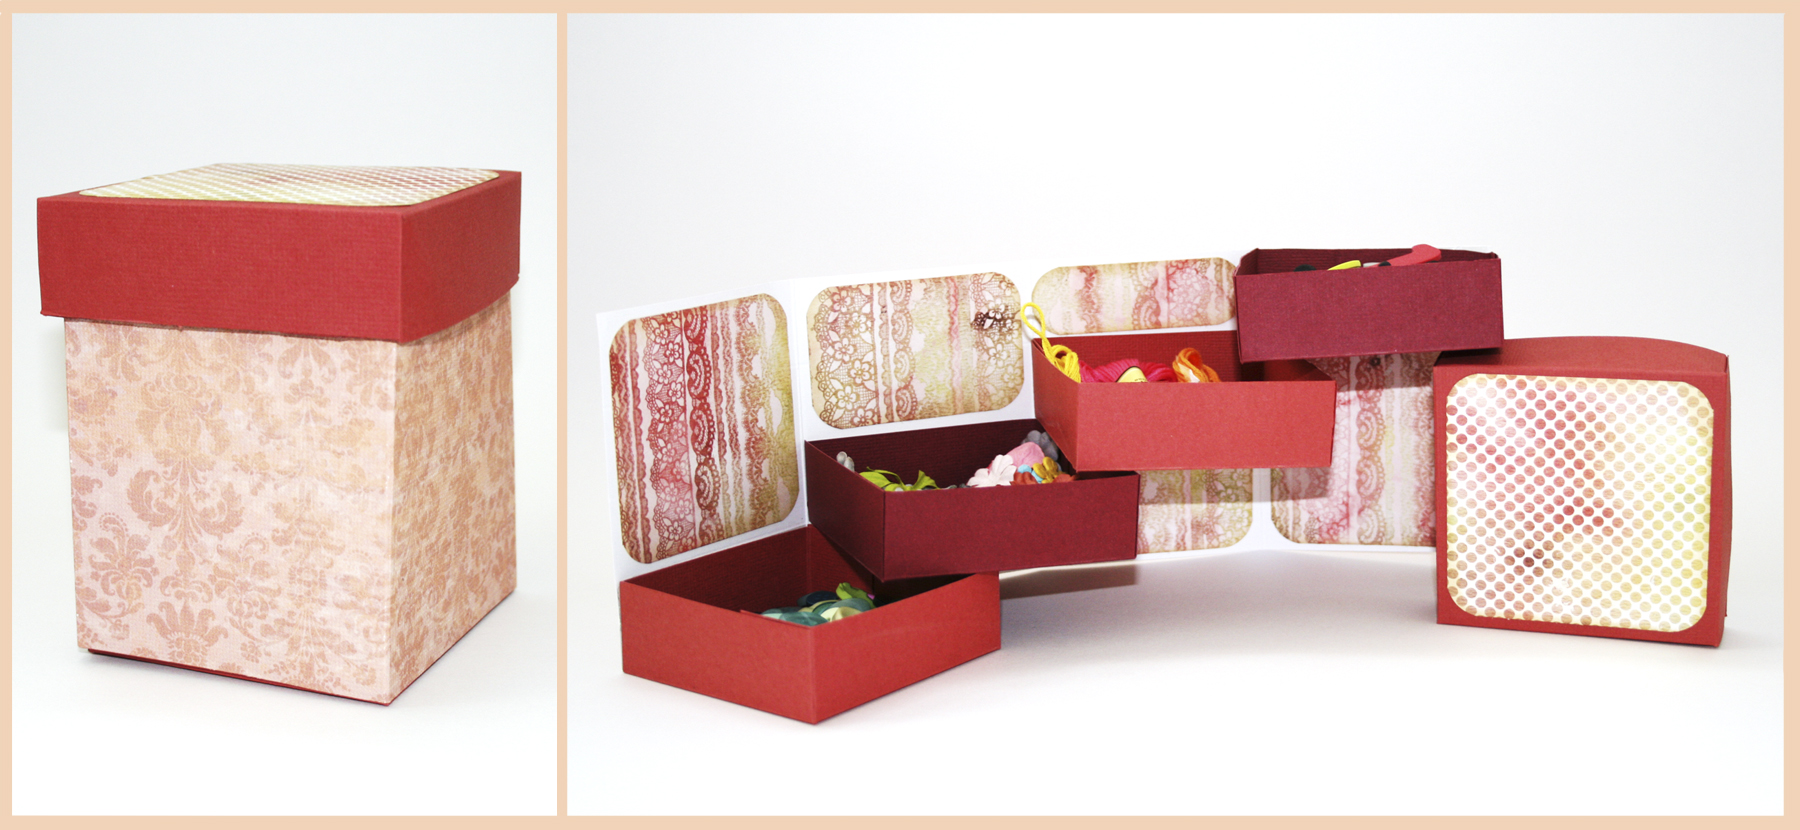
OK. I’ll admit it. I am addicted. Addicted to boxes… Luckily I have been moving a lot in the past years, so I got to buy boxes and treys over and over again. I just LOVE that everything has its place. Be it the tiniest of places, but a dedicated one.

Therefore when I saw this idea of a box of drawers online (in numerous places) I immediately knew that this project is right up my alley. So I whipped up my own version of this project with a couple quick sketches and voilà, in about 20 minutes I had one more box to add to my collection.

Usage Ideas for the Box of Drawers

  • Sewing kit – A place for your threads, threaders and needles.
  • Embellishments center (as shown above) – You can put your buttons, paper flowers, die cuts, eyelets and brads all in one place.
  • Office supply organizer – A chic way to camouflage your paper clips and staples stash…
  • Family “Mail-Box” – Attach a name tag to each drawer and leave heartfelt notes to each other. (This project can accommodate any family size, just alter the height of the drawers for a smaller family, or add more drawers and alter the height of the box for a bigger family).

I’d love to hear what ideas you come up with… so please do share!

So if you feel like making your own box of drawers keep on reading:

Tools & Supply

How To


[The great music is by Josh Woodward from his album “Here Today”].

Step-by-step Instructions

  1. Drawers –
    1. Cut 4 pieces of 5″ by 5″ cardstock. [The following applies to each of the 4 pieces]
    2. Score at 1″ all around. To make it easier to score, align your cardstock with the 4″ mark on your paper trimmer.
    3. Fold all your score lines with a bone folder.
    4. Cut one slit on each flap up to the first score line.
    5. Apply strong adhesive to the back of each flap. Make sure the flap is covered entirely.
    6. Adhere all the flaps together to the edges of the drawer, aligning edge to edge.
  2. Body –
    1. Cut your cardstock at 4″ by 12″. You can use patterned cardstock.
    2. Score your cardstock at: 3″, 6″ & 9″ lengthwise and fold all your score lines with a bone folder.
    3. Score LIGHTLY widthwise at each 1″ to draw some guidelines for the placement of the drawers.
    4. Apply a strong double sided tape to each of the box’s walls in increments of 1″.
    5. To embellish the inside of the boxes cut 6 pieces of patterned paper, as follows: 2 pieces at 2¾” by 2¾”, 2 pieces at 1¾” by 2¾” and 2 pieces at ¾” by 2¾” – Round their corners and ink the edges with distress ink. Then adhere to their respective place on the interior of the box.
    6. Adhere the drawers to the box. Make sure not to place a drawer nor to apply adhesive on any of the score lines.
  3. Lid –
    1. Cut your cardstock at: 5¼” by 5¼”.
    2. Score at 1″ all around. [Again you can align your cardstock with the paper trimmer’s 4¼” mark].
    3. Cut a slit on each of the flaps up to the first score line.
    4. To decorate the lid, cut a piece of 3″ by 3″ patterned paper. Round its edges and ink it up with distress ink, then adhere to the center of your cardstock.
    5. Apply strong double-sided tape to the back of each of the flaps and adhere together, aligning edge with edge.

A Cute Box Of Drawers A Cute Box Of Drawers

Share

If you have any question, suggestion or remark – don’t hesitate to contact me – either leave a comment here, use the contact form or start a new thread on the Creativity Prompt Flickr Group!!!

I would also be very happy to see your own creations, so don’t be shy and share 🙂