/** Font types */

Posts Tagged ‘cards’

Freebie – Print, Cut and Fold Valentine’s Cards

Monday, February 13th, 2012

Valentine's Cards

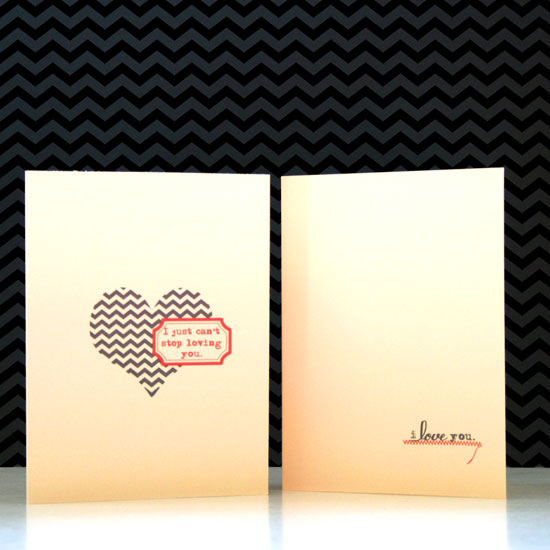
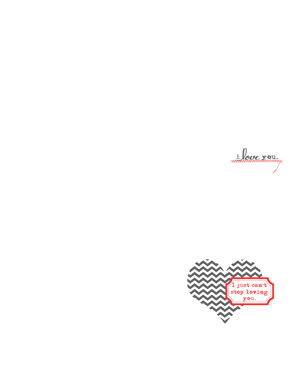
Free printable cardsToday, just in time for Valentine’s Day, I am sharing FREE printable Valentine’s cards with you guys (for personal use only).

All you have to do is print them on letter size cardstock, cut in half – lengthwise – at 5½” and then fold in half, at 4¼”. That. Is. All.

If you feel like documenting a love story, check out my free lovestruck journaling cards as well as the stitched doilies cards.

To download it simply click on the image (or the link) and if it doesn’t work try to right-click on it and opt for the “save target as…” option (it may be phrased a bit differently on different operating systems – but do NOT opt for the “save image as” option, as you will get the low resolution tiny preview image).

I hope you like it and have lots and lots and lots of fun with it.

Make sure you didn’t miss the rest of the free printables on Creativity Prompt.

Share

How are you going to use these cards? Please leave a comment and share.
Unleashing The Creative Child Within You
Back when we were kids creativity came naturally to us. Everything was possible and our prolific imagination was the only limit we knew.
Through the years we have grown apart from our inner creative child and along with that – have lost our pristine and utter joy of creation.

In this e-book I will pave your way back to your inner creative child, brick by brick.

“Unleashing The Creative Child Within You” will explain why you became distant from your core creativity and will reveal the secret to getting it back.

With exercises designed specifically to help you find the inner child within you, regain its confidence and unleash it – you are bound to get your mojo back faster than you think.

Get “Unleashing The Creative Child Within You” for your Kindle
for only $4.99.

You can read the Kindle book on Kindle devices, on your smart phones or on your PC or MAC.
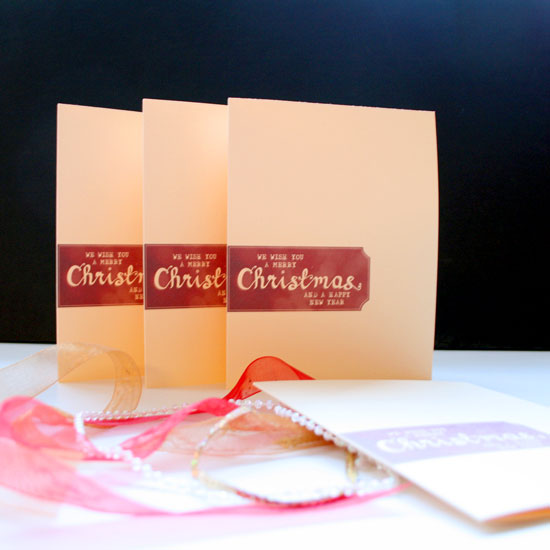
Friday Freebie – Print-Cut-Fold Christmas Cards

Friday, December 2nd, 2011

Christmas Cards

Free Journaling LabelsThis week I am sharing FREE printable Christmas cards with you guys (for personal use only; My calligraphy).

You are going to LOVE these. All you have to do is: (1) Print on letter-sized cardstock; (2) Cut lengthwise at 5½”; (3) Fold widthwise at 4¼”, and voilà, you’ve got a Christmas card!

I don’t believe it gets any easier than that…

To download it simply click on the image (or the link) and if it doesn’t work try to right-click on it and opt for the “save target as…” option (it may be phrased a bit differently on different operating systems – but do NOT opt for the “save image as” option, as you will get the low resolution tiny preview image).

I hope you like it and have lots and lots and lots of fun with it.

Make sure you didn’t miss the rest of the free printables on Creativity Prompt.

Share

How are you going to use these labels? Please leave a comment and share.

Make Your Own Planner 2012
Check out Creativity Prompt’s unique self paced workshop: “Make Your Own Planner”. In this workshop you will make a beautiful handmade planner for 2012. Not only will you get the planner kit for instant download, but you will also get a high resolution video tutorial as well as printable instructions to guide you on each step of the way. Either treat yourself or get it to create wonderful gifts for your family and friends.
Join now – for only $12

Bonus Freebie – Holiday Greetings Bands

Wednesday, November 16th, 2011

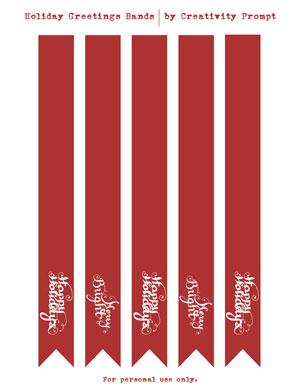
Free holiday printablesI have been playing with calligraphy some more and came up with these holiday greetings.

Naturally, I wanted to share this set of FREE holiday greetings bands with you guys (for personal use only) to wrap around cards, gifts or napkins

As it is my own “penmanship” it’s far from being perfect, so please keep that in mind…

To download it simply click on the image (or the link) and if it doesn’t work try to right-click on it and opt for the “save target as…” option (it may be phrased a bit differently on different operating systems – but do NOT opt for the “save image as” option, as you will get the low resolution tiny preview image).

I hope you like it and have lots and lots and lots of fun with it.

Make sure you didn’t miss the rest of the free printables on Creativity Prompt.

Share

How are you going to use these bands? Do you have some creative ideas? Please leave a comment and share.

Make Your Own Planner 2012
Check out Creativity Prompt’s new and unique self paced workshop: “Make Your Own Planner”.
This workshop will show you how to make a beautiful handmade planner for the year 2012. Not only are you going to get the entire meticulously designed planner kit for instant download, but you will also get a high resolution video tutorial as well as step-by-step instructions to guide you on each step of the way. Either treat yourself with a fresh and creative start for the coming new year, or get it to create wonderful gifts for your family and friends.
Join now

And Yet Another Card Set – I have Many People To Gift…

Wednesday, April 13th, 2011

card set

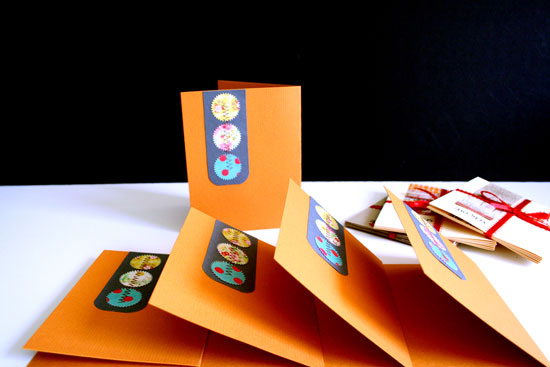
This set is without a greeting because I actually use these cards for the gifts I am giving everyone, so a generic greeting won’t do. I want to write a personal greeting for each person. This is how I roll…
card set

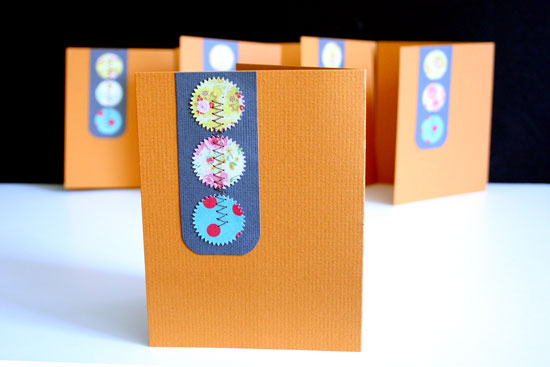
This card set is probably the simplest of them all.

All I did was to cut a piece of cardstock (3½” by 1½”), then punch out 3 pinking circles from the Emma’s Shoppe’s collection by Crate Paper (it’s such a cute collection).

I adhered the three punched pieces to the cardstock using 2-way glue and sew over it [I used the 2-way glue to make sure the adhesive won’t clump the sewing machine].

I secured the ends of the threads with regular tape and rounded the corners, then adhered to the cardstock base.

That is all.

Isn’t it simple?


Welcome Little One Workshop
Check out Creativity Prompt’s new and unique self paced workshop: “Welcome Little One”. This workshop will provide you with everything you need, and then some, to make a fabulous handmade mini album to record the first moments of a new born baby.

Quick Share – Another Card Set

Monday, April 11th, 2011

Card Set

I made another card set to give away to my family.

For this set I stamped a partial imprint of Hero Arts’ Dandelion Frame cling stamp. To do that I laid the stamp on the table, facing up and inked it with VersaMark ink. Then I took the piece of cardstock (3½” by 1½”) and laid it on top of the inked stamp and pressed on it gently with my fingers to make sure the ink transfered properly.

Then I covered the image with clear embossing powder and melted it with a heating tool.

Then I aded a strip of American Crafts ribbon to the edge of the carstock piece.

Next I sewed the top edges of the ribbon strip and secured the ends of the threads with regular tape.

Then I rounded all the corner with We R Memory Keepers corner chomper (which I had to help a little with my precision scissors, because it had to go through the ribbon) and adhered it all to the top left of my pre-printed card.

Super easy.


Welcome Little One Workshop
Check out Creativity Prompt’s new and unique self paced workshop: “Welcome Little One”. This workshop will provide you with everything you need, and then some, to make a fabulous handmade mini album to record the first moments of a new born baby.

Handmade – The Gift That Keeps On Giving

Monday, April 4th, 2011

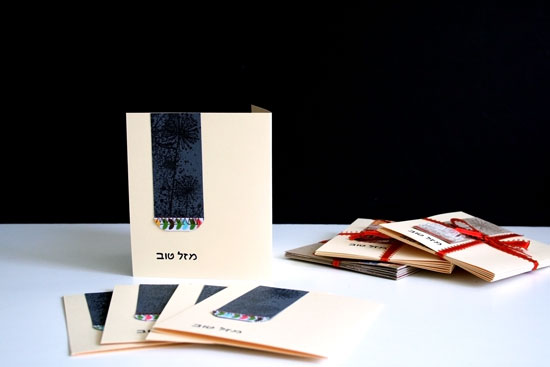
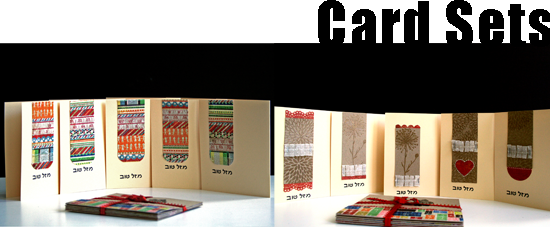
handmade card sets

We are about to visit home soon, after more than a year away. In the midst of making all the “gift arrangements” I found out that what my sister remembers the most and uses the most is the bonus set of handmade cards I gave her last year. Not the fancy schmancy make up or the cool toys for the kids. Just a batch of cards that I made myself. What a revelation.

We are still up to our ears with boxes containing gifts and specialties, but I decided to add a bonus handmade card sets to each of my peeps back home.

As my family lives in Israel and greets its acquaintances in Habrew, I decided to create the greeting digitally and print the cards’ frame and build on it.

As for the design I wanted to make each set cohesive with a repetitive design element, in both layout and materials.

The best way for me to go about it was to choose one collection paper pad, one (or two similar) stamp and one additional embellishment.

I love the results.

To finish it off as a gift, I wrapped each bundle with a cute ribbon and infused it with love dust.

The “ingredients” are from my recent humongous purchase from Scrapbook.com after 6 months of scrap supply dryness…

Here is what my shopping cart included:

What do you think? Will all these goodies finally get me going?

Share

Did you buy anything you are really excited about lately?

Update

At the advice and sweet encouragement of wonderful Virginia I decided to add these card set to the Moxie Fab World’s challenge. Wish me luck 🙂


Welcome Little One Workshop
Check out Creativity Prompt’s new and unique self paced workshop: “Welcome Little One”. This workshop will provide you with everything you need, and then some, to make a fabulous handmade mini album to record the first moments of a new born baby.

Friday Freebie – Elegant Happy New Year Cards

Friday, December 31st, 2010

Free Journaling LabelsHappy New Year everyone! I hope you enjoyed 2010 and will enjoy 2011 ten times more!

As a thank you token I am sharing a couple of printable happy new year cards with you guys (for personal use only).

All you need to do is print them on 8½” by 11″ sheet of cardstock, cut in half – lengthwise (at 4¼”) and fold in half (at 5½”). That is all!

To download it simply click on the image (or the link) and if it doesn’t work try to right-click on it and opt for the “save target as…” option (it may be phrased a bit differently on different operating systems – but do NOT opt for the “save image as” option, as you will get the low resolution tiny preview image).

I hope you like it and use it to wish happy new years to all your friends and family – it is so easy with printable cards.

Make sure you didn’t miss the rest of the free printables on Creativity Prompt.

To jumpstart your new year resolution process, you may want to check out this special New Year’s Resolutions Series I posted a couple years ago or another New Year’s resolution approach I posted last year.

Share

How are you going to use these labels? Please leave a comment and share.


Make Your Own Planner 2012
Check out Creativity Prompt’s new and unique self paced workshop: “Make Your Own Planner”.
This workshop will show you how to make a beautiful handmade planner for the year 2012. Not only are you going to get the entire meticulously designed planner kit for instant download, but you will also get a high resolution video tutorial as well as step-by-step instructions to guide you on each step of the way. Either treat yourself with a fresh and creative start for the coming new year, or get it to create wonderful gifts for your family and friends.
Join now

Welcome Little One Workshop
Check out Creativity Prompt’s exciting self paced workshop: “Welcome Little One”. This workshop will provide you with everything you need, and then some, to make a fabulous handmade mini album to record the first moments of a new born baby.

Special Freebie – Printable Thank You Cards

Monday, November 22nd, 2010

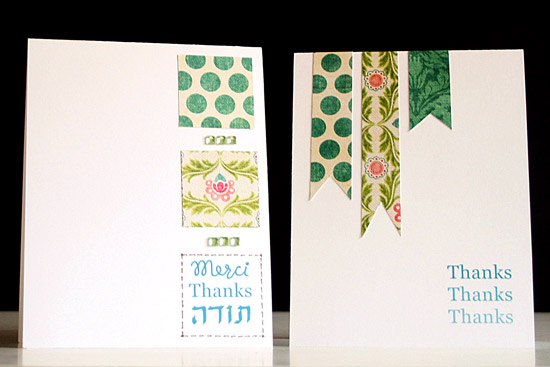
Thanks Cards

[Cardstock – Wausau, Patterned paper – My Mind’s Eye, Gems – Hero Arts]

Free Journaling LabelsIn the spirit of Thanksgiving which is celebrated here this Thursday I want to share a set of printable thank you cards (for personal use only).

To download it simply click on the image (or the link) and if it doesn’t work try to right-click on it and opt for the “save target as…” option (it may be phrased a bit differently on different operating systems – but do NOT opt for the “save image as” option, as you will get the low resolution tiny preview image).

This print, cut and fold cards are perfect for last minute thanks giving… (please excuse my dorky pun). As a quick reminder, cut lengthwise at 4¼” and fold each piece in half.

I hope you like it and make use of the cards by spreading your love and letting people know you appreciate them.

Make sure you didn’t miss the rest of the free printables, especially the printable holiday card set.

Share

Will you be giving thank you cards in the spirit of the holiday? Please leave a comment and share.

Make Your Own Planner 2012
Check out Creativity Prompt’s new and unique self paced workshop: “Make Your Own Planner”.
This workshop will show you how to make a beautiful handmade planner for the year 2012. Not only are you going to get the entire meticulously designed planner kit for instant download, but you will also get a high resolution video tutorial as well as step-by-step instructions to guide you on each step of the way. Either treat yourself with a fresh and creative start for the coming new year, or get it to create wonderful gifts for your family and friends.
Join now

Video Tutorial – Dimensional Ornaments Card

Tuesday, November 9th, 2010

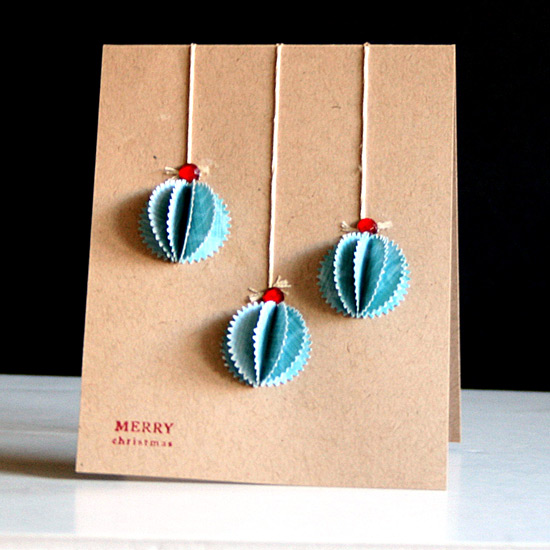
Dimensional Ornaments Card

I wanted to share with you a quick and simple card I made. You can also use the same technique to create ornaments for your tree. You may use any symmetrical shape to make it.

Supply

How To


[Go here to watch on YouTube and while there, please rate, comment and subscribe.]

Step by Step Instructions

  1. Cut you cardstock at 4¼” lengthwise and fold in half to create your card base.
  2. For each ornament, punch 5 punched pieces of patterned paper and fold each one in half.
  3. Adhere only one half of the punched piece to the second one, making sure the edges are aligned and repeat on all five punched pieces.
  4. Repeat for all the ornaments you want to add to your card.
  5. Decide how you want to lay your ornaments on your card and pierce a hole on top of each ornament and another hole on the fold of the card in a straight line above each ornament.
  6. Thread your embroidery floss through both pierced holes and tie at the bottom, close to the top of each ornament.
  7. To secure the knot, apply a glob of a strong liquid glue on each knot and attach a gem to it, to conceal the glue.
  8. Adhere the ornaments below each knot.
  9. Stamp your greeting.

Share

What holidays are you celebrating in the next couple months? I am really excited about Hanukkah, the Festival of Lights. Share yours by leaving a comment below.

Make Your Own Planner 2012
Check out Creativity Prompt’s new and unique self paced workshop: “Make Your Own Planner”.
This workshop will show you how to make a beautiful handmade planner for the year 2012. Not only are you going to get the entire meticulously designed planner kit for instant download, but you will also get a high resolution video tutorial as well as step-by-step instructions to guide you on each step of the way. Either treat yourself with a fresh and creative start for the coming new year, or get it to create wonderful gifts for your family and friends.
Join now

Another Day, Another Card

Thursday, September 23rd, 2010

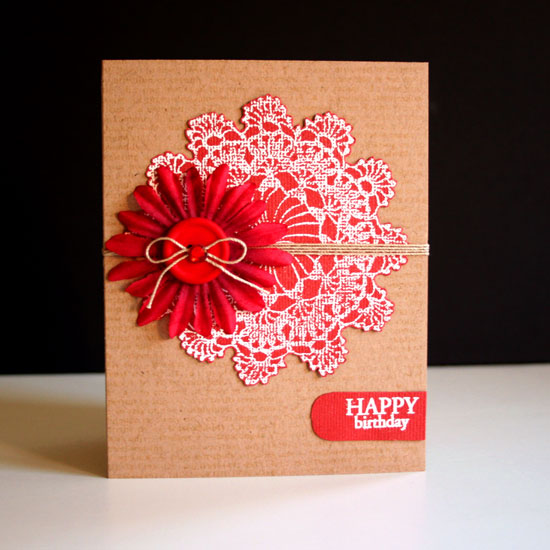
Happy Birthday Card

After making yesterday’s cards I felt inspired to play around with Hero Arts’s Circle Doily cling stamp some more. Plus, in the meantime I got invited to another birthday party of a very dear friend…

Then again, do I really need a reason to make another card? I didn’t think so either.

This time I thought I will use autumnal colors to indicate the season.

Supply

How To

  1. Start by cutting and folding the card base (cut at 8½” by 5½” and fold at 4¼”).
  2. Stamp the big definition stamp on the card base with a very light ink color (Antique Linen).
  3. Stamp the doily with Versamark ink on the red cardstock and pour over some white embossing powder. Tap off the excess and heat emboss with a heat gun.
  4. Cut around the doily with precision scissors and adhere to the card’s front.
  5. Cut a small slit on the card’s fold and feed a string through it, make sure both end will “meet” at the front of the card.
  6. Feed the ends through the flower, add a couple foam adhesive dots to the flower for an extra hold and adhere in place.
  7. Feed the ends through the button holes and tie in a bow. Secure the bow with a dot of clear adhesive and conceal the adhesive with a gem.
  8. Stamp the greeting with white embossing powder on the same red cardstock. Apply embossing powder. Tap off the excess powder and heat emboss.
  9. Cut around the greeting, leave some more room at the end pointing inwards and round both corners of that end with a corner rounder. Adhere in place.

Share

What is your favorite stamp or stamping technique? Do you rather make cards without any stamping involved? Please share your opinions and thoughts by leaving a comment.

Welcome Little One Workshop
Check out Creativity Prompt’s new and unique self paced workshop: “Welcome Little One”. This workshop will provide you with everything you need, and then some, to make a fabulous handmade mini album to record the first moments of a new born baby.