/** Font types */

Archive for the ‘creativity prompt’ Category

Is It A Card? Is It A Mini Album? It’s A Birthday Gift.

Monday, September 3rd, 2012

Birthday Mini Album and Card

Today my dear husband is celebrating his birthday.

So here comes the proverbial question – what do you get for someone who has everything?

[Mainly because he always wants so little]

The answer is obvious – get him something handmade.

My husband always loves the mini albums and cards that I make for him [or so he pretends…]

This time I decided to make a hybrid – a card which is also a mini album.

It starts with a simple greeting on the cover and it goes on and on and on and on…

It’s basically a very long greeting, illustrated by photos, paper and embellishments.

There is a bonus here… 99.9% of the mini album is from ONE PAPER KIT by Simple Stories.

Plus, I only used about a third of it…

It comes ready with cute stickers, word stickers, letter stickers, border stickers as well as already designed 4″ by 6″ and 3″ by 4″ double sided pages (and other sizes as well). It also contains some 4″ by 6″ transparencies that I used as well (and still have more leftover for other projects).

So all I had to do is come up with the greeting… and the photos and add a few more letter stickers here and there from my stash. I also added a few old Maya Road chipboard arrows. But really – it’s mostly made out of this one paper kit.

Take a look, see for yourselves =>

…and if you like it – please

The Pages

Mini Album Spread by Creativity Prompt

Mini Album Spread by Creativity Prompt

Mini Album Spread by Creativity Prompt

Mini Album Spread by Creativity Prompt

Mini Album Spread by Creativity Prompt

Mini Album Spread by Creativity Prompt

Mini Album Spread by Creativity Prompt

Mini Album Spread by Creativity Prompt

Mini Album Spread by Creativity Prompt

Mini Album Spread by Creativity Prompt

Mini Album Spread by Creativity Prompt

Mini Album Spread by Creativity Prompt

Mini Album Spread by Creativity Prompt

Mini Album Spread by Creativity Prompt

Mini Album Spread by Creativity Prompt

Mini Album Spread by Creativity Prompt

Supply


JM-S2 | Signs
Bring life to your projects with handmade epoxy stickers.

Just $3.00 per package.
6 stickers in each package.
Each sticker measures approximately ¾â€ by ¾â€.


Creative Jumpstarts || 7 Creative Things To Do When You Feel Uninspired

Wednesday, August 29th, 2012

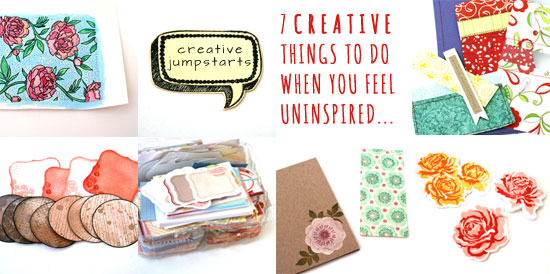
Seven Creative Jumpstarts

If you like it

I often find myself wanting to do something creative but feeling a bit uninspired, as if I’ve lost my creative mojo. I know I want to experiment with new products or to try new techniques but I can’t think of a solid idea for a specific project.

On these occasions I try to make mini, one-step projects that are still creative but do not require any pre-planning.

Many times these itsy bitsy pieces spark my creative spirit and bring back my mojo. On other times, I still have something I can use later on, when I have a solid idea but less time…

Here are some of the stuff I do:
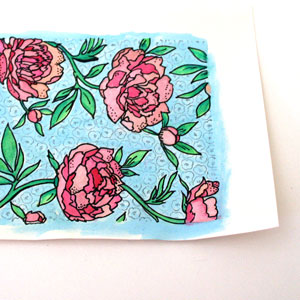
Watercolor Stamped BackgroundsWatercolor stamped backgrounds.
I love the watercolor look that seems to appear everywhere on the creative-web-sphere. The thing is that watercoloring takes time, even for the most basic applications (such as mine). For one thing, post cleanup is required. Plus you have to get water and blotting paper and special watercolor paper…

Do you see my point?

Therefore, I find these inspiration-twilight-zones perfect for a mini watercolor project. Simply stamp a background stamp with a water-resistant ink (such as Stazon) on watercolor paper and color away. Later you can use it as an element on a page or a card. Add some black details with a broad-tip pen for a bolder look.

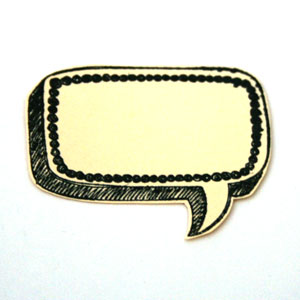
Stamp and cut.Stamp and cut.
This one is a spin on watercoloring a stamped piece, for times you don’t feel motivated to break out the watercolors, water, brushes, etc.

For that mini micro project you only need one ink pad, some cute, easy-to-cut stamps and any paper.

When I shop for new stamps I always think of images I can stamp, cut and stow for later use… When the time comes to make an actual card, scrapbook layout, mini album or even to wrap up a gift – you would LOVE to have that stash of pre-cut images to use in a snap.

After all, by the time you get really inspired, you want to use your precious time for designing cool stuff, not on technicalities, right!?

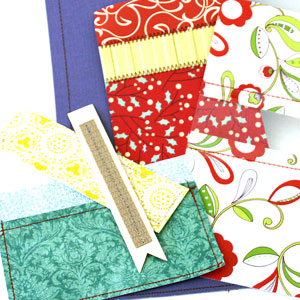
Sew random paper stripsSew random paper strips.
This creative jumpstart performs a double duty: (1) It’s easy and does not require ANY pre-planning; (b) It’s an AWESOME way to use your scraps and if you are anything like me, you have a ton of them.

I am not very good with the sewing machine (= that’s the understatement of the year). That humble stack of randomly sewn pieces is the combined effort of several mini-sewing-sessions, with months apart… Having said that, I really love the machine-stitched look. I think that it adds a new dimension and texture to any project, not to mention a more finished look.

The great thing about machine stitched elements is that you can’t tell when they were carefully sewn on the project or added later as an afterthought… Which is why I think it’s so great to simply stitch random pieces of paper together. The time will come when those sewn panels and pockets and strips will perform their duty, honorably, on a future project.
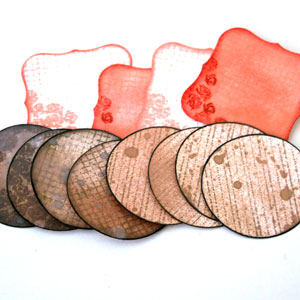
Make your own journaling spots.Make your own journaling spots.
This is another great example of something small that you can do that gives you an opportunity to experiment with different techniques and stamps and can be very useful in the future.

Either punch or die-cut your journaling spots in advance or stamp them first and cut around the stamp image. Then simply play with them => Add distress inks and stains, mist them, stamp on them, doodle, use letter and word stickers on them.

Just have fun and experiment and get as messy or as tidy as you want.

Finally, store them with the rest of your stash for later use.


Cut pre-made journaling spots.Cut pre-made journaling spots.
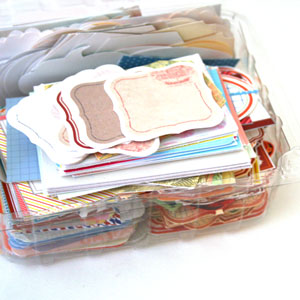
OR you can simply print one of my MANY free printable journaling spots, cut them and stash them in an old strawberries container, just like I do… [see picture on the left]

You may also use cuter and more tightly closed containers, if you so wish.

I’m not sure I should say so myself…, but they are so useful. I almost always use a piece on every scrapbooking project I make.

Having these ready-to-go pieces is making it much easier to use them. I don’t think I would ever start searching my file folders for a specific journaling labels set, then printing it and cutting it – all just for a specific journaling spot on a specific page of a specific project. I don’t think so.
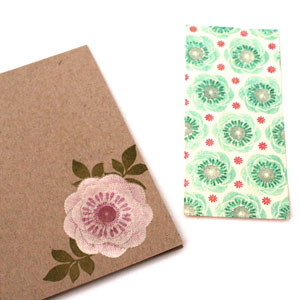
Pre-stamp cards.Pre-stamp cards.
I am notorious for buying stamps just because they look cute. I admit it. I used to get them and not be exactly sure what to do with them. Oops.

That was before I decided to simply use them. Duh. I just stamp them on plain card-bases and set it aside until my creative mojo strikes or until I need a quick card and have no time to make it. Whichever comes first. Guess what comes first more often…

Sometimes I just add the cute image to the card base (as you can see on the right) and sometimes I stamp on a 5½” panel that I can add to a card later (as you can see on the left), with or without foam adhesive. Sometimes I also add Stickles, because I’m feeling extra sassy…, but shhh, please don’t tell.

It was very smart of me to use a limited edition stamp set that isn’t available anymore…
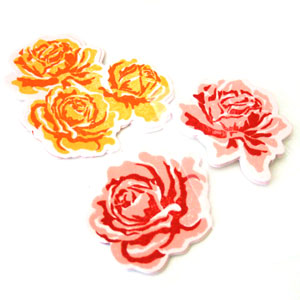
Die cut and stamp.Die cut and stamp.
To finish up, I have another spin on the stamp-and-cut suggestion. Wait for it… it’s a die-cut-and-stamp suggestion. Did I tell you how ‘smart’ I am feeling today? Oh, I just did. Okay.

Many brands offer combinations of stamp sets with matching dies. These are perfect for creating mini professionally-looking embellishments that you can use in so many different ways and on so many different projects. You only need a one-time investment in the dies and stamps set and that’s it. Each additional die-cut embellishment you create is practically free.

Make as many as you need, at any color combination you love at the moment or that suits your stash of paper/cardstock/printed photos…

Share

Do you have other suggestions for creative jumpstarts that need no pre-planning, just some free creative time? If you do, please share in the comments section below!
Unleashing The Creative Child Within You
Back when we were kids creativity came naturally to us. Everything was possible and our prolific imagination was the only limit we knew.
Through the years we have grown apart from our inner creative child and along with that – have lost our pristine and utter joy of creation.

In this e-book I will pave your way back to your inner creative child, brick by brick.

“Unleashing The Creative Child Within You” will explain why you became distant from your core creativity and will reveal the secret to getting it back.

With exercises designed specifically to help you find the inner child within you, regain its confidence and unleash it – you are bound to get your mojo back faster than you think.

Get “Unleashing The Creative Child Within You” for your Kindle
for only $4.99.

You can read the Kindle book on Kindle devices, on your smart phones or on your PC or MAC.

Travel || Oregon Mini Album

Monday, August 27th, 2012

Vacation Mini Album

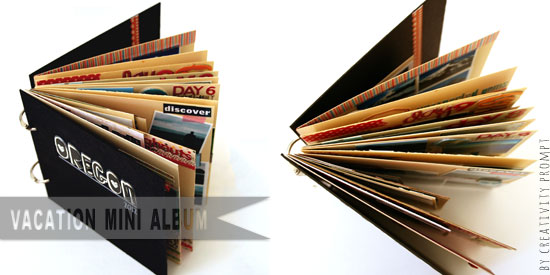
My Oregon mini album is finally done.
That means that I decided that it’s good enough for me.
This decision must come at some point, otherwise nothing will ever get done.

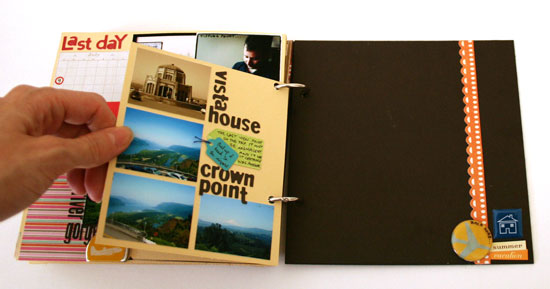
I went for a very simple set-up – just plain 6″ by 6″ cardstock pages and chipboard cover with some pages that are smaller, to accent a place or a memory or a certain day.

If you like it –

The Pages…

Prepare for a long, photo heavy, journey 🙂
I hope your scroll-finger won’t hurt too much…

Travel Mini Album

Travel Mini Album

Travel Mini Album

Travel Mini Album

Travel Mini Album

Travel Mini Album

Travel Mini Album

Travel Mini Album

Travel Mini Album

Travel Mini Album

Travel Mini Album

Travel Mini Album

Travel Mini Album

Travel Mini Album

Travel Mini Album

Travel Mini Album

Travel Mini Album

Travel Mini Album

Supply

I simply raided my stash. I used a ton of letter stickers, word stickers border stickers and mini paper pads.

Unfortunately, not all of them are available for purchase. Some are REALLY old.

I love combining new and old products.

I also used quite a few of my Journaling Mates and my printables.

Here are some of the products I used that are still available (click on the image to be directed to the online store):

Oregon Mini Album Is Coming Up Soon

Wednesday, August 22nd, 2012

Sneak Peek - Oregon Mini Album

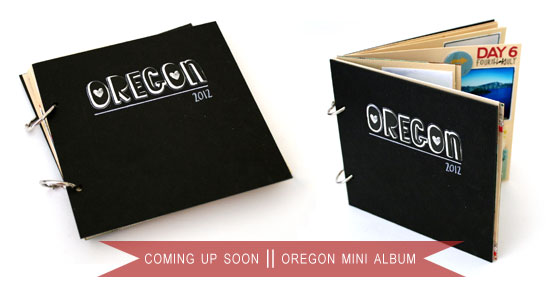
This mini album is almost finished. I just need to add non-Instagram photos…

Unleashing The Creative Child Within You
Back when we were kids creativity came naturally to us. Everything was possible and our prolific imagination was the only limit we knew.
Through the years we have grown apart from our inner creative child and along with that – have lost our pristine and utter joy of creation.

In this e-book I will pave your way back to your inner creative child, brick by brick.

“Unleashing The Creative Child Within You” will explain why you became distant from your core creativity and will reveal the secret to getting it back.

With exercises designed specifically to help you find the inner child within you, regain its confidence and unleash it – you are bound to get your mojo back faster than you think.

Get “Unleashing The Creative Child Within You” for your Kindle
for only $4.99.

You can read the Kindle book on Kindle devices, on your smart phones or on your PC or MAC.

Journaling Mates In The Hands Of Artists

Wednesday, August 8th, 2012

Alexandra

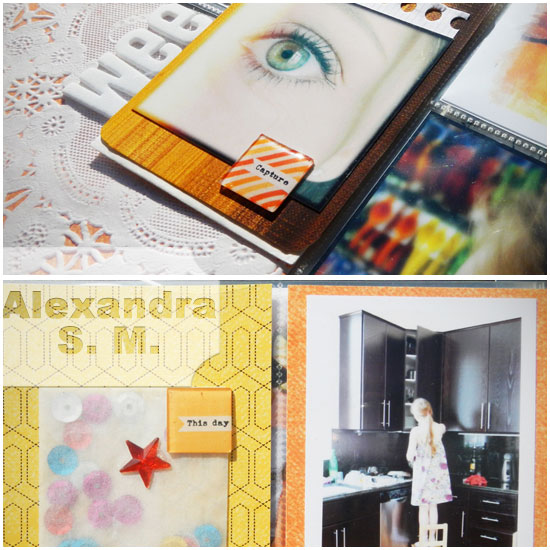
[Click on the images for the full blog post]

Monika

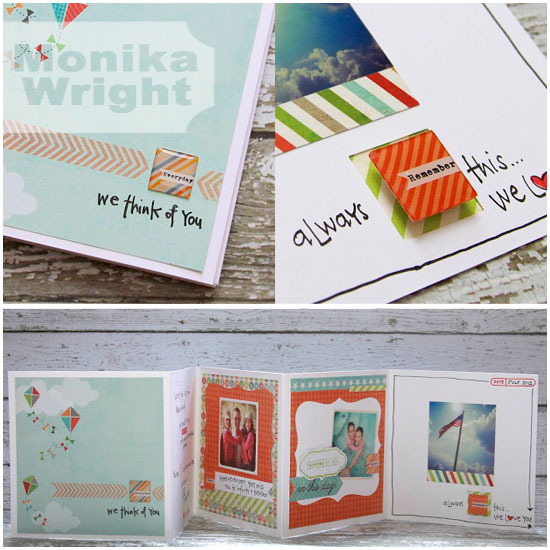
[Click on the images for the full blog post]

I believe that any extra word is redundant.

In the hands of true artists, my Journaling Mates truly shine.

Alexandra, of Art Scrap and More made a striking Project Life spread, using my stickers and a few of my ‘It’s a Date’ printables. The color scheme along with her GORGEOUS photos [and her beautiful little girl in the picture] cannot create a better backdrop for my epoxy stickers. Don’t you think?

Monika, of I Love It All, the queen of beautiful and heartfelt mini books, made a gorgeous mini book for her son. The combination of great design and her big and warm heart creates perfect keepsakes. I love how she added dimension to the stickers and created a whole new look with foam dots.

Make sure you visit these talented ladies’ blogs – you are sure to get quite a few servings of eye candy…

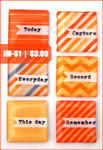
JM-S1 | Record
Spice up your everyday memories with handmade epoxy stickers.

Just $3.00 per package.
6 stickers in each package.
Each sticker measures approximately ¾â€ by ¾â€.


Card Inspiration – Just For You

Wednesday, August 1st, 2012

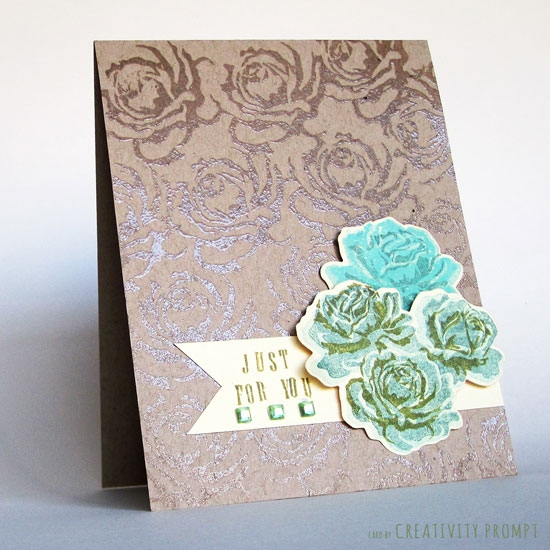
Just For You Card

Ever since I saw the sneak peek of this stamp set from Papertrey Ink‘s last release (‘The Sweet Life’) I wanted to have them.

Luckily my parents had bought me that stamp set (along with a few other things). Thanks so much!

It took forever (well, a week and a half) to get them and in the meantime I saw this gorgeous card by Alexandra, made with that exact same stamp set. What a tease…

I finally received my Papertrey Ink order yesterday, and this is the first card I made with the stamps.

I used Papertrey Ink’s ink and I must say it isn’t my favorite. I find it a bit splotchy, even with a fresh new ink pad. What do you think about their ink?

Other Supply

How-To

  1. To create the portrait card base I cut the kraft cardstock, widthwise, at 4¼” and folded at 5½”. I used Martha Stewart’s scoring board with a stylus but it isn’t necessary, just helpful.
  2. Next I took the large detail rose stamp from Papertrey Ink’s set and repeatedly stamped it with the versamark ink, starting from the bottom left and making my way up.
  3. Then I covered the stamped images with clear embossing powder and set it with a heat tool.
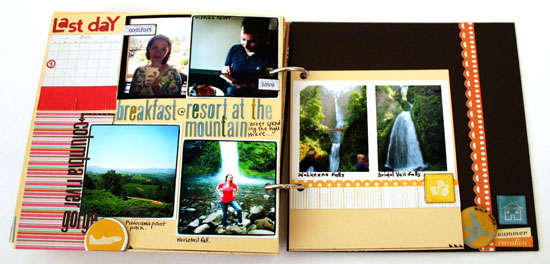
  4. To create the accent flowers I used the three-steps stamps from the set and the matching dies (they went like butter through my ancient Cuttlebug machine). As the dies aren’t see-through I first cut the ivory cardstock and then temporarily adhered the ‘naked’ die-cuts to a scrap paper and stamped, starting from the least detailed stamp with the lightest ink color and moving on to the most detailed stamp with the darkest color.
  5. Then I cut a 1″ strip of the Ivory cardstock and shaped its end into a banner shape, by cutting a slit in the middle and matching up the ends from each edge of the cardstock strip. I adhered it to the card with permanent tape adhesive and stamped the greeting with individual letter stamps (I actually did the stamping after adhering the accents, but this is not recommended…).
  6. Next I adhered the flowers die cuts. I attached the bottoms with regular tape adhesive and the tops with pop dots to add interest.
  7. To finish off the card I added some bling… How can I not, right!?

If you like it –

Unleashing The Creative Child Within You
Back when we were kids creativity came naturally to us. Everything was possible and our prolific imagination was the only limit we knew.
Through the years we have grown apart from our inner creative child and along with that – have lost our pristine and utter joy of creation.

In this e-book I will pave your way back to your inner creative child, brick by brick.

“Unleashing The Creative Child Within You” will explain why you became distant from your core creativity and will reveal the secret to getting it back.

With exercises designed specifically to help you find the inner child within you, regain its confidence and unleash it – you are bound to get your mojo back faster than you think.

Get “Unleashing The Creative Child Within You” for your Kindle
for only $4.99.

You can read the Kindle book on Kindle devices, on your smart phones or on your PC or MAC.

A Simple Card To Say Thanks

Monday, July 23rd, 2012

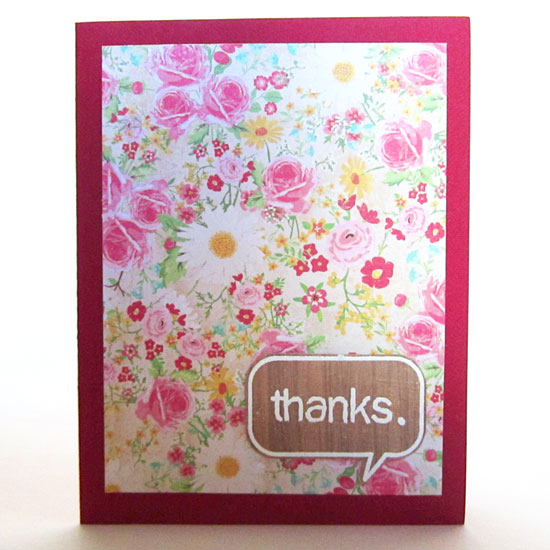
Thanks Card

During our Oregon vacation, my husband and I had spent one night at C.H. Bailey House.

This is a darling bed and breakfast that we didn’t really want to leave.

About a week after we came back we received a beautiful card from the hostess/owner, Sherry.

In this card she thanked us for choosing C. H. Bailey House.

I was so moved by this gesture that I decided to return a thank you card of my own, which is the one you can see above.

Sometimes a simple ‘thanks’ will suffice.

Products Used

Process

This card was super easy to make.

I simply cut the patterned paper a bit shorter and narrower than the card front (4″ by 5¼”) and mounted it over the card front.

Then I stamped the speech bubble on top of another, more solid, patterned paper with Versamark ink, covered it with embossing powder and heat set it with the heating tool.

Next I added the greeting, which fit perfectly inside the stamp from the other set – and embossed it as well. As I didn’t have a period stamp, I simply added it with a Versamark embossing pen before applying the embossing powder to the entire greeting.

Finally I cut around the embossed image and adhered it to the card with some foam tape.

That. Is. All.

If you like it –

JM-S1 | Record
Spice up your everyday memories with handmade epoxy stickers.

Just $3.00 per package.
6 stickers in each package.
Each sticker measures approximately ¾â€ by ¾â€.


Card Inspiration – Thanks

Monday, July 16th, 2012

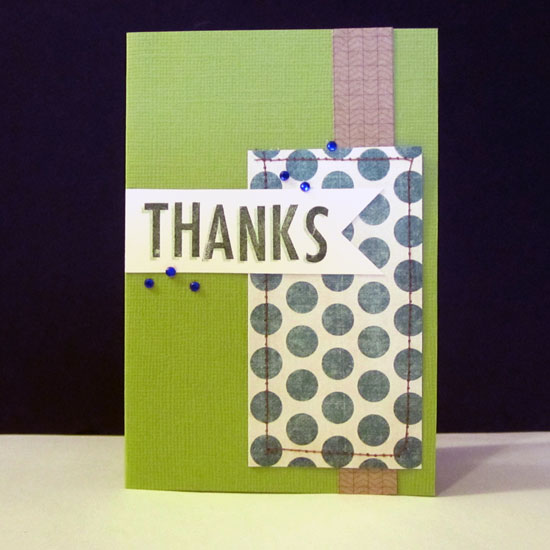
Thanks Card

I have recently won a spot (via Lisa Spangler’s blog) in Jennifer McGuire’s and Kristina Werner’s newest class: “Stretch Your Stamp“.

So far this is a FABULOUS class with so much information and a TON of inspiration. I will definitely check out their next classes.

The class is broken down into types of stamps (alpha, graphic, etc.) and for each type they have a separate lesson with a ton of non-conventional ways to use these stamps.

I was really inspired by one of the ideas from the letter stamps lesson, which is stamping the letters twice without re-inking the stamp and creating an offset shadow.

I’ve also just bought Studio Calico’s “Stepping Stone” alphabet stamp set. I love the font and the versatility of having a solid and an outline version of each letter. [Another buying option: Simon Says Stamp]

As the letter stamps are all cut to the same length, it is easy to align all the letters together and stamp the entire sentiment at once, rather than stamping each letter individually. It also helps that the word ‘Thanks’ doesn’t have repeat letters…

You should give this double stamping technique a try – it’s so easy and the results are really fun.

[Regrettably I found that most of my ink pads dried out, so my results are not the best – but try it with a juicier ink pad and you’d love it]

Now I need the ink fairy to visit, as I just bought a ton of stamp sets (well, 5 setsis a ton for me…) and I cannot play with them without ink. Bummer.

By the way, the stripe of patterned kraft paper is taken from the sheet I designed for the backers of my Journaling Mates. So with each package you buy, you get a piece of this high quality, exclusive patterned paper as well.

If you liked it –

JM-S2 | Signs
Bring life to your projects with handmade epoxy stickers.

Just $3.00 per package.
6 stickers in each package.
Each sticker measures approximately ¾â€ by ¾â€.


Monochrome Texture Technique Highlight

Wednesday, June 27th, 2012


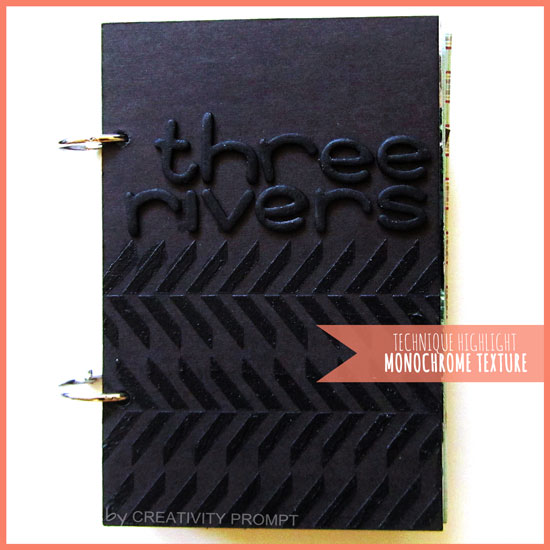
Monochrome Texture Technique Highlight

A lot of you commented and liked the monochromatic texture on the cover of my most recent travel mini album.

I am a great believer in giving credit where credit is due and in this case the credit belongs to my talented friend, Alexandra.

I was thinking about using a modeling paste with my stencils for a while but didn’t do anything about it UNTIL I saw this AMAZING page and technique highlight by Alexandra on creating your own background with masks. In this tutorial Alexandra created a gorgeous white on white texture using a modeling paste and one of Studio Calico’s masks.

After seeing how striking the result is I had to give it a go too.

Here is how I did it:

Supply

[Click on the image to find the product at Simon Says Stamp]

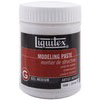
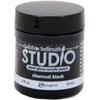
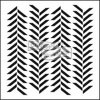
Liquitex MODELING PASTEBlack acrylic - Claudine Hellmuth Studio PAINTThe Crafter's Workshop MINI HERRINGBONE 6 x 6 Template

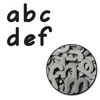
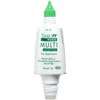
Maya Road DEBORAH MINI CHIPBOARD AlphabetTombow MONO MULTI Liquid Glue

How-To

Title

  1. Paint raw chipboard letters the same color of your background. Use a few thin layers of paint and let dry completely between layers, rather than slather on a thick layer of paint. Make sure to paint the sides of the letters as well to avoid the raw chipboard’s color peeking through.
  2. Let dry completely. Thin layers get completely dry very quickly.
  3. Adhere to your cover with a strong liquid adhesive that dries clear. Again, use minimal amount of glue. Just dot it a few times rather than applying thick lines of glue to avoid spilling.

Textured Pattern

  1. Affix the template to your background with a repositionable tape, such as painter’s tape or a washi tape.
  2. Mix the modeling paste with acrylic paint to create the same color as your background – skip this step if your are working on a white background.
  3. Apply a layer of the paste-paint mix with a spatula to make sure it spreads evenly on top of the template. Make sure that you apply pressure only vertically so you won’t accidentally push the paint underneath the template and mess up your pattern. If you don’t have a spatula you can use an old credit card or a plastic ID card. I’ve got a lifetime supply of fake credit cards from all the spam mail we receive in our mail box daily…
  4. If you want to create an imperfect pattern, mask off some of the template with the same low-tac tape you used to affix the template. Skip this step if you only wish to mimmic the template, as is.
  5. Remove the template carefully and let it dry completely.
  6. Marvel at your beautiful textured pattern. [Oops. Obviously this step is optional]

Share

Are you going to give this technique a go? Have you ever tried it? I would love to hear about your experience and any suggestion you may have!

JM-S2 | Signs
Bring life to your projects with handmade epoxy stickers.

Just $3.00 per package.
6 stickers in each package.
Each sticker measures approximately ¾â€ by ¾â€.


Travel Mini Album Featuring Journaling Mates

Monday, June 25th, 2012

Travel Mini Album

It’s been a while since I last posted a creative project.

As I have told you before, my right hand has been on the mend.

I wanted to get back on track as soon as possible and finish what I had started before said procedure was done.

A couple days after my sutures were removed seemed like a good time to get back on track.

Oh no. That was not a good idea.

By the time I finished with this album I was literally bleeding…

You can’t blame me for lack of determination, right?

Anyhow I wanted to spotlight a few of the different ways I used my Journaling Mates ןn this album.

DirectionDirection. One of the most obvious ways to use the Journaling Mates is to employ the images to direct the eye. Here I used an obvious arrow [JM-R2] to lead the eye in the direction I want it to go, but you may use any lines in the graphics to do the same thing for you – the airplane’s head [JM-R2], the index finger in the vintage hand image [JM-R2]“, etc.
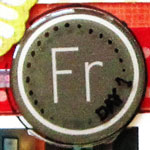
Indicate timeIndicate time. Another obvious use of the calendar Journaling Mates [JM-R1] is for indicating the time. It comes especially handy in travle albums where you wish to convey the passage of time and remember what happened on each day. You can either use the sticker as is or you can add more details to it with a permanent marker or doodle around it. Like I did on this example. These stickers may be useful in projects such as “Project Life“, “Week In The Life” and “December Daily” where the passage of time is a main theme.

TextureTexture. One of my favorite things to do with these stickers is to use them to add texture to an otherwise flat page. The epoxy stickers are slightly raised and are shiny which is a perfect combination to add to a page filled with only two-dimensional pieces such as photos, patterned paper and flat letter stickers.
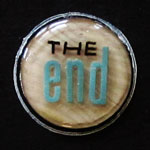
Combine ProductsCombine Products. Now that I’ve showed you how I use the stickers to add texture to two-dimensional stickers I will show you how I use these alphabet stickers to add interest to the Journaling Mate sticker itself. Here I used a woodgrain background sticker [JM-R2] and wrote ‘the end’ on it using a permanent pen and the same Lily Bee alphabet stickers. As I adhered this specific sticker on the back cover I also added a layer of Glossy Accents to it. To make sure your ink won’t bleed, once in contact with the Glossy Accents, first make sure it is completely dry and also give it a test-drive on a random piece of plastic packaging before using it on the sticker itself.
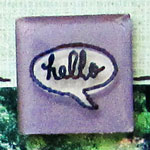
Outline and WriteOutline and/or write on it. There is another cool way to alter your stickers and add interest as well as adding context and personalizing it is by using a permanent pen to outline the images on the sticker – giving it a doodled, handmade look and also writing messages or greeting on it, just like I did on this speech bubble sticker [JM-S2]. What’s nice about this technique is that the three-dimensionality of the sticker adds movement and the outline seem a bit offset without the need to painstakingly draw an offset line. This technique would also make a very cute specialized card!
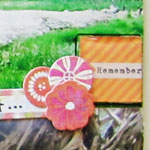
LayeringLayering. Working with layers of embellishments is very trendy right now and the Journaling Mates are perfect as either a base layer, like here, or a top layer. Their dimensionality comes in lieu of the trusty old 3D foam adhesive. By layering cute stickers on top of the sticker I created the same dimensionality without using additional products to raise the stickers.
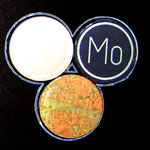
GroupingGrouping. There is no rule against using more than one sticker per page… I love to group similar embellishments together to create a focal point and the Journaling Mates are no exception. Here I used both calendar [JM-R1] and general travel stickers [JM-R2] together to finish off the album.
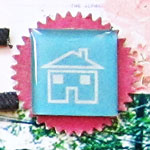
MattingMatting. One of the easiest ways to add visual interest and to emphasize the sticker is by sticking it on a mat of a contrasting colored paper. Here I used a pinking circle punch to create the fun mat but you can use any shape and any tool to create your mat.
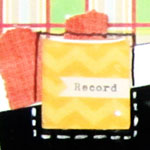
DoodlingDoodling. Last but not least is a fun idea you can use on any embellishment or element you have on your page. Doodling adds lightness and a ton of personality to a page. You do not have to start drawing intricate patterns. Just go with simple lines (or dashed lines) alternating between pen tips and colors. Again, the three-dimensionality of the Journaling Mates comes in handy as tracing it is totally fool-proof, just nest the tip of the pen on the foot of the sticker and trace. It cannot get any easier than that. Me thinks.

If you like it –

The Complete Album

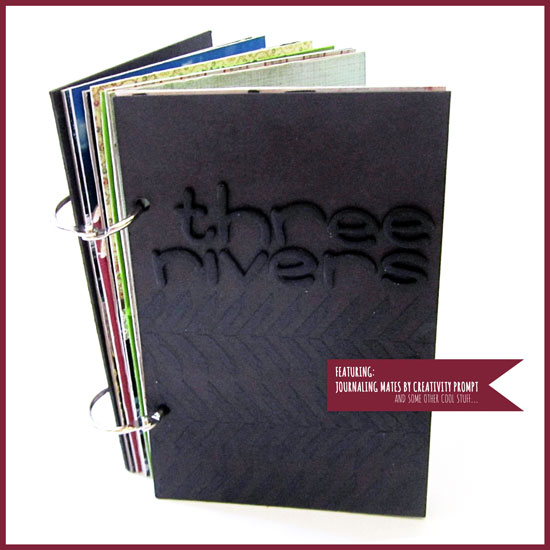
Three Rivers Mini album