/** Font types */

Posts Tagged ‘Video’

Inspiration Prompt – The Domino Effect

Monday, May 25th, 2009
The Domino Effect
[Photo by: Wikipedia]

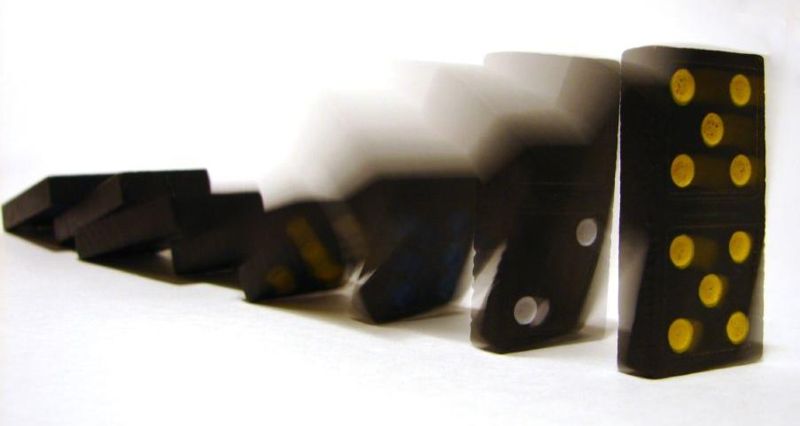
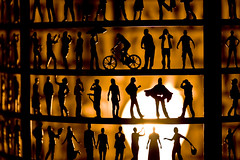
Creativity pertains to the domino effect on two different levels.

First. The domino effect represents a state of flow. After the first tile has dropped, the entire line of tiles is falling, one-by-one, until there is no tile left standing.

So is working in a state of creative flow. After the first couple of awkward lines has been put onto the paper or the first couple of sentences has been typed, there is no stop until a masterpiece emerges.

Second. The domino effect also represents a creative way to deal with mishaps or accidental occurrences. A whole new game (and perhaps a sport) evolved by chance. I remember my grandmother and grandfather used to play domino on the big dining room table, only instead of laying the tiles horizontally they laid it vertically. Looking at them playing, I can imagine how the falling dominoes game was invented…

So are many creative projects. One mistake. One wrong stroke, over heating or mixing the wrong materials can bring to wonderful creations of fine art.

For this week’s inspiration prompt I suggest to derive inspiration from the domino effect. We can benefit both from its representation of creative flow and of dealing with mishaps creatively.

This prompt was inspired by one of my readers – Alexander Gartley – who made this wonderful project, together with his co-workers, to promote a creativity and innovation festival at the Rochester Institute of Technology, where they work:

Dominoes Everywhere from Jared Lyon on Vimeo.

Enjoy the domino effect and get creative!

Share

Share your ideas and thoughts on creativity and the domino effect and leave a comment 🙂

Inspiration Prompt – Keep On Trying and Don’t Be afraid To Get Help

Monday, May 18th, 2009
Keep On Trying
[Photo by: Joiseyshowaa]

Whether we ask for it or not life has in store for us an abundance of challenges. As long as we are trying we will never fail. As long as we believe in our ability to overcome – we will succeed. Though there is one thing we should learn how to do and it is to allow ourselves to get help.

Getting help from a friend or a kind person is not failure, it is the means to success.

Every problem has its solution and some problems can be solved only by mutual work. Getting help doesn’t mean we are unable to solve the problem. It merely means we have identified the solution and it includes another person in it.

Be open. Be hopeful and optimistic. Keep on trying and don’t refuse a helping hand.

I saw this video on You Tube and it conveys this inspiration prompt wonderfully:

Share

Are you willing to keep on trying and get help when you need it? Share your thoughts and comment on this post.

Have a fahhhhhbulous day!!!

Creativity Prompt – Working With Sketches – Cards

Friday, May 8th, 2009

Working With Sketches - Cards
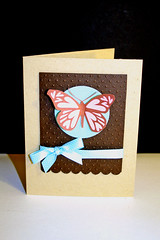
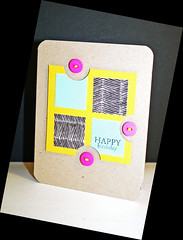
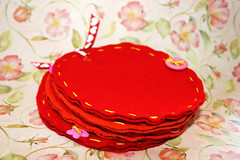
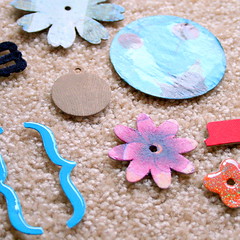
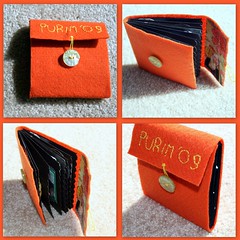
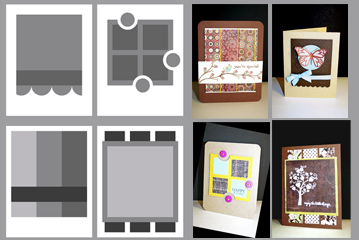
Whenever I feel uninspired I try to change the way I go about my work. Lately I have been feeling I am getting into a creative rut and just haven’t been feeling “in the zone”. That’s why I have decided to get out of my comfort zone (which is designing “as I go”) and try something I do not usually do – plan the project in advance…

I went ahead and used my Adobe Photoshop Elements 7.0, that makes my life a lot easier, but the same can be achieved with a simple grid paper, a ruler and some shape templates.

The benefits of using a sketch

  1. Seeing the big picture. Sometimes only after the fact I see that some elements don’t go well together. The scale isn’t right or the space between the elements is either too big or too small. The design is too busy or too empty. By sketching the design on a scratch piece of paper (or a computer file) I can see if things work out or not, before pulling out the expensive products and adhering them down.
  2. Easy placement and measuring. Working on a grid does the measuring for you. Instead of calculating how tall and how wide should be a panel in a 3 panels design, with an even gap between the panels and the edges of the card… – you just draw the shapes and start counting the square slots… Nothing gets easier than that. Translating the sketch onto your project is easy with the use of a T-Square ruler or a grid ruler. One square on the ruler is usually the same as one square on the grid you’re working with (usually an 1/8″ square)
  3. An inspirations boost. Although it seems conversely, using a sketch with bare elements actually sparks your creativity and do not limit it. Each element in your sketch can be interpreted in a million ways. You can play with different products, textures, dimensions and so on and so forth. As the design is taken care of you are free to think about the rest of the elements without fearing it wouldn’t work out.

I was working on some card sketches, and this is what I came up with:

Cards Sketch

[Click on the sketch for a larger view. Feel free use the sketches for personal use]

These are the cards I made using the sketches:

Sketchy Card

Sketchy Card

Sketchy Card

Sketchy Card

Take a look at how I made this last card:

Share

If you have any question, suggestion or remark – don’t hesitate to contact me – either leave a comment here, use the contact form or start a new thread on the Creativity Prompt Flickr group!!!

I would be VERY happy to see your cards based off these sketches, so don’t be shy and share – either leave a link at the comment section or share on the Creativity Prompt Flickr group‘s pool 🙂

Inspiration Prompt – Connecting People Through Art

Sunday, May 3rd, 2009
Connecting People Through Art
[Photo by: Stuart Richards]

Art is one of the most intimate expressions of one’s soul. Whenever someone creates something artistic, he dives deep inside himself in search of inspiration and motivation. The artist seeks his inner creative child and the connection between the two is manifested by the artist’s masterpiece.

This artistic process is one of the few things that are similar in all people. Religion, nationality, gender, beliefs and opinions cannot alter this process. Therefore why not use the forceful power of art to connect people together?

After finding the common denominator of people all around the world – lets use it to spread love and friendship all over.

In the beautiful project “Playing For Change” people are already forgetting their differences and using music to connect – watch the wonderful video below and see it happens.

Why should we stop at music. Art can connect people in many different ways.

Share

How can you connect people together through art? Have you ever done that?

Please share your thoughts and experiences by leaving a comment on this post.

Inspiration Prompt – You Are Great

Monday, April 27th, 2009
You Are Great
[Photo by: Pardeshi]

A friend of mine linked to a bunch of inspiring videos on twitter, among which this short movie by Kurt Kuenne has appealed to me the most (shared below). Everyone needs validation. (some people less than others). How lovely it is to hear “You are great” in a way that sounds genuine and sincere. It prompts a smile and warms one’s heart. It is wonderful.

If you haven’t heard it today, I wanted to tell you that YOU ARE GREAT. Yes you are.

You might live routinely – day in and day out – without noticing how amazing you really are. Without appreciating how beautiful you are. Without recognizing your accomplishments. Without smiling. Now is the time to stop for a split second and recognize how amazing you really are.

while a smile is starting to form, the heart to warm up and widen, validate a person standing near by and looking all gloomy and blue. Tell this person how amazing he is. Make him smile. You will feel even more amazing, so will this person – and the person he’s going to validate next, and the one validated afterward.

Lets make this world filled with happy and smiling people by validating forward.

Share

Let me hear your thoughts and leave a comment on this post 🙂

Have a great day wonderful person!!!

Creativity Prompt – How To Make An Oval Felt Mini-album

Friday, April 17th, 2009

Felt Mini Album
Surprisingly felt costs less than cardstock. How strange is that? Michael’s offers letter size pieces of felt in many vibrant colors for only 30 cents a piece. Regardless of its price, felt adds so much more to a project than a simple piece of cardstock. It adds softness, texture, cuteness and a dash of “je ne sais quoi” that makes everything better.

For this week’s creativity prompt I teach you how to make this cutest little felt mini album. If you feel like making one, stay tuned and keep on reading.

Tools and Supply

How To


Music by josh Woodward

Step By Step Instructions

  1. Cut from your cardstock 1 big oval and 5 ovals which are ¼” smaller then the first one. The big oval will be used as a template for your felt pages and the smaller ones will be used to support the felt pages and make them more durable.
  2. Take your largest oval and lay it down on your felt. Trace around it with a marker. You will need 10 felt ovals for a 5-pages album.
  3. Cut your felt ovals out.
  4. Note: for the sake of this tutorial, I have skipped this step – which is the main one => Now it’s time for you to create your beautiful felt album pages. Make use of the felt’s special qualities. Embroider on it. Sew your pictures and patterned paper onto it (just pierce them first with an awl). Add buttons, flowers and other pieces of fabric with a needle and a thread. Be creative!!! All the back stitches will be covered in the next step.
  5. “Sandwich” each 2 felt pages with 1 cardstock “core”. Adhere the felt pages temporarily with a tape runner.
  6. Sew all around the edges of the felt “sandwich”. Make sure you don’t sew through the cardstock.
  7. As you will not be able to conceal the edges of your embroidery floss, thread them through a button and tie in a knot. this way you can secure your stitching and add a decorative finishing touch at the same time. (Tip: Add a tiny bead of diamond Glaze to your knot to prevent it from fraying later on.)
  8. Punch a hole at the top of each oval “sandwich” and set an eyelet in it. The crop-a-dile works the best. (as you can see on the video, I was trying to use a Provo Craft’s eyelet setter too and it was too hard to poke through the 3 layers of felt and cardstock).
  9. Thread your ribbon (or book binding ring) through the eyelets (Tip: Cut the ends of the ribbon in a sharp angle to make the threading easier), make a cute knot and enjoy your fuzzy mini-album.

Mini Felt Album Mini Felt Album

Share

If you have any question, suggestion or remark – don’t hesitate to contact me – either leave a comment here, use the contact form or start a new thread on the Creativity Prompt Flickr Group!!!

I would also be very happy to see your own creations, so don’t be shy and share 🙂

You might also like these tutorials:

Inspiration Prompt – Is Freedom Manifested By Choice?

Monday, April 6th, 2009

In the coming Wednesday I will be celebrating Passover’s eve. Basically we are celebrating the release of the Israelites from the ancient Egyptian’s slavery. Sadly, the Israelites were not the only enslaved people. All through history – and in the present time as well – many people are enslaved by other people.

Penal servitude is an obvious situation where a person loses his human rights, but there are so many other kinds of servitude. For example taking the right to vote or the right to obtain higher education from a person also hinders his freedom.

For this week’s inspiration prompt I would like you to ponder along with me whether freedom by itself can be enslaving? An interesting notion to get our wheels rolling up there…

In Nineteen Eighty Four George Orwell describes an extreme situation in which slavery is considered freedom. In this book it is a corrupted slogan, but perhaps some aspects of it are true?

Psychologist Barry Schwartz is suggesting that perhaps more is actually less and maybe freedom is not manifested by choice, but to the contrary. I have recently listened to his fascinating talk on TED and would like to share it with you and hear your thoughts about it:

Share –

Does choice cultivate our freedom or taking away from it? Share your thoughts by leaving a comment on this post.

Pssst… In light of the coming holiday there are plans for some more fun this week. (Has anyone mentioned a giveaway???) If you are not already subscribed to Creativity Prompt, make sure to subscribe now, so you won’t miss the opportunity to win a great prize. {Look at the side bar for the free subscription options}.

Creativity Prompt – How To Use Those Paper Scraps

Friday, April 3rd, 2009

How To Use Those Paper Scraps If you are anything like me then you probably have a ton of paper scraps. The scrapbooking industry keeps on wowing us with delicious patterned papers and I feel bad about throwing away any tiny little cut out… Not to mention the environmental repercussions of tossing all that paper (read: severed trees) away.

I have found a great “marriage” between my current stash of paper scrap and patterned paper which is still on my wish list. I have derived inspiration from the wonderful new collections from Sassafras Lass and recreated my own patterned paper design, while using only paper scraps.

Sassafras Lass I was particularly inspired by the “Dream Big” patterned paper from the “Anthem” collection.

So if you are interested in recreating this layout while using all your little paper scraps – stay tuned and keep on reading:

Supply –

How To –


[Go to YouTube to watch the video in HD and feel free to rate, comment and subscribe]

Step By Step Instructions –

  1. Take a piece of scrap paper (I used recycled newsprint paper) and cut it to the size of your desired design. Mine is 8″ by 8″.
  2. Cut a circle from your scrap piece of paper. It doesn’t have to be centered. Just position it whenever you’d like your focal picture to be.
  3. With a pen and a ruler start drawing your design.
  4. After you are pleased with your design, list all your individual shapes by number, this will make your life much easier later on.
  5. Cut each individual shape with your scissors. Don’t worry about the curvy part, as your focal picture would lay over it.
  6. Now it’s time to get all your paper scraps. Use as many or as little textures, colors and patterns as you like.
  7. Adhere each individual shape to the back of your paper scrap. Make sure the number faces down (just apply your adhesive to the number itself, to avoid “mishaps“). Don’t forget to rewrite the number again at the back…
  8. Using those numbers, reassemble your design and adhere all the individual shapes onto your background cardstock.
  9. Adhere your focal picture with foam adhesive. The photo doesn’t have to be circular. I just think it adds some extra flair. (You can crop your photo with a photo editing software, such as Adobe Photoshop Elements, or you can use any circle cutting system you feel comfortable with).
  10. Add your title and call it good (Well, except for some journaling).

Share –

If you have any question, suggestion or remark – don’t hesitate to contact me – either leave a comment here, use the contact form or start a new thread on the Creativity Prompt Flickr Group!!!

I would also be very happy to see your own paper-scraps creations, so don’t be shy and share 🙂

Creativity Prompt – Embellishing Raw Chipboard shapes

Friday, March 27th, 2009

Chipboard Embellishments
This is post is the second in the series of Embellishing Embellishments. A couple weeks ago I suggested ways of embellishing paper flowers and this week we are going to embellish raw chipboard shapes.

Chipboard is a great way to add some dimension to your project, without adding too much bulk. Chipboard is basically a bunch of layers of paper, pressed firmly together, therefore it provides a slight raise, when adhered on regular cardstock or paper.

Saying that, chipboard, in its raw state, is rather… well… ugly. Many companies provide covered chipboard shapes but the price tag can rise up and you never get EXACTLY the color, texture, finish you want on your project.

There are many companies offering raw chipboard shapes. Usually the price does play a role in telling the quality of the chipboard. For the sake of this tutorial I was using Colorbok’s chipboard shapes, they retail for 1$ but they are very thin and the layers are easily separated (especially in techniques that requires gel medium). I do recommend Maya Road’s chipboard. It has high quality yet isn’t very expensive.

The techniques I am showing on this week’s video are:

Each technique requires different tools and supply, and you may not want to experiment with all of the techniques, so I will list a separate supply and tools list for each technique below. I will also post a small picture of the chipboard, after the technique had been applied on it. You can click on each photo for a larger view.

How To –

Step By Step Instructions –

Painting with crackle paint


Painting with crackle paint Painting with crackle paint

Tools and supply –

Instructions –

  1. Apply crackle paint to chipboard with the brush that comes with it. If you want, you can dilute the paint with a drop of water. Avoid bumps and clumps, but don’t apply it too thinly.
  2. Let dry completely.
  3. For an “epoxy” look, cover in Diamond Glaze and let dry for a few hours.

Flocking


Flocking
Tools and supply –

Instructions –

  1. Apply a generous layer of glue and cover with flocking material.
  2. Pat on flocking material with your finger. (Don’t press too hard).
  3. Let dry for a minute or so.
  4. Shake off excess flock.
  5. Repeat on “bald” areas (The step you will need patience for…).

Covering in glitter


Covering in glitter
Tools and supply –

Instructions –

  1. Apply a generous layer of glue and cover with glitter.
  2. Pat on flocking material with your finger. (Don’t hesitate to apply pressure this time).
  3. Let dry for a minute or so.
  4. Shake off excess glitter.
  5. Cover in Diamond Glaze (avoid bubbles) and let dry for a few hours.
  6. Alternatively –

    Cover chipboard with colored glitter glue and let dry completely.

Covering with cardstock/patterned paper


Covering with cardstock
Tools and supply –

Instructions –

  1. Apply glue to the right side of the chipboard in a very thing layer.
  2. Adhere chipboard to cardstock or paper, while its right side is facing down.
  3. Let dry completely and then cut around with a sharp craft knife.
  4. File the excess off.

Stamping


Stamping
Tools and supply –
You can use any stamp (rubber or photopolymer/clear) and any ink, I’ll list the ones I used on the video.

Instructions –

  1. Apply a base layer of ink to the chipboard. (I really like the smoothness of the chalk ink).
  2. Ink up the stamp well and stamp on the chipboard. Apply a good amount of pressure to make sure the image will transfer evenly and completely.

Decoupage


Decoupage
Tools and supply –

Instructions –

  1. Apply gel medium to chipboard (you can put a base coat of ink before, if you want the final result to be tinted).
  2. Separate the top layer of the napkin and lay it on the chipboard – right side up.
  3. Apply a second coat of gel medium on top of napkin.
  4. Wait until it dries completely. I was impatient and it made everything more complicated than it should be, So LET IT DRY!!!
  5. Cut around the chipboard shape with micro-tip scissors. (you can poke them in any hole or cavity of the shape).
  6. Apply a thin layer of gel medium to the edges of the shape. It will straighten all stray pieces of napkin as well as prevent the chipboard from separating.

Photo Transfer


Photo transfer Photo transfer

Tools and supply –

Instructions –

  1. Start by choosing your photos and printing them on transparency with an inkjet printer. I am using Canon MP620 Wireless All-in-One Photo Printer.
  2. Apply a base coat of ink to the chipboard.
  3. Apply gel medium to the chipboard and lay the printed transparency over it, inked side down.
  4. Apply pressure to the transparency with a brayer and rub the image off with a bone folder.
  5. Gently peel off the transparency and make sure the top layer of the chipboard isn’t stuck to the transparency. If it is stuck, peel it gently with the tip of your craft knife’s blade and adhere it back on with some more gel medium.
  6. Apply another coat of gel medium on top – but make sure it is completely dry first.

Share –

If you have any question, suggestion or remark – don’t hesitate to contact me – either leave a comment here, use the contact form or start a new thread on the Creativity Prompt Flickr Group!!!

Can you think of other ways to embellish chipboard? Which technique is your favorite? Which technique have you used before? Share your thoughts by leaving a comment on this post.

I would also be very happy to see your own creations, so don’t be shy and share a link 🙂

Cretivity Prompt – Felt Mini Album

Friday, March 20th, 2009

Felt Mini Album 
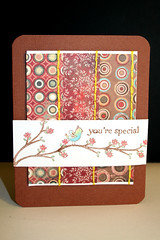
One of the hardest things in living far away from your family is being absent from family gatherings during the holidays. Purim is one of those occasions. The kids are wearing their costumes and the general atmosphere is one of joy and festivity. This Purim I wasn’t able to join my family, but I wanted to create a mini album that I can carry around so at least I will be near the photographed memories…

To capture the holiday spirit, I designed a mini album which is covered in felt and has some embroidery details on its cover, as well as a decorative edge to all the signatures inside. This mini album is in fact a dressed up version of the 10 minute mini book tutorial. I guess my minis want to dress up for Purim – who am I to stop them?

The felt cover protects the album, but also provides softness that makes you want to caress it… A feeling which goes hand in hand with the cute pictures of my nephews and niece: Superman, the Bride, Robin Hood and the Knight In Shining Armor…

If you want to make one for yourself or as a gift to a loved one, keep reading…

Tools & Supply –

How To –

Step by Step Instructions –

  1. Cut your cardstock at 9″ by 4″. (If you want to give up the scalloped edge, or to simply round up the corners, you can cut your cardstock at 8″ by 4″ and score at 4″ instead).
  2. Score your cardstock at 4½” and fold in half. Use a bone folder for a crisper crease.
  3. Align the edges of each closed signature with the tick marks of the border punch. Make sure the ends are placed at the same tick mark on both sides. Punch firmly and repeat all across the edge. If you are more cautious about your [EXPENSIVE] punch, or if your signatures are made of heavy-weight cardstock, you can punch each edge individually, as long as your alignment is precise. It will just take longer.
  4. Attach the signatures together with glue stick. Again, take special care at aligning the scallops together. Use a brayer to insure a strong hold.
  5. Let the signatures dry while they are spread wide open to make sure they won’t get stuck together.
  6. Measure and cut a stripe of felt. Use the signatures for measuring. Just pencil in a tick mark a little bit above the height of the signatures and cut along with sharp scissors. (~4¼” by 11½”).
  7. Figure out the placement of your flap using the signatures. Note that the spine adds some dimension. After finding the right placement, pencil in your title and embroider over it using a backstitch.
  8. After finishing your title design, use the remaining embroidery floss to create a loop in the middle of the flap. Thread your embroidery floss horizontally and allow a loop to form, then secure its ends. Don’t worry about the backside of the flap, as it’ll be covered later.
  9. Use the signatures to find the placement of the flap on the felt cover when closed. Allow some room for adding dimensional elements to the album’s pages. Sew a button in correlation to the loop you have just added to the flap.
  10. Measure and cut a piece of patterned paper and glue on the flap to conceal the embroidery’s backside. Use a brayer to insure a strong hold. (~4″ by 2″.)
  11. Attach the signatures to the felt with glue stick, let dry and start playing with the inside pages 🙂

Here is a glimpse to all the inside pages of my mini album:
[Click on the photo for a closer view]

The Inside Pages Of The Mini Album

Share –

If you have any question, suggestion or remark – don’t hesitate to contact me – either leave a comment here, use the contact form or start a new thread on the Creativity Prompt Flickr Group!!!

I would also be very happy to see your own creations, so don’t be shy and share 🙂