/** Font types */

Posts Tagged ‘layout’

Family Trip

Monday, June 13th, 2011

Family Trip Layout

This layout is photo heavy, as I wanted to include all the photos we took at a day trip with Nadav’s parents, while we were visiting home in April.

All the photos were printed at 4″ by 6″, but one was trimmed to fit in…

Supply Used


Welcome Little One Workshop
Check out Creativity Prompt’s new and unique self paced workshop: “Welcome Little One”. This workshop will provide you with everything you need, and then some, to make a fabulous handmade mini album to record the first moments of a new born baby.

You And I Share A Passion

Thursday, June 9th, 2011

You and I Share a Passion

In my last visit to Israel I found out that my 7-years-old nephew loves to take pictures.

I always knew he is a talented little guy. He’s drawing and painting whenever he has the chance to do so.

He’s also gifted, but that’s just me bragging. So unrelated… Moving on.

I never knew that he also likes to take pictures.

He is so talented. He has a great eye for composition and he did a very good job with my DSLR.

Better job than mine…

In this layout you can see a photo of me taken by him with my camera and a photo of the little guy with his camera, taken by me.

[Bragging again – he’s also very cute. Handsome little guy].

Products Used

[Note: a lot of the products are old, thus unavailable]

Grandma, This Is How I Remember You

Thursday, May 5th, 2011

Grandma, This Is How I Remember You

[Fonts: Little Days, Hobo and Adler.]

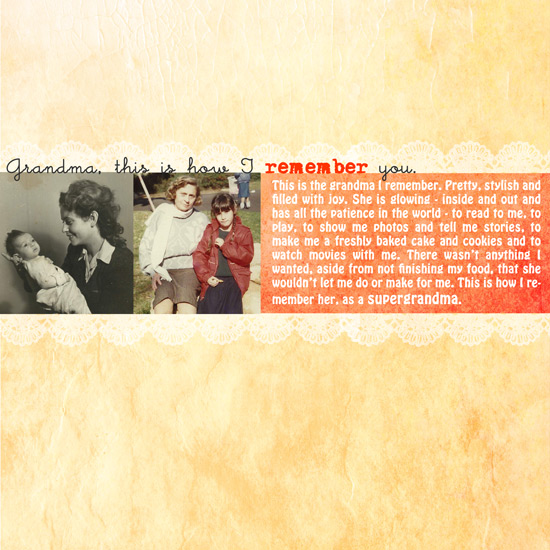
In the left photo you can see my grandma holding her first born, my mother (circa 1948) and on the right you can see me and grandma at the park near her home (circa 1988). 40 years apart – still beautiful.

Let me tell you some more about my grandmother.

She was born in Poland to an affluent family of merchants and Jewish scholars.

Her family was ultra-orthodox, Chassidic. Her parents had 10 children in total.

When she was a young adult she started questioning her parents’ Chassidic ways and had secretly joined a more secular Zionist group.

She was very careful not to hurt her father’s feelings and would leave home wearing long sleeved shirts and long skirts and then change into more modern apparel and meet with her Zionist friends.

Not long afterward she fell in love with a beautiful young student who shared her modern viewpoint and after awhile they got engaged.

Sadly, her beloved fiance was caught “in the line of fire” in an outburst against the Jews in the community and was hanged then and there in the center of the neighborhood.

She was heartbroken but determined to keep on living.

Just a couple years later, WW2 started and Hitler occupied Poland.

My grandma remembered the day the Nazis came to her neighborhood and started lining up all the jews. She and her family members ran out into the chilling evening and into the woods.

My grandma had blond hair and blue eyes and was well educated [thus fluent in Polish and Russian] so she could pass for a non-jew, which was what had saved her life and prevented her from the destiny of most of her other family members [very unsettling but true].

She was hidden for about a year, working as a potato peeler in a remote peasants’ inn until someone found out she is Jewish and asked for things she refused to give in return for his silence…

She took off immediately and ran towards the Russian border, where she was caught as an enemy of the country [being Polish…] and sent to a hard labor camp in Siberia.

In Siberia she had to stand all day with light clothes and thin soled shoes and cut trees, in the burning cold (up to minus 40 degrees in the wintertime). She received a portion of 1 coarse loaf of stale bread and 1 cup of water a day and watched hundreds of people give up and die – every single day. But my grandmother endured until the war was over.

Then she came back to Germany and got reunited with her brother. Only 2 brothers had survived the Holocaust (and 1 sister who had left for Israel before the war started and survived as well).

In Germany she met my grandfather who had lost his family as well. They fell in love and got married and had my mother while they were still living in Berlin.

Thereafter my grandparents left Berlin and came to Israel where they started their own restaurant in downtown Haifa and they had both lived in Haifa until their last day.

My grandma was a hard working woman and a survivor. She had strong determination to work as long as she could.

My grandma also had the type of charisma that drew people towards her wherever she went and whatever she did.

She was a generous person who always loved to host as many guests as possible and prepare noteworthy dinners for everyone.

She had led a long, laborious but fulfilling life – a real inspiration to everyone.

Creativity Prompt – Write Your Journaling With Letter Stickers

Wednesday, November 24th, 2010

Hoover Dam Layout

I am now working on my Las Vegas trip album. We went there last year and travelled around a little bit.

We were truly inspired by the story behind the Hoover Dam and I wanted to highlight the story in my album.

That’s why I decided to write down the story using letter stickers. It really emphasizes the story portion of the layout.

The micro mono stickers by Basic Grey are PERFECT for the job. They are small enough to stay in proportion and there are multiple stickers of each letter – both lowercase and capital letters. You really get a ton of stickers per sheet – and in the rare case you run out of a letter (like I ran out of ‘d’s) it is really simple to cut around the letter and use its outline instead, which also add a nice graphic element to the journaling.

Give it a try!

Side Note

Check out how I tucked in the ticket to the power plant tour underneath the picture on the left side of the layout. I do that a lot to keep souvenirs from my trip. All I do is apply the adhesive just to 3 edges of the photo, so it creates a pocket. If the ticket is on the smaller side, I add a strip of adhesive in the middle, to keep the ephemera from getting buried inside the photo pocket.

Supply

  • Background paper: Cloud 9 Design by Colorbok
  • Letter stickers:
  • Make Your Own Planner 2012
    Check out Creativity Prompt’s new and unique self paced workshop: “Make Your Own Planner”.
    This workshop will show you how to make a beautiful handmade planner for the year 2012. Not only are you going to get the entire meticulously designed planner kit for instant download, but you will also get a high resolution video tutorial as well as step-by-step instructions to guide you on each step of the way. Either treat yourself with a fresh and creative start for the coming new year, or get it to create wonderful gifts for your family and friends.
    Join now

Sometimes A Title Will Suffice – a Journaling Prompt

Monday, September 27th, 2010

a polka dots kind of day layout

[Fonts: Adler; Digital Kits:Bazinga Mini Kit by Shimelle Laine for Two Peas In a Bucket.]

I am an advocate of the story behind the photos.

Saying that, I also think that sometimes the story can be depicted with just a few words.

Sometimes the title alone will suffice to convey the moment.

This layout is a terrific example. The title is certainly enough (in conjunction with the date and the photo) to bring back the memories from that long day that at the end of it I decided to paint bright yellow polka dots on my nails… Oh, what a day it was.

Share

What memory can you capture with a single title? I would love to hear your thoughts, so please leave a comment and share with me.

Welcome Little One Workshop
Check out Creativity Prompt’s new and unique self paced workshop: “Welcome Little One”. This workshop will provide you with everything you need, and then some, to make a fabulous handmade mini album to record the first moments of a new born baby.

Sharing More Layouts

Wednesday, April 7th, 2010

Sometimes I just feel like creating with no reason or rhyme. No specific order. No specific theme. Just putting memories onto pretty paper.

Birthday

Supply

  • Cardstock: American Crafts “Earth Tones
  • Patterned Paper: Sassafras “Sunshine Lollipop” wee bundle.
  • Letter Stickers: generic from the 1 Dollar bin at Target.
  • Journaling tag: Creativity Prompt. (free)
  • Decorative tape: Anna Griffin Border Stickers [I used the Valentine collection]
  • Sticker: KI Memories.

Purim

Supply

Share

Have you been scrapbooking lately? Please leave a comment and share your thoughts and experiences.

Unleashing The Creative Child Within You

Is It Spring Yet – Sharing A Layout And A Techniqe

Tuesday, April 6th, 2010

Is It Spring Yet

Supply

  • cardstock: Bazzill
  • Patterned paper: My Minds Eye “Home” (pale blue), Autumn Leaves (text)
  • Adhesive: Fabri Tac by beacon; Glue Glider Pro by Glue Arts; 2 Way Glue by EK Success.
  • Letter Stickers: American Crafts “Lullaby” Thickers (white), Generic from the Dollar bin at Target (turquoise), Jenni Bowlin Tiny Circle Stickers.
  • Tools: Punches: EK Success (scallop border punch), Martha Stewart (starburst); Stapler: Tiny Attacher by Tim Holtz.
  • Journaling tag: Creativity Prompt.
  • Ribbon: American Crafts (Dotted), Generic and o-l-d (seafoam thin satin)
  • Jewels: generic.

How To

Pleated Ribbon

  1. Attach the edge of your ribbon with 2 tiny staples.
  2. Apply a line of fabric glue. Fabri Tac is WONDERFUL. (I wish I was endorsed by Beacon. I am not)
  3. Pleat the ribbon along the glue line irregularly to create a messy look. don’t worry about the pleats opening up at this stage.
  4. Go back and apply a bead of glue underneath each “pleat” to keep it in place.

Ribbon Flower

Also Known as – what to do if you run out of ribbon while pleating but happen to have a similarly colored ribbon at hand…

  1. Put a drop of fabric glue where you want your flower center to be at and adhere the tip of your ribbon strip to it.
  2. Apply some more glue around the glued edge and start turning your ribbon around it, flipping the ribbon occasionally.
  3. Keep applying more beads of glue around and building your “flower” until you are satisfied with its size.
  4. Cut off the excess ribbon and tuck the end underneath one of the pleats with another bead of glue.

Share

Is it spring yet? Share your thoughts by leaving a comment.
If you give the techniques a try – pweeeeeze share 🙂

Make Your Own Planner Workshop
Check out Creativity Prompt’s self paced workshop: “Capture Your Dream”. In this workshop you will capture, follow and make your dream come true as well as document your journey in a fabulous mixed media mini album.

Creativity Prompt – Going Back To Scrapbooking Basics

Friday, June 19th, 2009

Going Back To Scrapbooking Basics: photos and cardstock
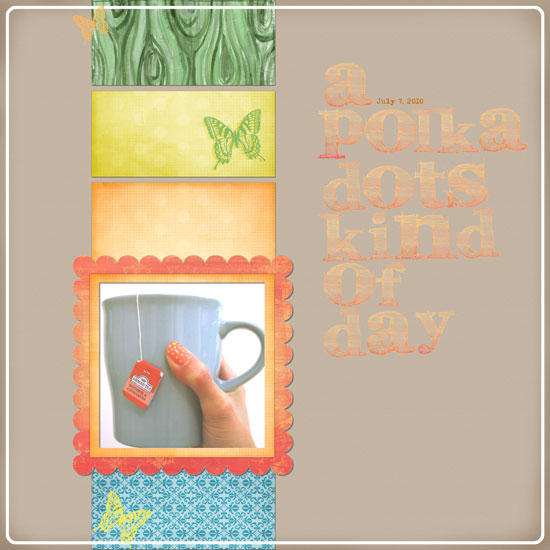
Every once in a while when I feel the muse is playing hide-and-seek I like to take a step backward, get rid of all the fluff and go back to the basics. The same applies to scrapbooking.

The industry is flooded with beautiful products and tools. Wonderful papers, inks, stamps, embellishments, die-cuts and so on and so forth. Design team members are making layouts that can be presented in art galleries. Little by little, the wonderful hobby of putting together a scrapbook to tell our stories is becoming a tedious chore with a lot of pressure involved.

I am sorry to say that I have heard many creative people deciding to give up scrapbooking altogether. Some did it knowingly and some just don’t get to it anymore because of all the work and pressure involved… Isn’t it a shame?

Pressure and high expectations are known foes of our inner creative child. They practically eliminate our creativity and drive our muse away.

Therefore for this week’s creativity prompt, I prod you to go back to scrapbooking basics. Make a layout with only your photos and cardstock and nothing else. Preferably without using any fancy tools as well.

This is how I did it –

Tools & Supply

Tips

  • Use the grid on your cutting mat and ruler to align and cut elements to size without measuring. Just align the edge with the marks on the grid for a fool-proof straight-cutting and even positioning.
  • You can also use the grid ruler to draw perfect frames around any element. Align the edge of your element with the grid and trace with a marker.
  • Emboss your journaling surface (either a tag or the background cardstock itself) to create subtle journaling guidelines.
  • Vary the tip size of the markers you use to add instant graphic interest to your journaling design.
  • DON’T FORGET THE STORY.
  • Most importantly – don’t fiddle with your layout. Know when to call it done and move forward to the next story. HINT – Perfection is NOT the criteria…

Share

How are you going back to scrapbooking basics? When was the last time you only pulled out your photos and cardstock?

Leave a comment on this post and share!

Workshop - Capture your Dream

Creativity Prompt – How To Use Those Paper Scraps

Friday, April 3rd, 2009

How To Use Those Paper Scraps If you are anything like me then you probably have a ton of paper scraps. The scrapbooking industry keeps on wowing us with delicious patterned papers and I feel bad about throwing away any tiny little cut out… Not to mention the environmental repercussions of tossing all that paper (read: severed trees) away.

I have found a great “marriage” between my current stash of paper scrap and patterned paper which is still on my wish list. I have derived inspiration from the wonderful new collections from Sassafras Lass and recreated my own patterned paper design, while using only paper scraps.

Sassafras Lass I was particularly inspired by the “Dream Big” patterned paper from the “Anthem” collection.

So if you are interested in recreating this layout while using all your little paper scraps – stay tuned and keep on reading:

Supply –

How To –


[Go to YouTube to watch the video in HD and feel free to rate, comment and subscribe]

Step By Step Instructions –

  1. Take a piece of scrap paper (I used recycled newsprint paper) and cut it to the size of your desired design. Mine is 8″ by 8″.
  2. Cut a circle from your scrap piece of paper. It doesn’t have to be centered. Just position it whenever you’d like your focal picture to be.
  3. With a pen and a ruler start drawing your design.
  4. After you are pleased with your design, list all your individual shapes by number, this will make your life much easier later on.
  5. Cut each individual shape with your scissors. Don’t worry about the curvy part, as your focal picture would lay over it.
  6. Now it’s time to get all your paper scraps. Use as many or as little textures, colors and patterns as you like.
  7. Adhere each individual shape to the back of your paper scrap. Make sure the number faces down (just apply your adhesive to the number itself, to avoid “mishaps“). Don’t forget to rewrite the number again at the back…
  8. Using those numbers, reassemble your design and adhere all the individual shapes onto your background cardstock.
  9. Adhere your focal picture with foam adhesive. The photo doesn’t have to be circular. I just think it adds some extra flair. (You can crop your photo with a photo editing software, such as Adobe Photoshop Elements, or you can use any circle cutting system you feel comfortable with).
  10. Add your title and call it good (Well, except for some journaling).

Share –

If you have any question, suggestion or remark – don’t hesitate to contact me – either leave a comment here, use the contact form or start a new thread on the Creativity Prompt Flickr Group!!!

I would also be very happy to see your own paper-scraps creations, so don’t be shy and share 🙂