/** Font types */

Posts Tagged ‘scrapbook’

Scavenging My Scrap Basket – Creativity Prompt

Monday, March 8th, 2010

My scrap basket is a disgrace. I seem to only use it one way – dumping more and more bits and pieces inside. I have scraps of papers from companies that no longer exist… (not that it’s that difficult in our economy, but I am talking about Chatterbox and the like…).

A scrap basket isn’t supposed to act as a burial place for broken 12 by 12 sheets… It is supposed to live symbiotically with the rest of the supply. Complete and enrich each other.

This is not the case, unfortunately.

My total lack of time drives me repeatedly to my stash of paper pads and loose leaf papers because it is easier, fresher, more approachable. Not the most economically and environmentally friendly way of working with papers… I know.

Sometimes I am determined to work with my scraps, and I usually love the result but it doesn’t happen frequently enough.

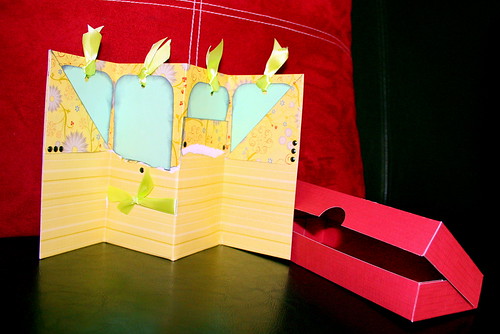
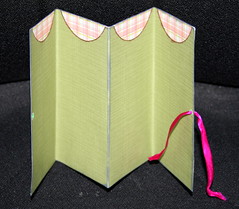
This weekend I felt like pulling out my scrap basket and see what treasures I can find inside, here is what I made –
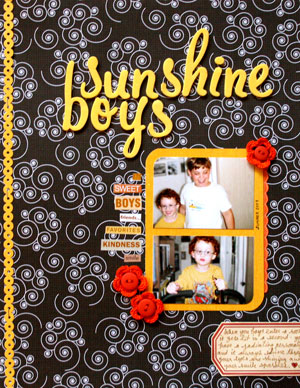
Sunshine Boys Layout
Supply

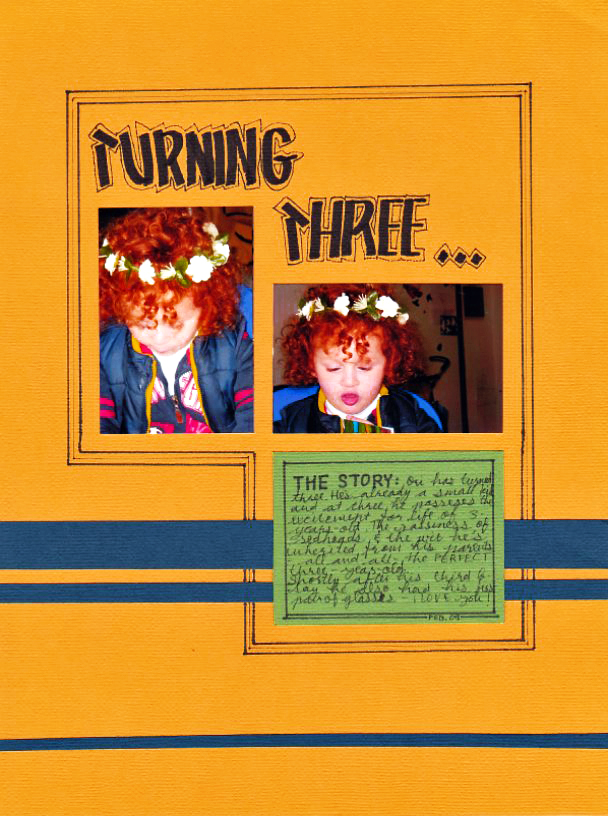
Patterned papers: Black River, Sassafras, Chatterbox.

Letter stickers: American Crafts, Making Memories.

Embellishments: Paper frills by Doodlebug Designs, buttons by We R Memory Keepers, Crochet flowers – handmade.

Journaling tag: Creativity Prompt.

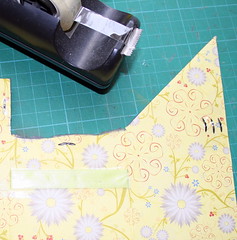
Tools: Tim Holtz (Tiny Attacher + Scissors), We R Memory Keepers Corner Chomper.
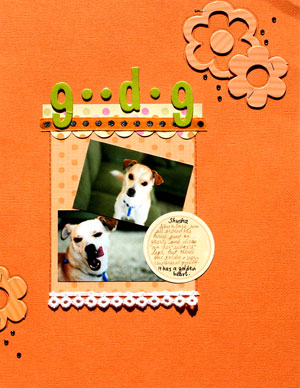
Goodog Layout
Supply

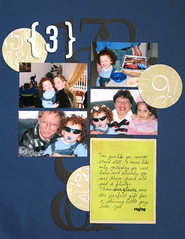
Patterned papers: Black River, KI Memories.

Cardstock & letter stickers: American Crafts.

Embellishments: Ribbon: American craft (orange), Other (lace). Chipboard accents: Making Memories. Jewels: Basic Grey.

Journaling tag: Creativity Prompt.

Tools: Tim Holtz. (I absolutely love the Tiny attacher. I was skeptic at first, but it goes through the chipboard like butter)
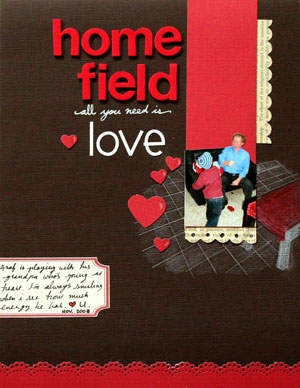
Home Field Layout
Supply

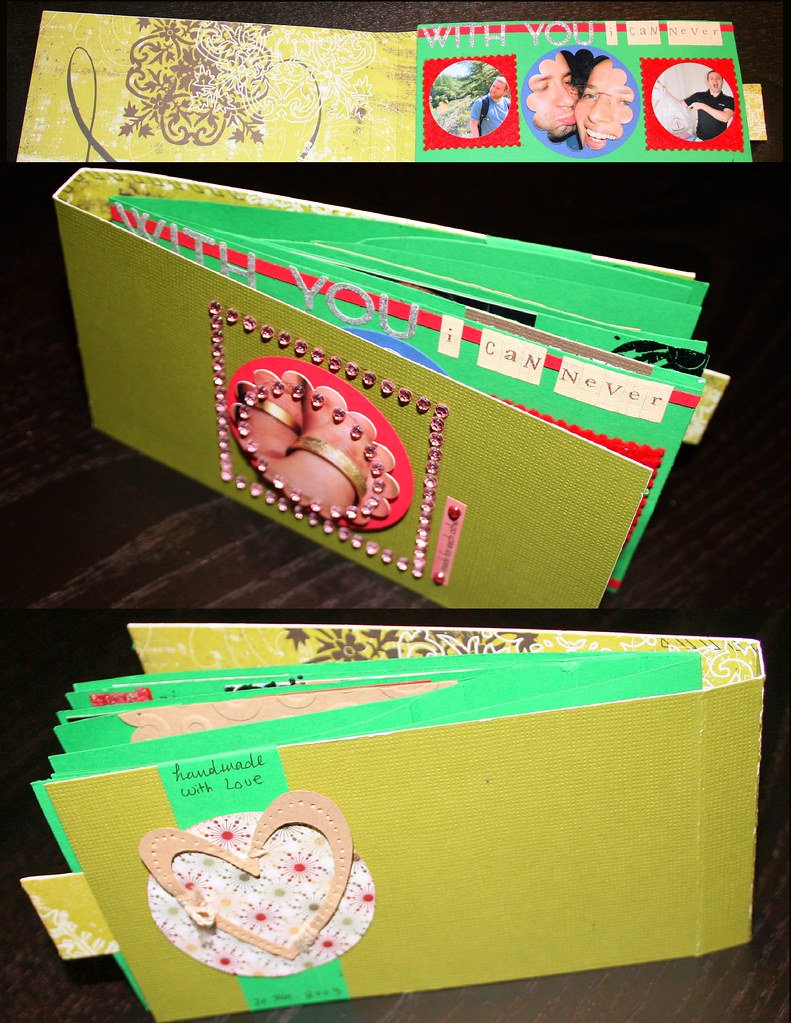
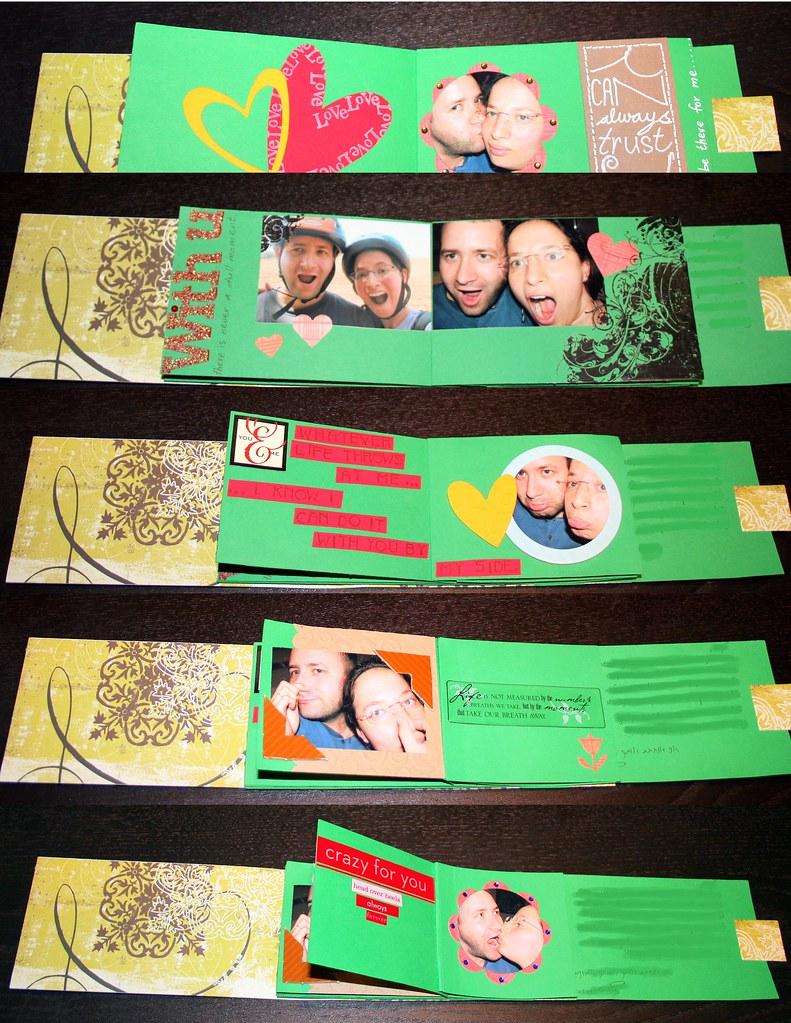
Patterned papers: vintage textbook paper.
Cardstock: Bazzill (dark brown) DCWV (red).

Letter stickers: American Crafts, Doodlebug Designs; White gel pen: Uniball Signo.

Punches: Martha Stewart (Heart + Doily Lace), Fiskars (Threading Water + Scallop Sentiment), Other: Small heart.

Journaling tag: Creativity Prompt (will be posted soon).

Other: colored pencils (Prisma)

Share

Have you been working with your paper scraps lately? What relationship do you have with your scrap basket/ drawer/ tray? Please share and leave a comment.

If you have any question, suggestion or remark – don’t hesitate to contact me – either leave a comment here, use the contact form or start a new thread on the Creativity Prompt Flickr Group!!!

I would also be very happy to see your own creations, so don’t be shy and share 🙂

Make Your Own Planner Workshop
This year you can really make your dream come true!

“Capture Your Dream” workshop is a self-paced, six weeks long workshop, that will walk you through a journey of capturing your biggest dream and making it come true.

In the process of making your dream happen – with lots of inspiration and guided self-exploration, you will also create a mixed media mini album from scratch and learn many tips and techniques – including some photography pointers that will add character to your photos and will help you take better pictures of your projects.

The workshop includes 30 printable PDF lessons with step-by-step pictures and instructions as well as several printable templates you may use in other projects too.

I am confident you will enjoy it and find it helpful so I also offer full money back guarantee while the workshop lasts.

Creativity Prompt – Make A SIMPLE Fabric Covered Mini Album

Friday, October 9th, 2009

A SIMPLE Fabric Covered Mini AlbumFor this week’s project you don’t even need cardstock. It’s as simple and easy as it gets…

All you need is a batch of 4″ by 6″ photos, a 5″ by 6″ piece of chipboard and a fabric scrap.

Is that all? Yes. That. Is. All.

In my album I gathered pictures from 5 different apartments my husband has lived at (in 5 different continents). There is one common denominator in each photo – my husband is completely absorbed in his computer. I named the mini album: “Nadav’s Playground”…

If you have a few photos that tell a story and you wish to compile them in this cute album you can carry around or gift to a dear one, than read on.

Tools & Supply

How To


Watch on You Tube [Music is by Josh Woodward with permission]

Step By Step Instructions

  1. Cut 2 pieces of chipboard at 2½” by 6″ each.
  2. Fold each photo in half lengthwise (into 2″ by 6″).
  3. Adhere half of each photo to the next with glue stick – back to back – to create a photo booklet. Go over it with a brayer to eliminate air bubbles or glue bumps.
  4. Lay your chipboard pieces over the left side of the fabric scrap. Leave a gap between the 2 chipboard pieces. The gap should be as thick as the booklet’s spine.
  5. Adhere the chipboard to the fabric with glue stick as laid before.
  6. Trim off the excess fabric. Leave a 2″ edge all around the chipboard pieces.
  7. Cut the corners of the fabric, but leave a small gap for a neat fold later.
  8. Adhere the fabric flaps to the chipboard with glue stick. Use a brayer to ensure the adhesion.
  9. Adhere the booklet to the cover with glue stick.
  10. Embellish! (Although the American Crafts letter stickers are self adhered, I added a dab of strong liquid glue to make sure they stay put. TIP – I ran out of some of the letters so I switched on my creative half. The ‘N’ is actually a trimmed ‘M’ and one of the ‘A’s is an ‘at’ sign – which goes well with the computers theme.)

A SIMPLE Fabric Covered Mini AlbumA SIMPLE Fabric Covered Mini Album

I want to share with you one of my favorite pictures from this mini album. It was taken here at our apartment in California. Note the pasta on his lap and the computer on the dinner table…

My husband's passion for anything computer-wise

Isn’t that a memory to cherish?

Share

If you have any question, suggestion or remark – don’t hesitate to contact me – either leave a comment here, use the contact form or start a new thread on the Creativity Prompt Flickr Group!!!

I would also be very happy to see your own creations, so don’t be shy and share 🙂

Creativity Prompt – How To make A Double Accordion Brag Book

Friday, June 26th, 2009

How To make An Accordion Brag Book
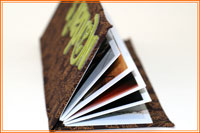
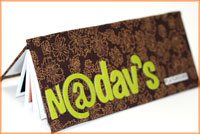
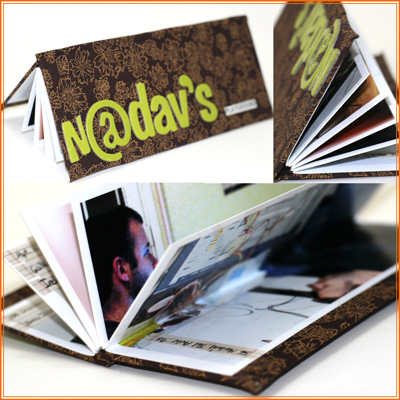
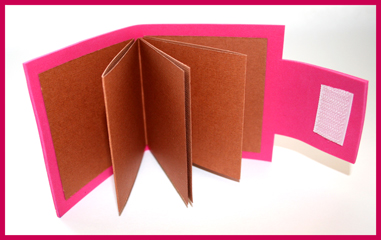
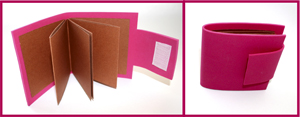
For this week I have a 5-minute-project for you. An adorable little brag book with a fun foam cover that makes it extra “snugglable”.

It is cute. It is easy. It is super, light-speed, quick and it is made with very inexpensive materials. The perfect project.

Put a 2″ by 3″ photo with a 1″ by 3″ piece of patterned paper or journaling strip on each page for the quickest scrapbook ever.

Tools & Supply

How To

Step by Step Instructions

  1. Cut fun foam to 3½” by 9½”.
  2. Cut 2 cardstock strips of 3″ by 12″ each.
  3. Score each strip at 3″, 6″ & 9″. You can just align your score lines with the 3″ mark on your paper trimmer.
  4. Fold your score lines – once up and once down – to create an accordion fold.
  5. Adhere the folded cardstock strips to the fun foam with a double sided adhesive. Optional – Before attaching each cardstock strip, you can add a strip of ribbon to it – just align the middle of the ribbon with the center point of the back of the cardstock and adhere to the fun foam. Tie the ends of the ribbon in a bow to make sure your accordion fold stays put.
  6. Find the center of the fun-foam cover’s flap with the grid ruler and mark 1″ on each side. Cut along these marks all the way to the bottom of the flap and snip off the ends.
  7. Adhere the velcro or magnetic snaps to the flap. To make sure the aligning is perfect, adhere both parts of the velcro while they’re attached together and then peel off the backing and close the flap. To allow some room for bulky embellishments, make sure you don’t close the flap too snag.

Accordion Brag Book Accordion Brag Book Accordion Brag Book

Share

If you have any question, suggestion or remark – don’t hesitate to contact me – either leave a comment here, use the contact form or start a new thread on the Creativity Prompt Flickr Group!!!

I would also be very happy to see your own creations, so don’t be shy and share 🙂

Reminder

Only a few more days left for the early bird’s admission to “Capture Your Dream“. Don’t miss the special offer of only $14.95 for 30 downloadable lessons!!! (LESS THAN 50 CENTS PER LESSON)

Workshop - Capture your Dream

Creativity Prompt – Going Back To Scrapbooking Basics

Friday, June 19th, 2009

Going Back To Scrapbooking Basics: photos and cardstockEvery once in a while when I feel the muse is playing hide-and-seek I like to take a step backward, get rid of all the fluff and go back to the basics. The same applies to scrapbooking.

The industry is flooded with beautiful products and tools. Wonderful papers, inks, stamps, embellishments, die-cuts and so on and so forth. Design team members are making layouts that can be presented in art galleries. Little by little, the wonderful hobby of putting together a scrapbook to tell our stories is becoming a tedious chore with a lot of pressure involved.

I am sorry to say that I have heard many creative people deciding to give up scrapbooking altogether. Some did it knowingly and some just don’t get to it anymore because of all the work and pressure involved… Isn’t it a shame?

Pressure and high expectations are known foes of our inner creative child. They practically eliminate our creativity and drive our muse away.

Therefore for this week’s creativity prompt, I prod you to go back to scrapbooking basics. Make a layout with only your photos and cardstock and nothing else. Preferably without using any fancy tools as well.

This is how I did it –

Tools & Supply

Tips

  • Use the grid on your cutting mat and ruler to align and cut elements to size without measuring. Just align the edge with the marks on the grid for a fool-proof straight-cutting and even positioning.
  • You can also use the grid ruler to draw perfect frames around any element. Align the edge of your element with the grid and trace with a marker.
  • Emboss your journaling surface (either a tag or the background cardstock itself) to create subtle journaling guidelines.
  • Vary the tip size of the markers you use to add instant graphic interest to your journaling design.
  • DON’T FORGET THE STORY.
  • Most importantly – don’t fiddle with your layout. Know when to call it done and move forward to the next story. HINT – Perfection is NOT the criteria…

Share

How are you going back to scrapbooking basics? When was the last time you only pulled out your photos and cardstock?

Leave a comment on this post and share!

Workshop - Capture your Dream

Creativity Prompt – Working With Sketches – Scrapbook Layouts

Friday, May 15th, 2009

Last week we were using sketches to make handmade cards. This week we go back to our trusty Adobe Photoshop Elements 7.0 or handy-dandy grid paper and plan scrapbook layouts.

The idea is the same – planning the layout in advance helps in looking at the design as a whole, making sure it is harmonious, balanced and complete.

Also using a grid helps to figure out all the measurements for us and all we have left to do is to pull out our supply, cropped photos, paper trimmer and grid ruler and start playing.

In scrapbooking there is an additional advantage which is the ability to use the sketch as a layout template for digital scrapbooking. To learn how to use a digital layout template check out this nifty video by Jessica Sprague.

As a bonus to my fabulous readers I am making this week’s sketch available for a free download (for personal use only) both for digital and traditional scrapbookers. Just click on the right button below:

free template downloadfree template download

Translating the sketch into a layout –


[Music is by: Josh Woodward]

Some tips & techniques shared on the video

  • Use the grid ruler to find the center of your cardstock (or any other element) easily. After finding the center, it’s really easy to figure out the right placement.
  • Use the grid ruler to align your elements together. Just place the ruler on your element and make sure the grid line is aligned with the edge of your element and that the ruler protrudes from the edge at the exact size of your desired gap, then align the next element with the ruler’s edge.
  • Use your paper trimmer together with a stylus to create straight journaling guides. Just score your journaling box or journaling tag at every ¼”.
  • To create a perfect half circle notch, just temporary adhere your photos on a scrap piece of paper (junk mail will do just fine) with the same alignment as they are supposed to have on your layout. Then punch out your half circle, using an hand-held punch.
  • When using a colorful and vibrant photos on top of a bright-colored background you can add interest without overwhelming the eye by using either lace cardstock or an overlay instead of regular patterned paper.
  • Embossing adds texture and interest. To emphasize the embossing use a cardstock with a white core (or otherwise different colored core cardstock) and lightly sand it to reveal the core on the embossed image.

Share

If you have any question, suggestion or remark – don’t hesitate to contact me – either leave a comment here, use the contact form or start a new thread on the Creativity Prompt Flickr group!!!

I would be VERY happy to see your layouts based off of the sketch here, so don’t be shy and share – either leave a link at the comment section or share on the Creativity Prompt Flickr group‘s pool 🙂

Creativity Prompt – How To Use Those Paper Scraps

Friday, April 3rd, 2009

How To Use Those Paper Scraps If you are anything like me then you probably have a ton of paper scraps. The scrapbooking industry keeps on wowing us with delicious patterned papers and I feel bad about throwing away any tiny little cut out… Not to mention the environmental repercussions of tossing all that paper (read: severed trees) away.

I have found a great “marriage” between my current stash of paper scrap and patterned paper which is still on my wish list. I have derived inspiration from the wonderful new collections from Sassafras Lass and recreated my own patterned paper design, while using only paper scraps.

Sassafras Lass I was particularly inspired by the “Dream Big” patterned paper from the “Anthem” collection.

So if you are interested in recreating this layout while using all your little paper scraps – stay tuned and keep on reading:

Supply –

How To –


[Go to YouTube to watch the video in HD and feel free to rate, comment and subscribe]

Step By Step Instructions –

  1. Take a piece of scrap paper (I used recycled newsprint paper) and cut it to the size of your desired design. Mine is 8″ by 8″.
  2. Cut a circle from your scrap piece of paper. It doesn’t have to be centered. Just position it whenever you’d like your focal picture to be.
  3. With a pen and a ruler start drawing your design.
  4. After you are pleased with your design, list all your individual shapes by number, this will make your life much easier later on.
  5. Cut each individual shape with your scissors. Don’t worry about the curvy part, as your focal picture would lay over it.
  6. Now it’s time to get all your paper scraps. Use as many or as little textures, colors and patterns as you like.
  7. Adhere each individual shape to the back of your paper scrap. Make sure the number faces down (just apply your adhesive to the number itself, to avoid “mishaps“). Don’t forget to rewrite the number again at the back…
  8. Using those numbers, reassemble your design and adhere all the individual shapes onto your background cardstock.
  9. Adhere your focal picture with foam adhesive. The photo doesn’t have to be circular. I just think it adds some extra flair. (You can crop your photo with a photo editing software, such as Adobe Photoshop Elements, or you can use any circle cutting system you feel comfortable with).
  10. Add your title and call it good (Well, except for some journaling).

Share –

If you have any question, suggestion or remark – don’t hesitate to contact me – either leave a comment here, use the contact form or start a new thread on the Creativity Prompt Flickr Group!!!

I would also be very happy to see your own paper-scraps creations, so don’t be shy and share 🙂

Creativity Prompt – Waterfall Mini-Album

Friday, February 6th, 2009

Waterfall Mini-Album For this week’s Creativity Prompt I have a fun little project for you – The Waterfall Mini Album. It’s a whimsical album that showcases your treasured memories in a playful way.

I have seen a couple of these mini-albums online but non had provided any instructions for assembling it. Therefore I have reversed engineered this album by trial and error with copy paper, until I managed to get it right. It ended up looking nothing like the ones I have seen online, but I love it and I can call it ‘mine’.

Now you can learn from my mistakes and have the full proof way of making your own waterfall mini-album…

Tools & Supply –

Tools and Supply
[For a closer look, click on the photo]

Click here for more details on my basic tools and supply.

SEI Alpine Frost paper pad.

How To –

For the cutting measurements, click here.


[The great music is by: Josh Woodward from his album: Only Whispering.]

More peeks –

Album's pages Album's pages

[For a closer look, click on the photos. I have erased the private letter to my husband]

Enjoy!!!

If you have any question, suggestion or remark – don’t hesitate to contact me – either leave a comment, use the contact form or start a new thread on the Creativity Prompt Flickr Group!!!

I would also be very happy to see your own waterfall mini albums, so don’t be shy and share 🙂

Some more feedback on the videos is welcomed!!! (Don’t forget to rate & comment on YouTube. If you feel like it… 😉 )

Creativity Prompt #17 – Tag Book

Friday, September 19th, 2008

Tag Book

For this week’s creativity prompt I have a quick and easy project for you. All you need are 3 sheets of 12″ by 12″ cardstock (OK, and some double sided tape).

With such an easy and low maintenance project I am sure every single one of you can make this beautiful tag book, along with the cute little matching box. This makes a great keepsake for yourself or a thoughtful, yet very affordable, present for a loved one.

So, lets get to work:

Supply-


Tools (optional) –

Instructions –

Tag Book

  1. Score one side of the cardstock every 3 inches and the other side at 6 inches.
    Scoring
  2. Cut 3″ down each 3″ score line on one side.
    cutting
  3. Fold and embellish the 4 flaps of the cardstock anyway you wish. You can get some ideas from this picture:
    creating embellished folds
    Here is another way of creating the pockets for the tags. You can create that with a circle punch:
    alternative pockets.
  4. Optional – Apply short strips of packing tape to seal the tips of the brads and the ribbon on the inside of the pockets to prevent the tags from getting stuck inside.
    Sealing
  5. Apply double sided tape to the seam of each fold line, as well as to the edges of the cardstock. Then fold along the 6″ line and adhere the two sides together. As an alternative, you can run all these lines through the sewing machine, and create the pockets after folding along the 6″ line.
    Adhering the pockets
  6. For the tags, cut 4 pieces of cardstock at: 2 5/8″ by 5½”
    Cutting tags
  7. You can embellish the tags with an ink pad, a corner rounder and some ribbon – and your tag book is ready!!!
    tag book

Cardstock Box

The box tutorial video is given as a courtesy of Jennifer Muraoka. Jennifer is an extremely talented artist and I enjoy following her creations both on her blog: “Kiyomi Krafts” and on her You-Tube channel. Apart from her wonderful creations, she also conveys her great personality through her tutorials and blog posts.

Share

Share your tag book creations on the Creativity Prompt Flickr group or by leaving a comment on this post with a link to your creation. You are also welcome to share your thoughts about this tag book and to suggest ideas on what to use it for. Your comments are always adding so much value to the prompts, so keep on commenting 🙂

Reblog this post [with Zemanta]