/** Font types */

Posts Tagged ‘creativity prompt’

Video Tutorial – How To Make A Mini Book Out Of Soap Wrap

Monday, September 13th, 2010

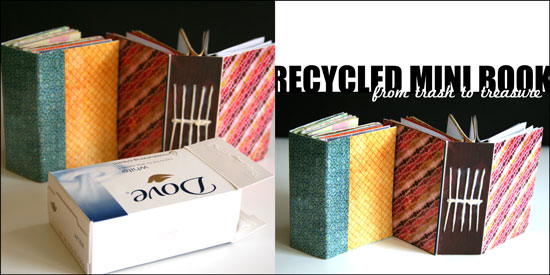
Recycled Mini Book

The Story

You know how much I love recycling and turning my trash into treasure so it’s no surprise that I came up with this project after my bathroom got filled with empty boxes of soap.

When Amy from Mod Podge Rocks e-mailed me and asked if I wanted to use some of the Plaid products on my future projects I knew this mini book idea would be perfect for the test run. The funny thing is that just before Amy e-mailed me, I already bought a huge bottle of Mod Podge Gloss for paper just the week before so I had a chance to try out 2 other products that got sent to me by the company: Mod Podge Hard Coat and Mod Podge Sparkle.

I really, really, really loved the Mod Podge Hard Coat. I initially chose it for another project. I accidentally ruined a set of coasters I had and thought the Hard Coat formula will be perfect to restore them. However I used this as a top coat for the mini book and it is amazing. It is a bit thicker than the original formula and it dries clear into a hard coat (just as its name suggests…) that seals the cover and secure the binding of the book. I really recommend this for book makers.

The Sparkle formula has fine glitter in it and it adds a fun glittery top coat to any surface. What i like about it is that it adds the glitter without the mess that usually goes with it… You just need to apply it with a foam brush and the glittery particles doesn’t rub off of it after it dries up.

The recycled mini book can be made out of any box, of any size, so I purposefully left out exact measurement, so you can use the same technique on any empty box that comes your way.

So if you feel like playing along and learn how to make this recycled mini book, keep on reading.

Tools and Supply

This project uses MINIMAL supply, as it’s mostly recycled.

How To


[Go here to watch on YouTube and while there, please rate, comment and subscribe.]

Step by Step Instructions

  1. Flatten the box by carefully disconnecting the connecting flaps at the bottom and inside the box. You may also use a craft knife for that.
  2. Use your scissors to cut off the flaps, as well as the inner flap and the short edge attached to it, so you are left with 3 sections: 2 cover sections and a spine, already creased for you…
  3. Measure the width and height of the cover sections and the spine and cut pieces of patterned paper at the same size for the cover. If you want to conceal the binding you will need one piece the size of the cover section and the other size larger by the width of the spine plus an additional inch. If you choose to conceal the binding, adhere the outer cover papers at the end.
  4. Apply a thin layer of Mod Podge to the cover section and the spine, lay the pattern paper on top of it and apply an additional layer of Mod Podge on top to seal it off. Put it aside to dry.
  5. Take a plain copier paper, the same width and height of the spine and mark 3 horizontal lines on it – one at the center and two additional ones, about an inch apart. If you work on a larger box, you may want to add more lines, equally separated from each other.
  6. Next mark equally separated vertical line, each line stands for one signature. I used 5 signatures, so I drew 5 vertical lines, one at the center and the rest in ¼” intervals.
  7. Cut your signature inserts to double the width of the cover section and the same height and fold each signature of paper inserts in half.
  8. Line up the paper guide with the inner crease of the signature and poke holes on the crease next to each of the 3 horizontal lines. these holes will help later with the binding process.
  9. After the inner cover is layered with paper with a base and top coat of Mod Podge and completely dry, line up the paper guide with the inner spine and poke a hole at each of the intersections of the horizontal lines with the vertical lines.
  10. Start binding the signatures together. Take the first one, insert the needle through the center hole and into the center hole of the signature, than to the upper hole and back from the bottom hole, into the center hole to the outer cover – repeat on all the signatures.
  11. Once you finish binding all the signatures together, weave the thread through the center line of threads until it meets the initial loose end and tie them together in a tight knot. Cut the excess thread and tidy up the knot to look as smooth and straight as possible.
  12. Lastly, apply a layer of Mod Podge Top Coat on top of the outer cover and the spine, it will secure the binding as well. You may also apply an additional layer of Sparkle Mod Podge if you want a fun glittery finish to your mini book.
  13. Enjoy!!!

Share

If you have any question, suggestion or remark – don’t hesitate to contact me – either leave a comment here, use the contact form or start a new thread on the Creativity Prompt Flickr Group!!!

I would also be very happy to see your own creations, so don’t be shy and share 🙂
Make Your Own Planner 2012
Check out Creativity Prompt’s new and unique self paced workshop: “Make Your Own Planner”.
This workshop will show you how to make a beautiful handmade planner for the year 2012. Not only are you going to get the entire meticulously designed planner kit for instant download, but you will also get a high resolution video tutorial as well as step-by-step instructions to guide you on each step of the way. Either treat yourself with a fresh and creative start for the coming new year, or get it to create wonderful gifts for your family and friends.
Join now

Make Your Own Planner Workshop
Check out Creativity Prompt’s self paced workshop: “Capture Your Dream”. In this workshop you will capture, follow and make your dream come true as well as document your journey in a fabulous mixed media mini album.
Creativity Prompt – Flip Your Template

Thursday, May 27th, 2010

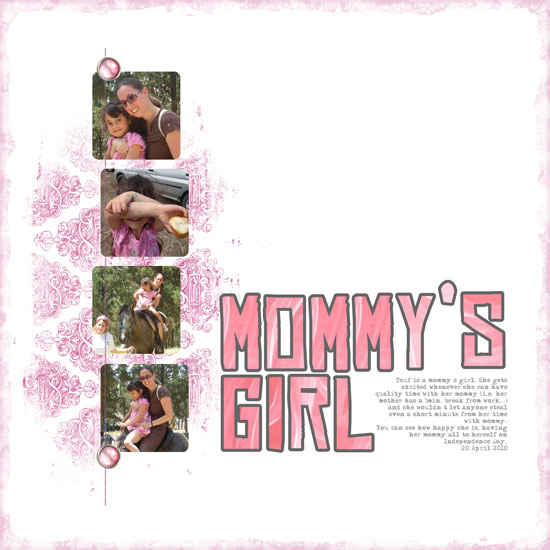
Mommy's Girl

[Font: Adler; Digital Kit: Count To Four by Shimelle Laine for Two Peas In A Bucket.]

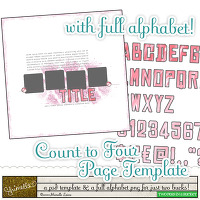
Count To Four Kit Last week I used the Count To Four template and alpha kit as is, just tweaking the colors, adding a background paper and some accent flourishes.

This week I wanted to use the exact same template, which I really like, but to make it look completely different. I also had no more than a few minutes available to make it happen… Busy times.

Well, easy.

All I had to do was to flip the template [“image” => “rotate” => “90 degrees to the right”]. I also moved the text box and title around and ended up with a completely different layout with the same 2 Dollars template… Completed in about 15 minutes.

Does it get any easier than that?

It is really important to get the stories down before they are forgotten, but many times we just do not have the time to reinvent the wheel, come up with a great design and start from scratch. Using a template (or a sketch) is a great way to go about it, but there’s a limit to how many templates we can go out and buy, isn’t it?

So here’s a good way to utilize the template you already have (or the layouts you’ve already designed) – just flip them. Vertically, horizontally, sideways. Tweak them a bit here and there and get a fabulous completely new, well designed layout in a snap.

Share

Do you reuse loved layout designs? Please share your thoughts by leaving a comment.

Think Outside the Box – Literally + Selective Coloring With Photoshop Elements

Thursday, May 6th, 2010

One way to get out of a creative rut is to use our stash – not as intended…

Use a “girly” collection for a boy’s layout or vice versa [as I did below].
Use a Christmas collection for a 4th of July layout.
Use a travel collection for a wedding.
Use patterned paper as a background and plain cardstock as an accent.
Use paper flowers as journaling blocks.
Use a winter themed paper for a summary layout.

Just ignore what the “box” says and create.
Free your mind.

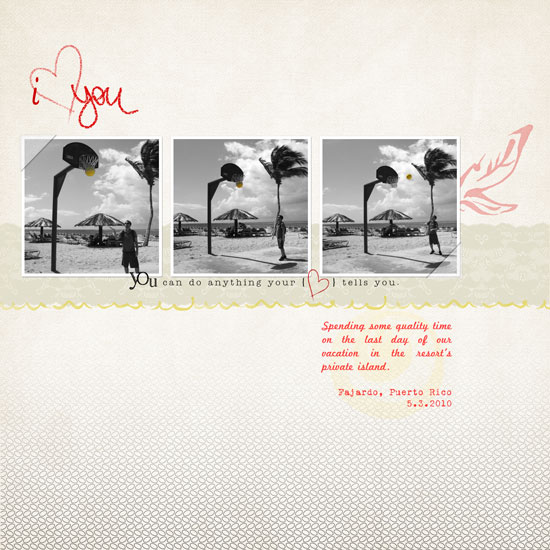
In this layout I used Karla Dudley’s new kit KD Fly Girl for a manly layout of my husband shooting hoops at the beach:

i Heart you

[Fonts: Marketing Script, VTPortableRemington; Digital Kits: KD Fly Girl by Karla Dudley.]

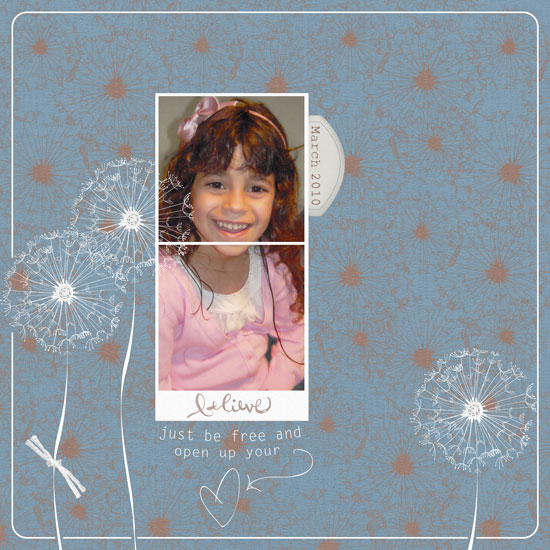
And in this layout I used Karla’s KD Fly Boy kit to create a girlie-girl layout featuring my princess niece:

Believe

[Font: Rough Typewriter; Digital Kits: KD Fly Boy by Karla Dudley.]

Photoshop Elements Tip – Selective Coloring

On my “I heart You” layout I turned my photos to black and white (by de-saturating them) and kept just the vibrant yellow color of the ball.

The azure sky and turquoise ocean are beautiful, but they are distracting from the story I want to tell.

By removing the color of everything but the ball – I am drawing attention to it and hinting that the focus of my story is there.

There are 3 ways to get that look – choose the one most comfortable to you:

Method 1

  1. Duplicate the photo’s layer (press CTRL+J on a PC or CMD+J on a MAC).
  2. Make sure your upper layer is highlighted and de-saturate the colors all the way to the left (press CTRL+U on a PC or CMD+U on a MAC).
  3. Make sure your upper layer is highlighted and choose the eraser tool (work with the default circular brush). Lightly erase just the object whose color you’d like to retain.
  4. Merge both layers when you’re done.
  5. [P.S. This is also how I “colored” the heart red on the kit’s PNG file.]

Method 2

  1. Duplicate the photo’s layer (press CTRL+J on a PC or CMD+J on a MAC).
  2. Make sure your upper layer is highlighted and de-saturate the colors all the way to the left (press CTRL+U on a PC or CMD+U on a MAC).
  3. Make sure your upper layer is highlighted and choose the Quick Selection Tool. Click on the object whose color you wish to retain until it is highlighted completely by the marching ants. If you “slip” just unselect by pressing ALT on a PC or OPT on a MAC while simultaneously clicking on the part you don’t want selected.
  4. Press delete.
  5. Merge both layers together.

Method 3

  1. Choose the Quick Selection Tool. Click on the object whose color you wish to retain until it is highlighted completely by the marching ants. If you “slip” just unselect by pressing ALT on a PC or OPT on a MAC while simultaneously clicking on the part you don’t want selected and duplicate your selection (press CTRL+J on a PC or CMD+J on a MAC).
  2. Deselect (press CTRL+D on a PC or CMD+D on a MAC)
  3. Make sure your lower layer is highlighted and de-saturate the colors all the way to the left (press CTRL+U on a PC or CMD+U on a MAC).
  4. Merge both layers together.

Share

Are you using your stash in an untraditional way? Please share your ideas/ projects with us.

Picture Imperfect – Creativity Prompt

Monday, May 3rd, 2010

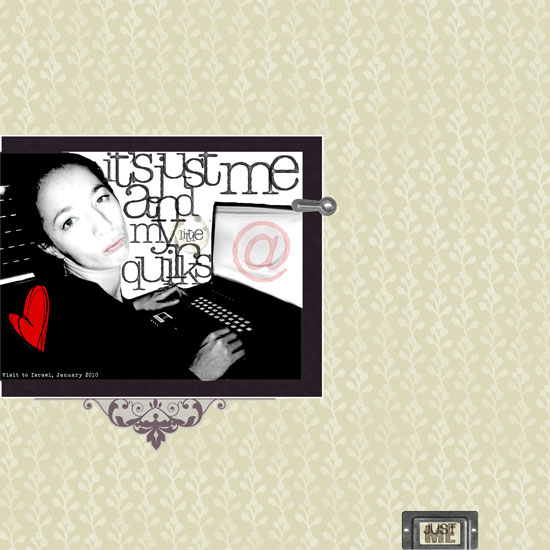
Me And My Little Quirks - Picture Imperfect

[Fonts: Urania_Czech; Digital Kits: KD Digi Essentials 5 (alpha brushes and coffee stains), KD Jillian (patterned papers) – all by Karla Dudley.]

In telling your story, the first thing you need to tackle is embracing imperfection.

Our true story, life story, isn’t about all the moments we were meticulously dressed, our make up perfectly applied and our hair glamorously done.
Our true story is about real – day to day – life.

It is the way we are when we wake up in the morning after a sleepless night.
It is the funny faces we allow ourselves to make only when we are surrounded with loved ones.
It is the way we deal with hardships.
It is the things we struggle with and eventually achieve.
It is the glow we have after completing a workout in the early hours of the day.
It is the laughter in our eyes when we make it to the top of the hill or when we meet a long lost friend.
It is about looking in the mirror and smiling because we accept ourselves the way we are.

This is who we truly are!

This picture was taken with Nadav’s cell phone camera.
I was jet lagged after a looooong flight and setting up my laptop at his parents’ guest room.
I was tired, cold, a bit dehydrated and making a goofy face (on purpose).
The picture is far from being perfect but it represents me. It portrays a side of me I want my future kids to see.

So I made a layout out of it.

Go ahead and embrace your imperfect pictures. Let them tell a true story.

Design Drill Down

As both me and the photo’s quality were sub par (hello understatement of the year…) I worked around it, making the photo look more “artistic” and “organic”.

I turned it to black and white, cranked up the levels settings, used funky alpha brushes instead of just a font and blurred and manipulated the background plus i added a touch of color to highlight my “true colors”…

The heart, lips and e-mail symbol make a visual triangle of red and the purple mat against the yellow background helps the photo pop up – as it is the main element.

The embellishment under the photo mat softens the quirky look and the bookplate “grounds” the page and also conveys the theme… Its small size is also purposeful story-wise.

There is also contrast between the soft and traditional look of the background pattern and the embellishment and the modern, funky look of the photo, myself and alphas.

Share

Have you scrapped an imperfect picture that tells a true story lately? share your thoughts with me and leave a comment.

National Scrapbooking Day Blog Hop

Saturday, May 1st, 2010

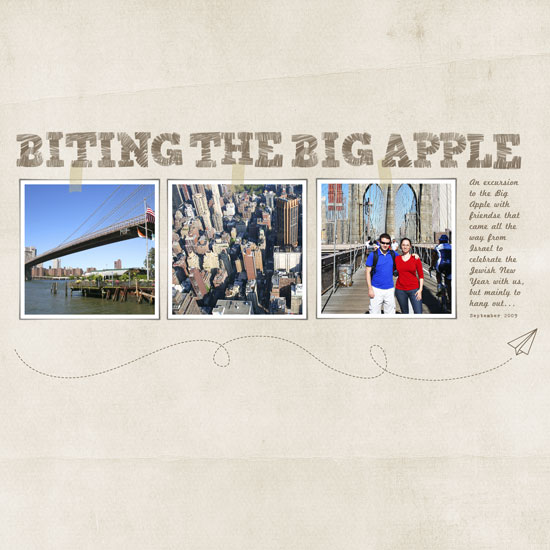
Biting the Bog Apple layout

[Fonts: Erika Ormig, Marketing Script; Digital Kits: KD Frame Essentials 1, KD Digi Essentials (masking tape), KD For The Boy (background paper), KD Fly Boy (paper airplane), KD Stamp Alphas 1 – all by Karla Dudley.]

Today is National Scrapbooking Day and to jump start the day some creative bloggers and I have gathered together in a special blog hop.

Each of us is sharing a layout with her interpretation to the subject – “Cross Country Road Trip”.

Go on and browse all the blogs to see their amazing layouts, to leave some loving and appreciative words behind and to participate in the drawings (On the table there are a copy of my e-book Unleashing The Creative Child Within You and My Mind’s Eye LUSH minibook with papers and who knows, you may hop and find some more goodies in your way)…

We invite you to join us and create a layout (all paper, all digital, or hybrid) about a trip to anywhere in the 50 United States [or anywhere else if you’ve never been to the States] and to submit a direct link to your wonderful layout on Rosann’s blog by May 15th at 11:59pm EST for a chance to win the goodies.

If you are new to my blog, make sure to pick up some of the FREE printables I am giving away each Friday. I’m sure you’d love yesterday’s woodgrain journaling labels!

Blog Hop Order

  1. Rosann => Submit your layout here for a chance to win!
  2. Jana
  3. Terri
  4. Kim
  5. Sharon
  6. Lacey
  7. Karen
  8. Avital => YOU ARE HERE

Enjoy!

Be Playful – Creativity Prompt

Wednesday, April 21st, 2010

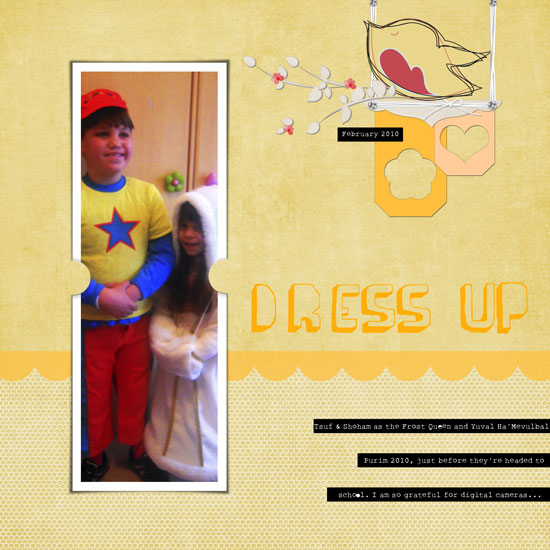
Dress Up - playful Layout

[Fonts: Rough_typewriter, Barnes_erc_; Digital Kits: KD Tweet, KD For The Boy, KD Frame Essentials – all by Karla Dudley.]

All work and no play? not in my (scrap)book!

Scrapbooking is important.
Telling the story is important.
Perpetuating memories is important.

saying that, scrapbooking is also a hobby.
As a hobby it’s supposed to be awesome.
As a hobby it’s supposed to be fun.
As a hobby it’s supposed to conform to OUR rules – not vice versa!

So I am very much into inserting some more playfulness into the process.

In this layout, with help from Karla Dudley‘s playful designs and a playful free font I have injected a much needed gaiety and cheerfulness into my layout.

The bird, for instance, is actually made out of 3 different images from the KD Tweet kit, that I layered and locked into one layer. You may need to adjust the angle of the image a bit (move your mouse cursor next to the top edge of the bounding box until it looks like a rounded arrow, then click and drag slightly up or down). I also “built” the bird-swing by using different images together, not necessarily the way one would traditionally use them.

You can mimic this idea/look with traditional “hard-copy” products by layering embellishments together or using things a bit differently than usual.

It made me smile. It might make you smile too!

Photoshop Elements Tip
How did I make the labeler-like strips?

Easy!

  • Use the rectangle shape tool to draw a short and wide strip. Make sure your shape color is black.
  • Choose the type tool and pick a typewriter font, make sure your font color is white.
  • Click on your rectangle and start typing. Click twice to commit.
  • Choose the move tool and pick 2 layers – the shape and the type (make sure they are both highlighted).
  • Click on the ‘align’ button at the top of your window and align the 2 layers together, both vertically and horizontally.
  • Lock the layers together to keep the alignment.
  • Repeat.

Share

How do you insert playfulness to your layouts? Share by leaving a comment (or a link to your playful layout)

Is It Spring Yet – Sharing A Layout And A Techniqe

Tuesday, April 6th, 2010

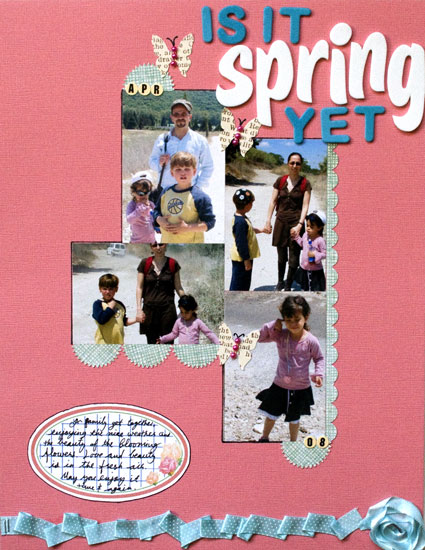
Is It Spring Yet

Supply

  • cardstock: Bazzill
  • Patterned paper: My Minds Eye “Home” (pale blue), Autumn Leaves (text)
  • Adhesive: Fabri Tac by beacon; Glue Glider Pro by Glue Arts; 2 Way Glue by EK Success.
  • Letter Stickers: American Crafts “Lullaby” Thickers (white), Generic from the Dollar bin at Target (turquoise), Jenni Bowlin Tiny Circle Stickers.
  • Tools: Punches: EK Success (scallop border punch), Martha Stewart (starburst); Stapler: Tiny Attacher by Tim Holtz.
  • Journaling tag: Creativity Prompt.
  • Ribbon: American Crafts (Dotted), Generic and o-l-d (seafoam thin satin)
  • Jewels: generic.

How To

Pleated Ribbon

  1. Attach the edge of your ribbon with 2 tiny staples.
  2. Apply a line of fabric glue. Fabri Tac is WONDERFUL. (I wish I was endorsed by Beacon. I am not)
  3. Pleat the ribbon along the glue line irregularly to create a messy look. don’t worry about the pleats opening up at this stage.
  4. Go back and apply a bead of glue underneath each “pleat” to keep it in place.

Ribbon Flower

Also Known as – what to do if you run out of ribbon while pleating but happen to have a similarly colored ribbon at hand…

  1. Put a drop of fabric glue where you want your flower center to be at and adhere the tip of your ribbon strip to it.
  2. Apply some more glue around the glued edge and start turning your ribbon around it, flipping the ribbon occasionally.
  3. Keep applying more beads of glue around and building your “flower” until you are satisfied with its size.
  4. Cut off the excess ribbon and tuck the end underneath one of the pleats with another bead of glue.

Share

Is it spring yet? Share your thoughts by leaving a comment.
If you give the techniques a try – pweeeeeze share 🙂

Make Your Own Planner Workshop
Check out Creativity Prompt’s self paced workshop: “Capture Your Dream”. In this workshop you will capture, follow and make your dream come true as well as document your journey in a fabulous mixed media mini album.

Simple Cards To Create In Minutes

Thursday, April 1st, 2010

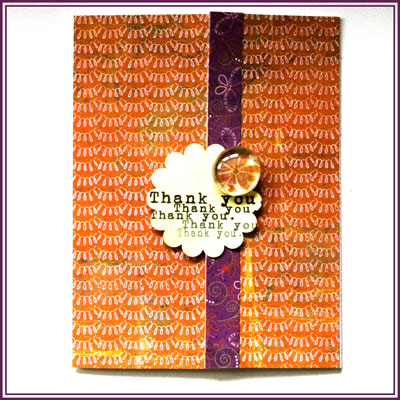
Thank You Card

Thank You Card

Supply

How-To Pointers

  • For the greeting, all I did was to open a new 8½” by 11″ document at 300dpi and write “Thank You” in black with the text tool. Than I duplicated the layer a few times and changed the size by dragging the edge of the bounding box. I Positioned each layer randomly and changed the opacity of each layer. Then I printed it on white cardstock, punched it and sprayed it with Glimmer Mist (immediately absorbing the excess liquid, so the ink won’t spread).
  • For the flower accent, I just adhered the dew drop on a Basic Grey paper with some Diamond Glaze. I’ve found it easier to put the glue on the dew drop and then press on the paper than to do that the other way around. Ranger Glossy Accents will also work great. I love it too. After the glue dries up, I cut around the dew drop, which also acts as a weight to help the gate-fold card stay shut.

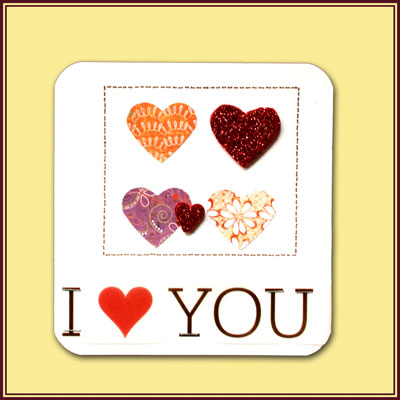
I Love You Card

I Love You Card

Supply

How-To Pointers

  • The self adhesive fun foam wouldn’t go through the punch, so I punched a scrap piece of paper, adhered it to the backer of the fun foam (as the shape is symmetric), and cut around with precision scissors.
  • To attach the vellum greeting I used the Tiny Attacher and tried to aim the staples to the lines of the letters… almost successfully… I concealed the back of the staples with a strip of patterned paper I adhered to the back.
  • For the faux stitching box, I first marked it with a pencil, using a T-Square ruler and then went over it with American Crafts brown precision pen and erased the pencil marks.
  • This card isn’t standard. It’s a square card, measured 4¼” by 4¼”. It started as a standard card, but after finishing it I felt a smaller size would look better. Trial and error, that’s the way to go.

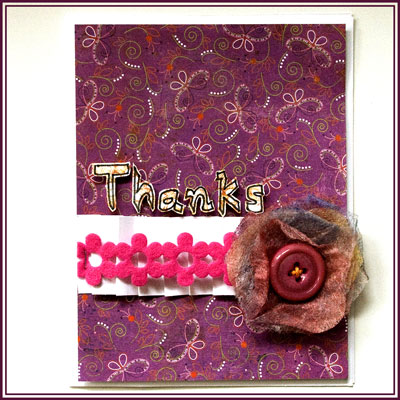
Thanks Card

Thanks Card

Supply

How-To Pointers

  • I made the flower from used dryer sheets and Glimmer mists. You may find the video tutorial here.
  • I used the scoring board to make the pleated cardstock “ribbon”. I just scored repeatedly in intervals of ½” and 1/8″ and folded the scoring lines later to create the pleats. A mountain fold after each ½” mark and a valley fold after each 1/8″ mark. Down and up and down and up… I attached it to the patterned paper with a line of glue runner, then supported it with 2 tiny staples that also attached the felt ribbon to it.
  • For the funky greeting, I first penciled it on the paper lightly (using 2 pencils held together to create the broad line), then I went over the lines with a black pen, erased the pencil marks and cut around it with precision scissors. I adhered each letter with a tiny foam dot to add dimension.

My favorite card is the first one, with the “photoshopped” greeting. Which one is yours?

Share

Have you recently made a card to show you care? Share your thoughts by leaving a comment or share your card on the Creativity Prompt Flickr Group.

Unleashing The Creative Child Within You
Back when we were kids creativity came naturally to us. Everything was possible and our prolific imagination was the only limit we knew.
Through the years we have grown apart from our inner creative child and along with that – have lost our pristine and utter joy of creation.

In this e-book I will pave your way back to your inner creative child, brick by brick.

“Unleashing The Creative Child Within You” will explain why you became distant from your core creativity and will reveal the secret to getting it back.
With exercises designed specifically to help you find the inner child within you, regain its confidence and unleash it – you are bound to get your mojo back faster than you think.

Your inner creative child wants to come out and play, so don’t disappoint it and get “Unleashing The Creative Child Within You“.

Freebie Friday – Trendy Journaling Labels

Thursday, March 25th, 2010

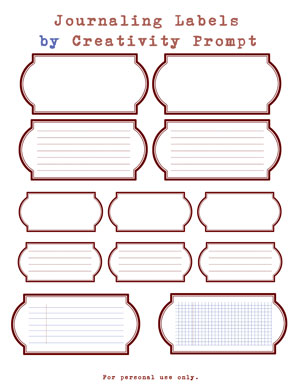
Free Trendy journaling Labels
This week I want to share a FREE set of trendy journaling labels.

You may download them, save them and print them as many times as you want (for personal use only.) A mention would be great too…

This is the set I used to make this gatefold thank you card.

To download the set simply click on the image (or the link) and if it doesn’t work try to right-click on it and opt for the “save target as…” option (it may be phrased a bit differently on different operating systems).

I hope you like it and have lots and lots and lots of fun with it.

Make sure you didn’t miss the rest of the free printables on Creativity Prompt.

So What Can You Do With These Printable Labels?

  1. Use them as journaling spots on scrapbooking layouts.
  2. Use them on your cards.
  3. Use them for addressing envelopes (idea by Lisa Spangler).
  4. Use them as spice jar labels (idea by “the Tiny Homestead“).
  5. Use them for a mini book (idea by Kathy).
  6. Use them as notebook labels.
  7. Use them to “tag” your books.
  8. Use them as gift tags.
  9. Use them to organize your closets or your pantry.
  10. Use them for random acts of Kindness, by writing cheerful messages on them and spreading them out!

Share

How would you use the journaling labels? Please leave a comment and tell me your secrets.

If you have a special printable request, do tell and I will try to make some dreams come true.

For next week I have a lovely set of fancy journaling labels to share, so stay tuned!!!

A Blast From The Past – Revisiting Childhood

Thursday, March 25th, 2010

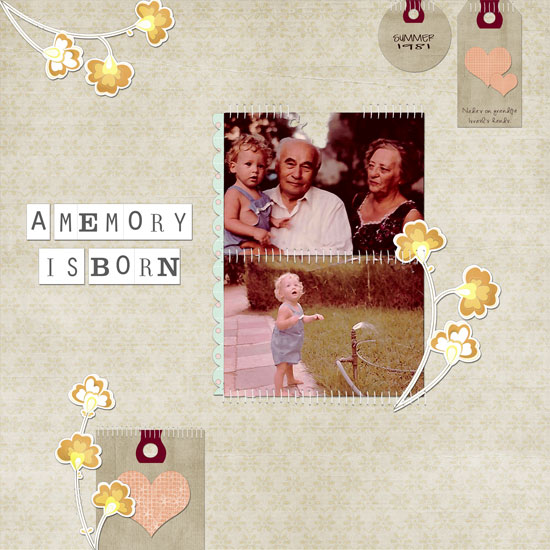
A Memory Is Born

[Font: KD Everyday; Digital Kits: KD Spring 10, KD Cardstock Essentials 1 – Both font and kits are by Karla Dudley]

This week my mother in law sent me a wonderful surprise e-mail with a fabulous attachment – a few pictures of Nadav as a 1 year-old. I was so happy to receive these pictures, that I have never seen and it combined wonderfully with Karla Dudley’s new release: Spring 10 Kits:

KD Spring '10KD Spring '10 miniBOOK

The vintage springy color palette was perfect for these old photos from the early Eighties and with Nadav’s FABULOUS golden hair. I only wish the quality of the scans was better, so I could have zoomed in and showcase his bright and big blue eyes.

Pictures are triggers of memories and the great thing about them is that you can never know what memories they will bring up. It always starts with the obvious scene that is showcased in the picture but the flight of imagination pushes you deeper and deeper into your past and reminds you of a person who used to be present but had passed away (such as Nadav’s grandfather, Israel, who’s shown here). It reminds you of a place you used to live in or visited often and may be gone or perhaps your memory of it is way different than the way it is right now. It may remind you of a favorite (or not so favorable) piece of clothing you used to wear. A hairstyle you used to have or a relative had. So many memories – one photo…

I remember the first time I revisited a park I used to spend hours in it while I was a kid. I was so disappointed. The humongous part in my head was nothing but a few hundred squared feet. How could I have spent hours playing hide and seek back then?

You see? I am already deep in “reminiscing mode”.

[Nadav, by the way, didn’t even recognize the small dude in the picture at first. So maybe it’s just a ladies’ thing, I don’t know…]

Share

Have you had the chance to go through old pictures lately? What memories do they bring? Do you get “a blast from the past” too? Please. Do share. Just leave a comment. It’s easy and it makes my day.